Image Map
Showing posts with label home tour. Show all posts

New World Market Metal Dining Chairs

The post title totally gives me away, but I'm going to tell you a little story anyways.
Once upon a time...
just kidding, that is how my little Elle starts ALL her stories.

On with it.

I had an out of body experience the other day...

My husband and I were walking up to +Cost Plus World Market in search of a shower curtain when we saw the holy grail of the clearance world...

a 75% OFF sign for all Outdoor Furniture.

And it was sitting on a metal chair.

There were 5 chairs in all...

2 red (orange?), 1 blue (black?) and 2 yellow.

I was almost excited, except with only being 5 chairs I was holding back. 

So inside we headed. I wanted to head straight for the outdoor section in pursuit of the 6th chair, but we got side tracked by our original purpose- shower curtain.

Then Miss Elle had to use the potty...

then we got distracted by baskets, and rugs and pillows... you get the idea.

I started to get anxious because I knew someone else would want MY chairs

FINALLY we made it to the outdoor section. 

There weren't any more chairs. 

I started freaking out as we headed to checkout.

My husband thought we should just get the five, I wasn't sure.

So, I headed back to the front of the store to double check that I wanted the chairs.

and what do you know...

there were 6!!

Hallelujah!! 

So even tho we were only after a shower curtain, we came home with these...

Red , yellow , blue metal chairs

for just about $150. 

SCORE!

Only I'm in a conundrum now.  How to unify them?

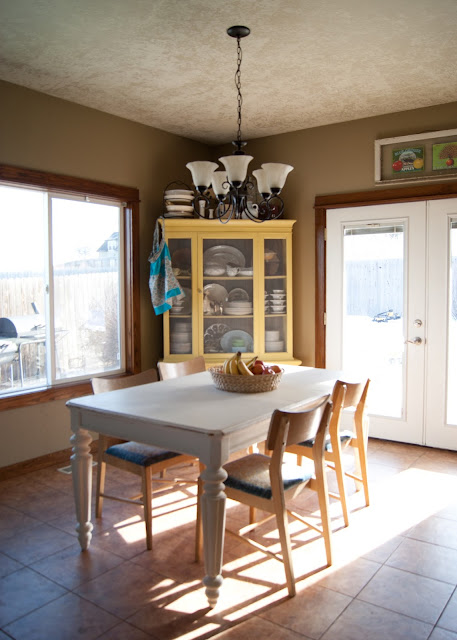
We banished our old chairs to the garage (still untouched from the day I bought  them, I might add...) and brought these in around my newly painted table. I had just painted it a week prior to finding chairs, because it was gross from my kids and a I failed to seal it the first time I painted it.

Here's what my table looked like at the beginning of the year...

Dining room before - mid century dining chairs and white table

Now, I'm living with the hot mess of color, but only until we can decide on a color to paint the chairs.

After - World Market metal chairs in multiple colors and painted dining table, yellow hutch
(hey look! I didn't even bother to clear away my coffee mug or boosters...or edit my crummy iPhone shot for you.... #reallife )

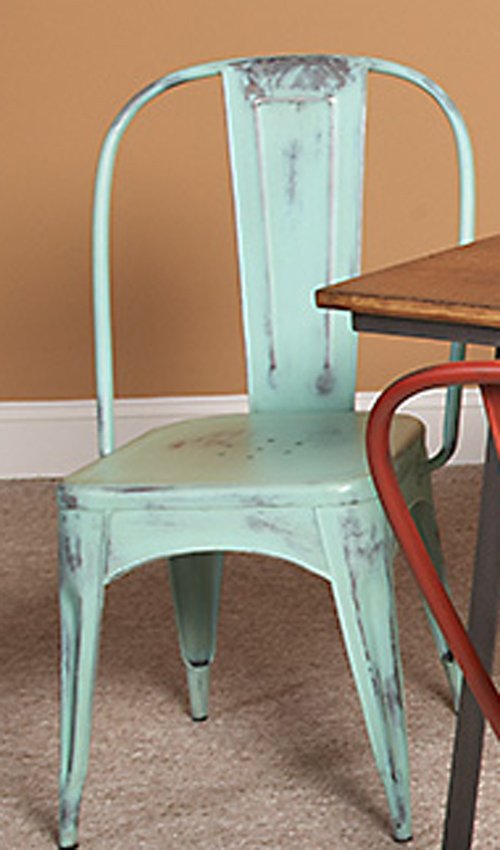
Here are a few ideas:

Side Chair in Mint Green
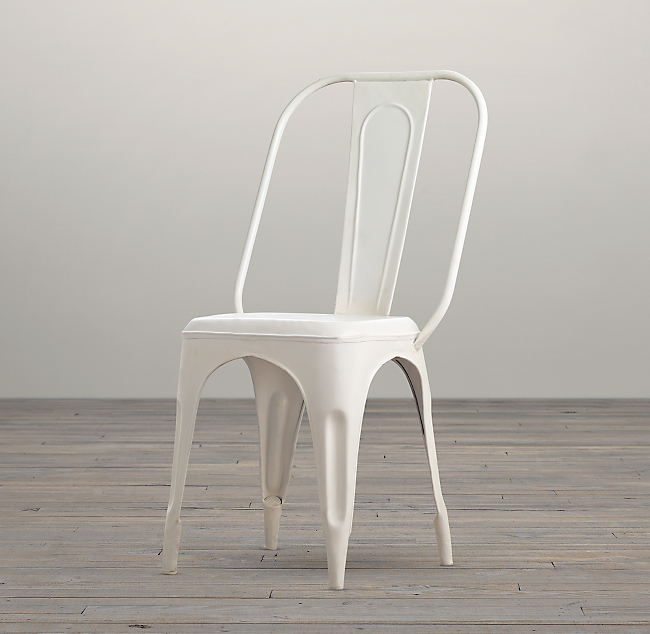
or
White
I need to pick a color and decide if I want a clean look or something a bit more distressed.
Also, I'm trying to keep the bigger picture in mind... future white cabinets...lighter color walls...rustic farm table....white trim...oh, and the pretty yellow cabinet I've never blogged about, its staying yellow.

I'd love some ideas or color suggestions!!!???
Image Map

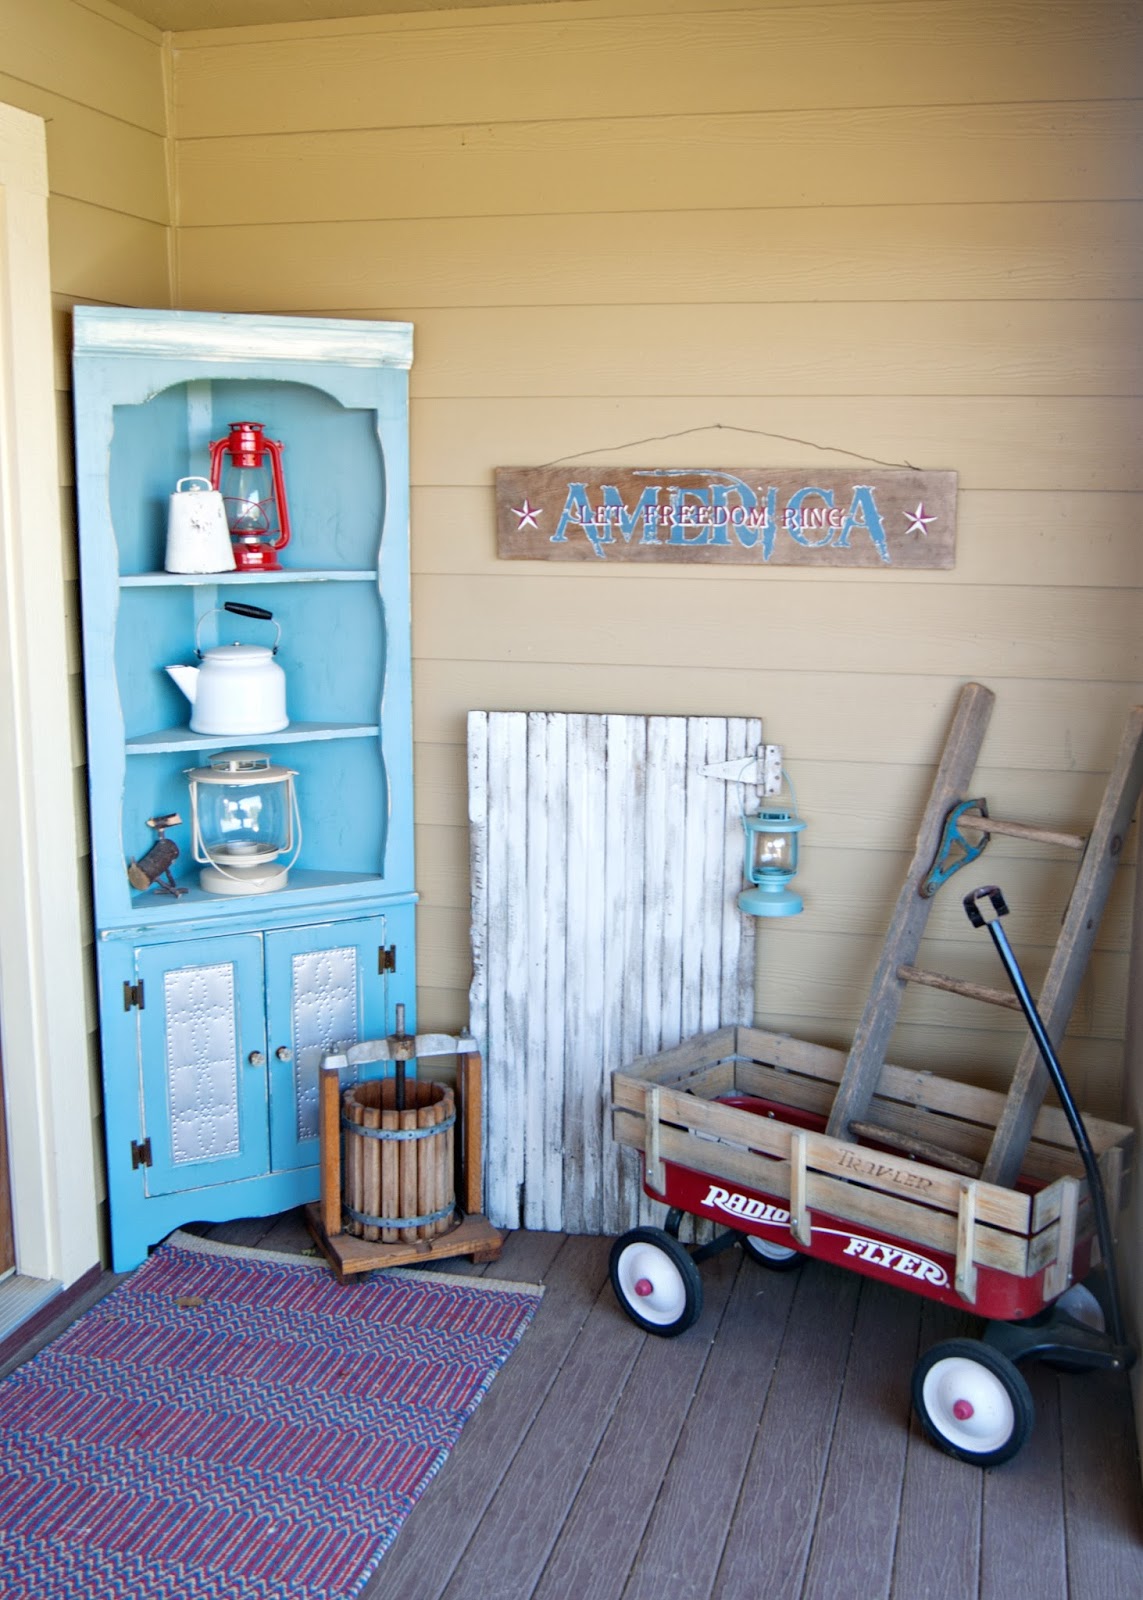
A Vintage Americana Front Porch

Here's a little tour of my "Americana" Front Porch

A Vintage Americana Front Porch

I was inspired by my new rug and my America sign I painted a couple years ago...

A Vintage Americana Front Porch
I painted my yard sale corner hutch a pretty shade of blue...
A Vintage Americana Front Porch
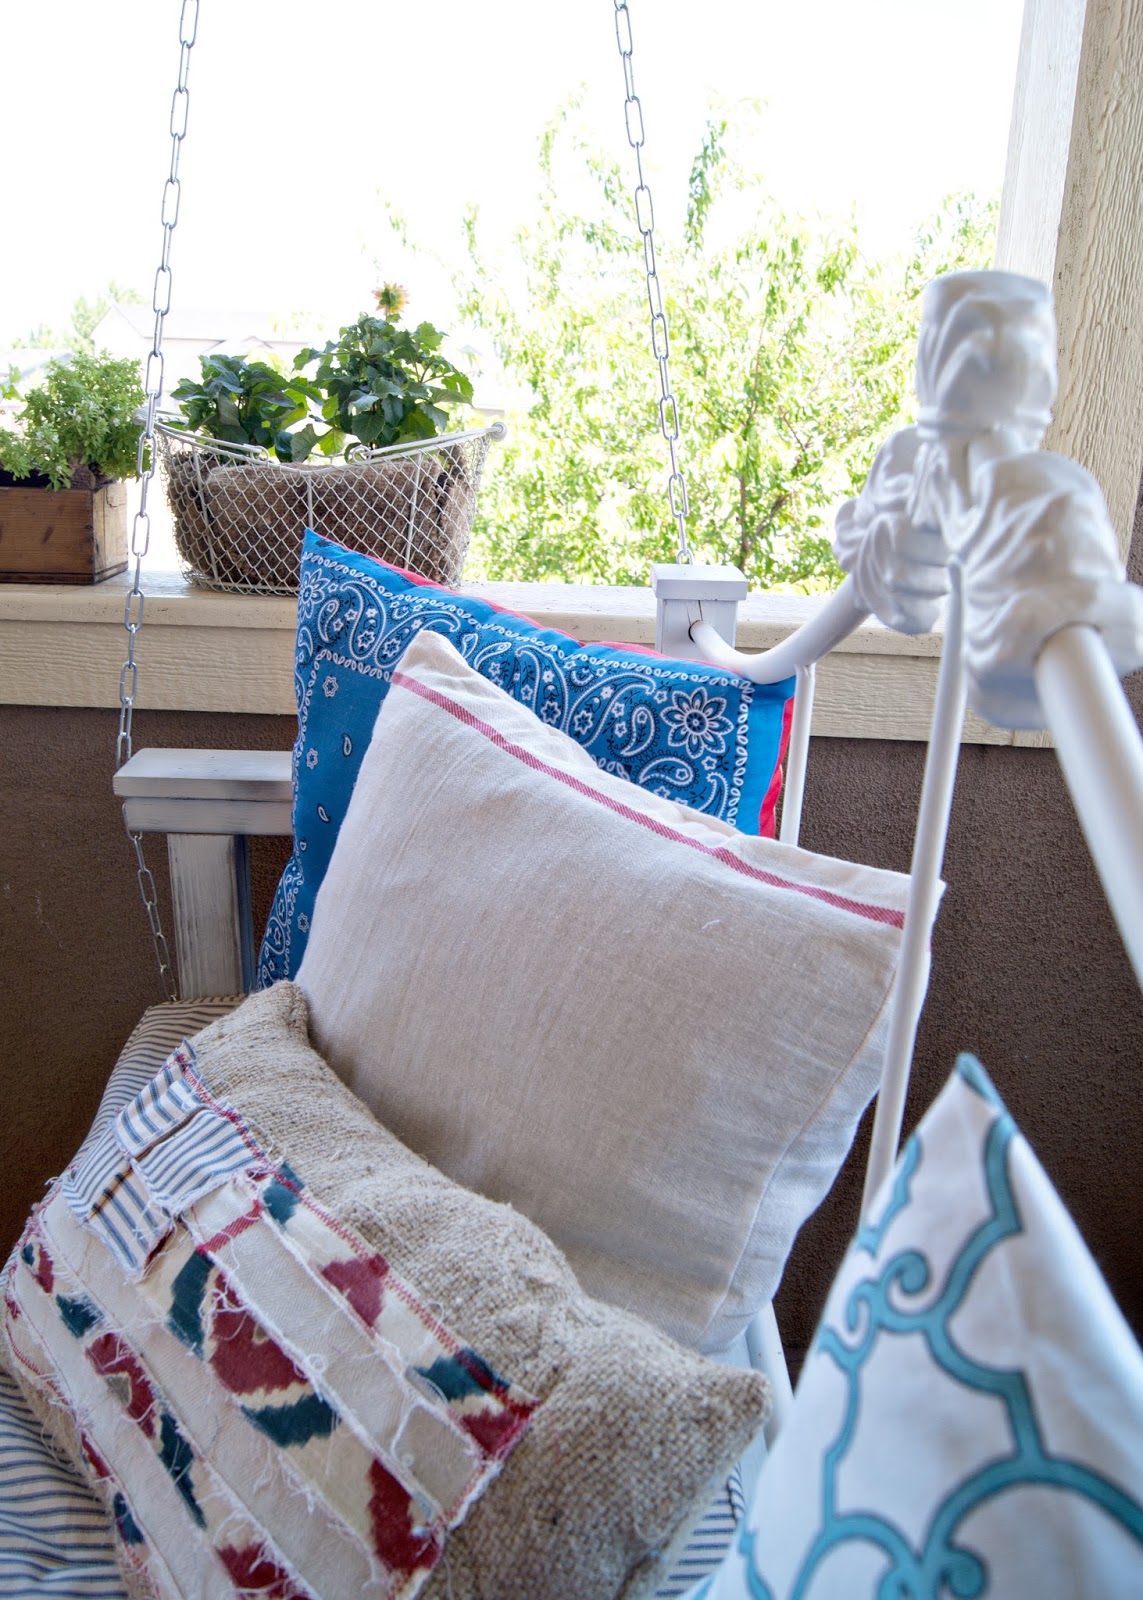
My husband built me this porch swing by reusing my old daybed and some new lumber...

A Vintage Americana Front Porch
I sewed all the pillows. Including the scrappy flag pillow!

A Vintage Americana Front Porch

I'm loving my vintage Americana porch!

Image Map

Project: Curb Appeal {part 1}

I realized I haven't ever shared what the outside of our house looks like... 

It became most apparent when I needed some before pictures of our house and realized I don't have any - other than Instagram shots in the snow... 

#bloggerfail
Here's a before...
Before pictures of house

Do you see that tall bush to the right of the front door?

No?

See that thing creeping in and choking the life out of our porch now?

removing an intrusive bush


Yeah, I mentioned to my husband that we should probably trim it back a tad.

I left for the post office and came back to this...

Removing an intrusive bush.

Wahahaha!!!! 

Bye bye bush, nice knowing ya!

Apparently if you move a man from North Idaho, to the desert in Southern Idaho he will find any excuse to pull out a really big chain saw.

Stay tuned!

MUCH more to come on #projectcurbappeal


The $5 yard sale find that prompted a laundry room makeover... {before & after}

This post was originally publish on 5/28/2014, but has since been edited to include an update about the color used on the cabinets.

How's that for a blog post title?

This makeover was no where near the top of my to do list.
It probably should have been given its condition...

Laundry Room before
Actually the above picture isn't half bad...but, if you  follow me on Instagram (@averielaneblog) you might remember this picture the day I started my little project...

Laundry room before

embarrassing much?
So how come it got bumped to the top of the list?

Well, my husband dropped me off at an OB appointment so he could hit a few yard sales near the hospital. I ended up waiting forever and he was done before I even made it into my appointment. He met up with me and was all giddy about a yard sale find.

Him: "I got you something you've been wanting FOREVER"

Me: "Really? What's that?"

Him: "a pair of things you have wanted and never had and it will help your back not hurt"

Me: "what on earth!? How much did you spend?"

Him: "$5"

Me:  "I have no clue what it could be..."

Him: "we need to go get the truck to pick them up"

Me: "just tell me already!"

He's a turd.

It ended up he found a pair of washer/ dryer pedestals!

Um, hello!!

As great of a find as they were (and we prayed they actually fit our machines) it also meant there was some work that needed to be done to install them. Most important was pulling the machines out so we could reroute the dryer vent.

Since the machines were being pulled out and I knew we wouldn't be wanting to do it again anytime soon, I decided it was as good a time as any to paint the laundry room...
which meant I needed to also paint the horrible yellowish white cabinets...
Since I wasn't planning this makeover, I really didn't want to spend any "extra" money on it.
I dug through my "oops" paint stash to see what color options I had for the cabinets that would also work with the new wall color (Martha Stewart Sandpiper)

I initially really wanted gray cabinets, but my only gray looked TERRIBLE with the walls - its the middle colored door below.. (bottom door color is original cabinet color ).

Laundry Room Makeover - picking the cabinet color
 Then I saw this greenish-blue color that I had grabbed at some point (a $2 quart from Home Depot). I painted a test door and fell in love! I need to get to Home Depot to see if they can tell me what color it is!

Laundry Room Makeover - painting the cabinets

Winner winner! 
Now the big reveal...

Laundry Room After!!! 

Laundry Room Makeover - After

Here are the original goals for the laundry from our House Goals 2014 list...
- Paint Walls 
- Paint Trim
- Paint Doors
- Replace Floors
- add trim to upper cabinets
- add counter top over washer/dryer  (nixed that since we added pedestals)
- put washer face plate back on washer

Laundry Room Makeover - After

Obviously this is just phase one of the makeover.

I ended up taking down the medicine cabinet and a drying rod from over the sink and I decided the trim and doors can wait until I do the hallway trim.

We still need to address the floors, but I think they look a million times better with just a change of paint colors.

Am I crazy?

Laundry Room Makeover - After

We are also contemplating changing the counter or adding a back splash to sink area. Plus, I have plans to turn the fence into an art piece OR get a drying rack.
I think a rug and new light are on the list too, but other than that,  I love it!

Laundry Room Makeover - After - Green blue cabinets and old fence decor

I have spent a few hours sitting at our kitchen island watching the laundry. 
Its weird, but sooooooooooooooooooooooooo satisfying. 
One more look at the before...

Before

and the After!

after

Did I mention this makeover cost me $25.00!!!

$5.00 for the pedestals

$20.00 for the new dryer vent & supplies

Everything else we already had! 

Now you know why I like to stare at this room... 

I have had several requests for the color used on the laundry room cabinets. Because it was an "oops" paint I had to have it color matched.

You can take the code in the bottom right corner of the image below to your local Home Depot to have a color sample made.


Image Map
Sharing with:
Thursday S.T.Y.L.E - Life in Velvet

House Goals 2014

(I'm having some technical difficulties with Part Three of the DIY Bed post- so I am skipping ahead to this post! Thanks for your patience!)

House Goals 2014

We have been in our house since September, without any major changes to the house... 
like, literally.
We did install a pull-out garbage can in the kitchen. 
And I did paint our french doors...
But that is it. 
So today I'm putting together my list of goals for the rest of the year (ideally before baby comes in June!) And even tho I really don't want to, I'm including pictures of what my house looks like right now, in its very raw, post Christmas, state.
No judging.
Lets get started, shall we!?

Christmas Party Tour Of Homes

Welcome!
If you are new here, I think my Christmas tour will give you a lot of insight into what my "style" is...
a little western and
a lot of vintage...

Living & Dining Makeover {part 2}

Today you get to see my dining room makeover...well if you can call it a dining room...I keep thinking of the genie from Aladdin and his "itty bitty living space" or something like that! Lol...

Here is the Before (one more time):

After:

can't get enough....

Seriously. 
I am addicted to learning HTML code.
No, really, I feel like a bit of a nerd.

I love that I have a reason to create fun graphics! 
Like these buttons I just added to my page! Cute, right!!?
One easy place to find whatever you need right over there ------>

I'm a sucker for arrows
(....that's a bit of a hint for whats up for grabs tomorrow on the blog!)


Are you interested in having some graphics designed for your blog? Got ideas, but don't know how to implement them?
I can help!
My design service will be launching soon! 
STAY TUNED!


Practically FREE Office Desk {part 2}

Its time! You all have been waiting so patiently...I realized I was super nervous about showing you this whole project. Maybe slightly afraid of being judged...worried that what I did wasn't blog worthy. Should I restyle this, or rearrange that...
Then the other day I had an ah ha moment and I realized...
#1 some people will like it and some people won't
and
#2 this may not be magazine worthy, the shelves might not be styled just so, but its real life people!
This is how our family lives and I am pretty darn pleased with what we did!

As you enter from hallway.
A collection of boxes that store photos and a piece of ladder that I haven't decided a use for yet and a wire basket holds magazines.

a {Lucky} Mantel + Shamrock Art Tutorial

Its your LUCKY day! 
Just in time for St. Patty's day! A quick little DIY art project!


 I apparently don't own St. Patrick's Day decor...
so I made myself some.

Stairway Art

I have been MIA these last couple weeks... due to being in full on nesting mode!
Which is a good thing and means I have been knocking projects off my list left and right. I also celebrated my 30th birthday in there and had my parents come visit for a week! Who says turning 30 isn't a blast!?

Having my mom stay with me was a HUGE blessing! She helped with many of the little projects that desperately needed done( like hanging tons of baby cloths and ripping down offending border in the baby's room)! She also helped with a few projects I was too afraid to tackle on my own. One of those was my stairway photo wall... I have a very hard time committing on where to hang artwork, my mom on the other hand just goes for it! Her house is an example of how to hang art work correctly...it all makes sense and is always the right scale for its location. I don't know how she does it! I, on the other hand, way over think everything...which is why my mud room is pretty much an art work storage area. Kinda sad! SO...while she was here, I asked if she would help me hang pictures in my stairwell. I wasn't going to hang much art work until the walls and trim got painted (notice the lovely honey colored stair rail ..blah..), but I think my nesting mode makes me want our house to feel more lived in. Thankfully my mom took on the task and showed me a thing or two in the process!


I had a ton of black framed family photos and an empty one I wanted to make a sign for. We got the idea to add a few other empty frames to balance out the first one!


{Little} Girl's Room


It has been a long time coming...a little room for a little girl! And I am not exaggerating when I say "little".

                                                                  The BIG reveal!


Considering Ellery's room was the first to be painted when we bought our house back in March, it felt like her room was a never ending project. Part of it was because my energy level is about zero with this pregnancy and because almost everything in the room has been made or modified by me. Some of the stuff I already had from when I was a little girl, some was stuff I made for Averie's room and the rest came from yard sales this summer. It was also very challenging to figure out how to organize the room. It has to be the smallest room in our house and to top it off it has almost NO wall space. Each wall has either a window or a door on it so I really had to get creative- thank goodness the closet is a decent size and I didn't have to make room for a dresser!

So for the tour!

Paint color: Martha Stewart Zinc
Pinned Image
I felt Elle's tiny room could handle a deep rich color because of all the light that comes in from the windows and door to the deck.

The dress up area is the first to greet you when you walk into the room. I took an ugly gold yard sale mirror and spray painted it black. I hung it at her height so it acts like a full length mirror!

I also refinished the glass knob coat rack {see what it used to look like here}  so she could hang dress up items.

A free shelf repainted is a great display surface for her collection of piggy banks, jewelry, and hair flowers. 
 The two pictures are one's my sister gave Averie when she was just a baby. They are a little hard to see, but they say "une belle" and "une chaise". A coat of pink spray paint helped tie the once blue framed pictures into the room.

I made the bunting out of some of Ellery's birthday party decor. I also glued some flowers from her cupcake toppers onto a plate that I had picked up at a yard sale last year.

One of the hardest sections of the wall space is right between the closet doors and the window. Since I had to leave enough room to accommodate future curtains, I decided to use some yard sale shelves to display a pair of vintage poodles. The poodles came from my Great Grandma's house...believe it or not we found them in a shed out back stored in a ratty old box. They were pretty grimy, but in perfect shape. I love the little pink rhinestone collars! Its so nice to have them finally displayed properly!

I feel like maybe this corner is missing something, but until curtains go up I am going to hold off changing it. This is also a good view of the blankets that fit perfectly in the space. The pink one was made by Ellery's auntie and I made the damask fleece blanket for my daughter Averie. After she passed away it was put in storage, but I decided it was just what Ellery's crib needed. When I got it out for little Elle she just clung to it...and it hasn't left her grip since...which is pretty cute considering its 5 times her size! I do love that it is being used again!! {if you notice, you can see Averie using the same blanket in the black and white pic hanging from the Beautiful Sign I made}

We placed her crib on an angle opposite from the door to her room. Really it was the only option because there was no wall big enough for it. The crib skirt is a old table cloth that was left over from her birthday party. As you can see I still need to figure out how to do curtains. I'll update you when I get them done.
The chandelier was in our dining room, but the hubby and I both agreed it was way two girly for there so it was an easy decision to move it to Elle's room.

You may remember this Rocking Chair Makeover. I love how it looks against the gallery wall!

We spray painted and then mounted two similar style shelves that we got at yard sales for book ledges. (clearly I need to paint the brackets! Oops!) 
We hand to think narrow because the door out to the deck opens onto this wall.
This is my most favorite part of her room. I love the look of a gallery wall and I can't get over how the pieces all work together.

This "one sign" I made for Ellery's first birthday!

Hand painted sign that I made last year for an auction, but then decided I loved too much to sell...its hard to see the colors, but they are white and pink.

This cross-stitch is one my Grandma made me when I was a baby. I framed it and added the lace trim and hand stitching. I placed it between to pieces of glass so the wall color would act as matte. The frame was from another picture that I decided wouldn't work in her room. It used to be gold, so I spray painted it pink. The black & white plates I picked up at a yard sale as is- ribbon and all!

This grouping was really fun. I found the ugly mirrors at a yard sale this summer {see here}. Originally I painted them white, but then decided to carry the pink throughout the gallery wall. A quick coat of spray paint and a bit of sanding made the mirrors look quite cute!
I then mounted a letter E that I made for Elle's birthday right over top of a fabric stretched canvas frame...I actually hung the fabric first and then put a nail thru it to hang the E. I used another one of the fabric frames on the entry way shelf...both I have hauled around for several years now.

The "Ellery" sign is another reuse from her birthday party. I just printed on card stock and used the famous Ikea frame. The pink shelf I have had since high school. It was originally lime green, but again the pink spray paint worked wonders to make it fit with the new color scheme.
The silver mirror was a yard sale find...I loved its patina and left it as-is!


That brings us back to the view of the entry area...you can also see in this picture that the closet doors need to be painted or stained to match the room. We haven't decided what we are doing in the rest of the house yet so they will have to wait for awhile. Anyone ever refinished wood hollow core doors?? yea,...me either.

So what do you think of this "little" room? I think its big impact for such a little space and I am happy that it finally has come together!!

Here is a quick break down of what this room cost:

1 Gallon Paint- $25
1 can High Gloss Gel trim paint - $20
Crib- {baby shower gift}
Rocking Chair - {gift}
Footstool- $2
Ikea rug- {already had}
Chandelier {free}
Large shelf- {free}
Black & White plates- $1
Set of 3 mirrors- $1
Silver mirror- $2
Book ledges- $1.50 + brackets $2
Black mirror- $2
Reclaimed wood signs- {free} + a little craft paint I had on hand.
Glass knob coat rack- {free}
1 can pink spray paint- $4.50
1 can black spray paint- $4.50

Project Total:
$65.50

Thanks for taking the tour! I will be sure to update this post when we get the curtains up- I know you will all be waiting!


Related Posts Plugin for WordPress, Blogger...