Image Map
Showing posts with label vintage. Show all posts

My Favorite Projects of 2015 + Looking Forward to 2016

This year has been one wild ride!


I know that tradition is to look back on the most popular posts of 2015, but honestly, sometimes my favorites and what gets traction on social media & Pinterest aren't always the same thing. So I'm doing things a bit differently this year. I'm choosing to look back on some of my favorite projects and moments of 2015...they are the things that tell my story the best and help explain what 2016 will look like (or at least what I think it will look like!)

So first lets look at some of my favorite DIY projects of the year (in no particular order)....

Project Kid's Bathroom Reveal :
We finally wrapped up this little bathroom makeover and its still one of my favorite projects in the house! That sliding barn door window covering...um, yea...the most awesome thing EVER! 


Fireplace Makeover :
Now this project...it was my first ever featured on Apartment Therapy and also the first to totally get ripped apart by the general public. It taught me A LOT about how to tune out the negativity that can come from being a blogger in a world full of opinions.  In the end it comes down to how I feel about projects we do around here and guess what!? I happen to love our fireplace...and it looks a million times better to me than it did before! Although, the fireplace and the wall surrounding it are on our list of things we want to readdress in 2016! I can't wait to share more about that!!


Talk about challenging ourselves to do something we had never seen done before. We decided to try pouring concrete over our existing counter tops! What!? Pretty much crazy talk! It worked...mostly...but we definitely would do things differently next time. 


We also tackled our island using reclaimed wood from North Idaho. So far, they have been a dream. I STILL have a finish coat to do, but that will happen in 2016 - along with finishing up our new floating wood shelves (I haven't even talked about  those yet!!!) Also on the kitchen list: replacing the almond colored outlets, repairing and re-painting the island, and touching up paint. Then we should be able to call the kitchen DONE!


Master Bedroom Makeover:
Yay for taking the time to focus on our bedroom! My favorite bloggy thing to do every year is participate in the One Room Challenge. For the spring challenge I chose our Master Bedroom. Things have since changed a bit in here since, but I still love our room and I am super happy we took the time to do it! Our Master Bathroom is 100% on the list for 2016!


Now the next thing on my list of favorites was not really a DIY, but has quickly become a huge part of what I do.

Vintage Shows featuring Averie Lane Boutique:
I have always talked about wanting to have a booth at vintage shows. I grew up with a mom who loved to antique and I married a man who grew up running auctions. I love vintage stuff and we incorporate it into our home decor, but I only have so much room, so turning my love of auctions and yard sales into a side gig seemed like a logical next step. I also wanted a place to showcase my artwork. I paint a lot of arrows, but I knew I was capable of SO. MUCH. MORE! Boy, I could never anticipated how amazing these shows would be! It is hard work, but its a dream come true. I already have 5 shows booked for next year!!!


Speaking of next year, that brings me to one project I'm most excited for in 2016....


oh yes.... baby #4 in the Koogler clan is on its way! We are due June 5th and will get to find out the gender sometime in January! The kids are excited, my husband keeps making "what were we thinking" jokes and I'm over here just trying to keep my shit together! Ha! This might help explain the lack of post towards the end of year. I always suspect a blogger is preggo when the posting derails, don't you? Super true in my case! It was all I could do to keep up with Christmas shows and holiday orders let alone work on house projects and blog!

Being that this is my 6th  (and LASTbaby, I am soaking it up...the good and bad, because its such a precious time and a beautiful miracle! I will do some posts updates after I survive the New Year, so look forward to those!


So there you have it! A look back at 2015 here at Averie Lane. Thank you for hanging in there with me as I navigate some new terrority with my life and this blog! My goal in 2016 is to be better about showing whats going on in all aspects of our life...not just DIY. I'll talk more about those when I put my goal list for 2016 together!


How to Make Over a Vintage Vinyl Dinette Set (using Spray Paint & Mod Podge!)

So the other day my husband dropped me of at work (I babysit at our gym a couple times a week) and then he took the kids and headed off to check out the local garage sales. 

When he picked me back up he was so excited because he had found this...

Dinette Set Before

A vintage 1970's dinette set for about $25.

Wanna know what my first thought was?

Oh crap.

Even though it looked super cool, I couldn't wrap my mind around what it would take to reupholster all the seat backs and cushions (hello, scary vinyl!). Normally I'm all about trying to preserve the integrity of vintage pieces, but this set was badly smoke stained and one cushion had a rip in it, clearly I would need to take the whole thing apart. Honestly it was too overwhelming for me to think about.

I mentioned to my husband that I wish I could figure out a way to just paint it, but he shot that idea down because he claimed it couldn't be done. Well, I like to prove I'm right and found a couple great tutorials on how to spray paint vinyl (this one was especially helpful!) Except there was one problem, I had still had that one rip to contend with. In my search for ideas I cam across THIS tutorial on how to use Mod Podge & fabric to recover vinyl. This could actually work, I thought!

The next step was to come up with a plan.

Picking out supplies - spray paint and retro fabric

Since the table top itself was staying, I tried to find a vintage inspired fabric that I thought coordinated with it. Its hard to tell, but the table pattern is brown and so are the leaves in the fabric I picked. I then used my fabric to pick the colors for everything else. I picked Rust-Oleum Seaside* (*indicates affiliate links) for the cushions and Navajo White* for the chair frames and table legs - the off white color was a perfect match for the tabletop. I could've chosen about any colors I wanted, but the key is picking a paint that says it bonds to plastic. 

Once all my supplies were gathered I go to work!

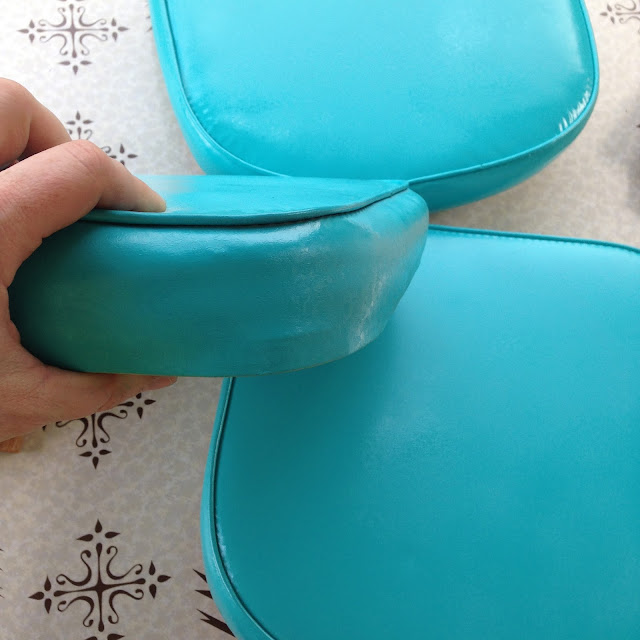
The first thing I did was take the seat cushions off of the chairs and then gave everything a really good cleaning with some dish soap and a scrub pad. You can see how discolored and nasty the seats were and I couldn't save the cardboard because it stunk so bad.

Taking apart chairs

I let the seats dry out in the sun and then I gave them all a couple coats of spray paint. Oh, just so you know, I actually tested the spray paint technique on one of the chair backs to see if it would work (***spoiler alert, it did!***) before proceeding with this whole project, so I went into this part very confident!

Cushions ready for spray paint
spray painted vinyl cushions

I was so happy to see that ugly brown go bye-bye!

Cushions feel just like vinyl! spray painted vinyl cushions

The vinyl stayed slightly tacky for a couple hours, but the longer it sat the softer it got. It feels just like vinyl now!

The next step was attaching the fabric. My plan was only to attach the fabric on the bottom edge of the cushion - that's where the rip was on one cushion.

Repairing a tip in vinyl using facric and mod podge

I cut strips of fabric wide enough to cover the cushion and wrap underneath a bit.

repairing a rip in a vinyl cushion using mod modge

On the first cushion, I just slid the fabric right up to the piping, but it was hard to hide where the edge of the fabric frayed, so on the rest of the cushions I rolled the edge of the fabric over so I would have a clean line against the piping. Just think of it as hemming, but with glue.

repairing a tear in vinyl using fabric and mod podge

My strips weren't quite long enough to make it around the cushion - I should have bought more yardage (I only bought 1), but the nice thing about using the Mod Podge was I could create a back piece that was pretty seamless with the rest.

In the picture below you can see how much I left hanging below the cushion. I did this so I could wrap it under the cushion just like the vinyl was. I planned on stapling it on, but ended up just gluing it. It worked great! Another great tip is to keep some baby wipes nearby to wipe up any glue that gets on the seat cushion!

vinyl cushion - spray painted and covered in fabric using mod podge

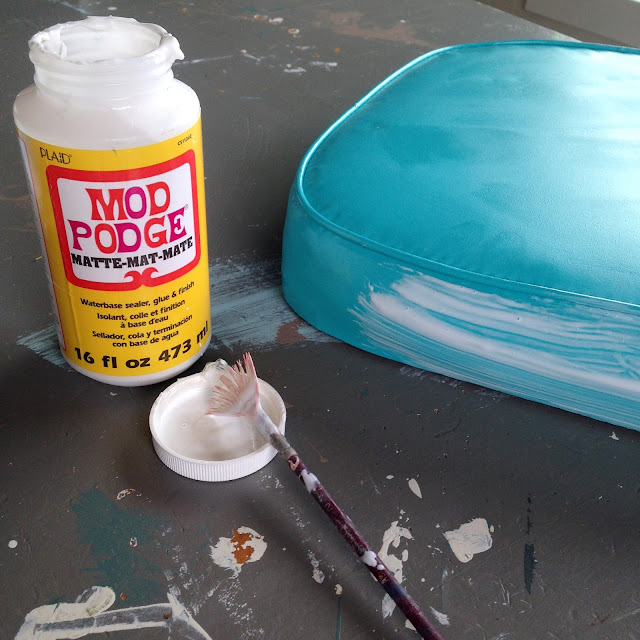
After I had the fabric on I went over it with another coat of Mod Podge. In the initial steps I used a matte finish, but once dried the texture was still pretty rough, so I did a second coat with a gloss (you could also use Mod Podge for Outdoors)

using mod podge to attach fabric to vinyl cushion

It turned out perfect and I can't even tell which cushion had the rip!! Yay!

How to Makeover a Vintage Dinette Set (using Spray Paint & Mod Podge!)

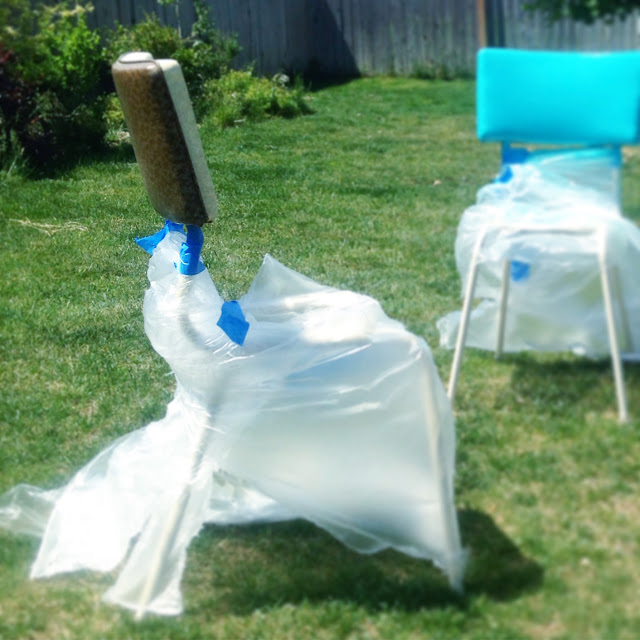
Finally I was ready to paint the rest of the table. First I taped off the table top and gave the table legs and the chair frames several coats of the Navajo White. I also recommend using a primer if your metal has any sorts of rust. After it was dry I taped off the frame so I could spray paint the back cushions. I thought about painting the backs white to save time, but it didn't look right, so I sucked it up and taped them off.

spray painting chair frames

Finally I was able to put everything back together!!

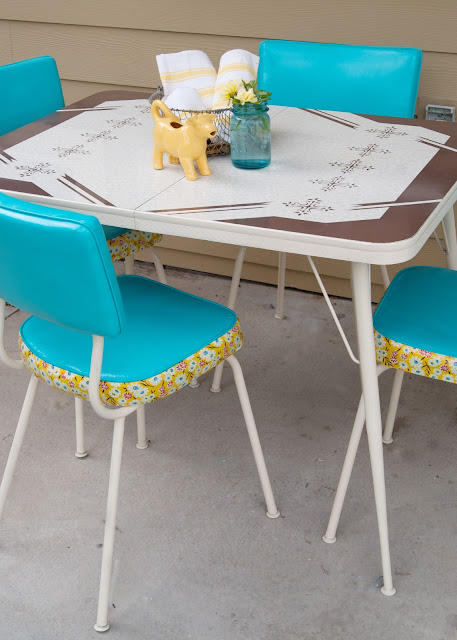
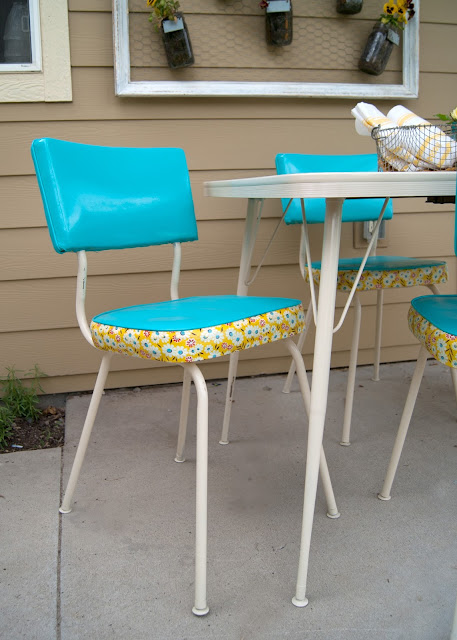
I set it up on our back porch to act as patio table for now. 

Isn't it cute!

How to Make over a Vintage Dinette Set (using Spray Paint & Mod Podge!)
How to Makeover a Vintage Dinette Set (using Spray Paint & Mod Podge!)
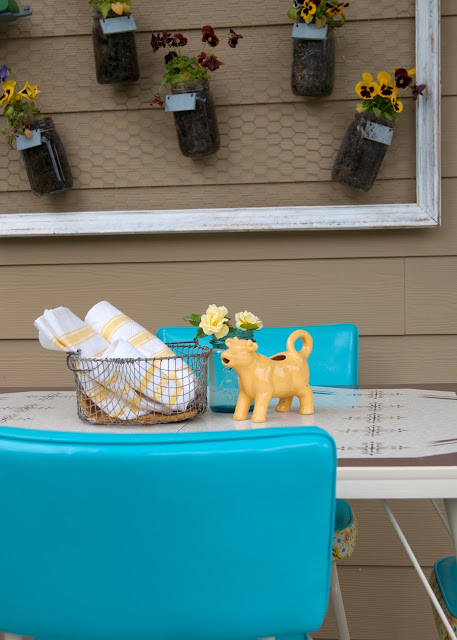
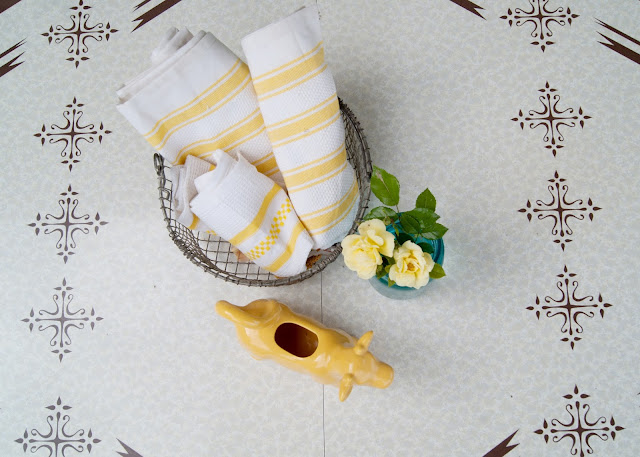
Table top - vintage table, blue mason jar, yellow tea towels, yellow cow creamer

Its hard to believe its the same table!!

How to Makeover a Vintage Dinette Set (using Spray Paint & Mod Podge!)
How to Make over a Vintage Dinette Set (using Spray Paint & Mod Podge!)

I really love how the table top stands out now too! That pattern is pretty awesome!

vintage dinette set makeover - yellow cow creamer, blue mason jar, vintage tea towels

The fabric helps give it a little nod to the 70s and the blue helps make the whole table feel brighter and happier. The brown was so drab before!

How to Makeover a Vintage Dinette Set (using Spray Paint & Mod Podge!)

What do you think?

Remember, here's where we started...

How to Makeover a Vintage Dinette Set (using Spray Paint & Mod Podge!) - before & after

and now!
How to Makeover a Vintage Dinette Set (using Spray Paint & Mod Podge!) - before & after
Seriously, so much better!!!!

I'm so happy I was able to save the dinette without reupholstering it!!!

How to Makeover a Vintage Dinette Set (using Spray Paint & Mod Podge!) - before & after

As much as I love this makeover, we have no real room for it, so if you are in the Boise area and are interested in this table feel free to contact me!

How to Makeover a Vintage Dinette Set (using Spray Paint & Mod Podge!) - before & after

Do you love this project? Don't forget to pin it in case you come across your own vintage table that needs a makeover!


8 DIY Vintage Accents for the Home

8 DIY Vintage Accents for the Home
By Jennifer Riner of Zillow


Source: Zillow Digs

For decades, savvy designers have added vintage charm to newer homes. While some homeowners prefer the shabby chic look, others might favor just a few staple antiques to offset more modern interiors. Whatever the case, incorporating rustic materials to homes creates cozy and interesting interiors.

Integrate one or multiple projects into rooms to create a historical look at thrifty prices. Here are a few basic do-it-yourself projects for homeowners to tackle.

1. Reclaimed Wood Headboards
What better to contrast fluffy comforters than sleek, pallet headboards? The recycled look is trending on a sustainability level, but reminiscent of shabby, antiques. Check out local construction sites for discarded wood slabs. Cut pieces so they can fit together seamlessly. For queen-sized mattresses, gather enough wood to stretch 60 inches wide. King-sized headboards usually measure at least 78 inches wide. Keep in mind that individual pallets can be shorter and attached together to fit appropriate widths. Sand and stain pallets before assembling.

2. Tree Slice Coffee Tables
While not as easy to come by, tree slices are unique accessories for homes. However, don’t go cutting down trees for this project. Instead, search craft websites like Etsy for tree rounds. Stack slabs for thick, round tables or attach hairpin legs for mid-century modern flair.

3. Pallet Walls
Again, free pallets are available to those who are patient and willing to search around before beginning their projects. If construction sites aren’t producing, try home improvement stores looking to get rid of broken pieces they can’t sell. Watch for parasites or other wood-feeding critters before bringing pallets indoors. Dismantle, sand and stain pallets, similar to building headboards. Wooden pieces can be attached directly to walls, although might potentially be a red flag for those searching for new homes when it comes time to sell. For easy removal, consider using plywood as a barrier.

4. Dress Mannequins  
Channel an inner fashionista by displaying old dress forms in walk-in closets or bedrooms. While these are great pieces as vintage décor, they also act as sturdy holders for hem jobs. Visit local fabric stores for basic mannequins and reupholster to match existing textiles throughout rooms.

5. Wood Pallet Floating Shelves
Have leftover wood from previous projects? Build simple, minimalist floating shelves. Use a 4-foot level and stud finder to mark shelf placement. Build and fix frames to act as invisible brackets or support systems. Then, cover hollow areas with wood and stain or paint entirely.

6. Antique Books
While Kindles are convenient, modern options for reading, real hardcovers are ideal for displaying historical literature. Bookstores often feature bargain bins for less popular, softcover novels. For old encyclopedias and almanacs, visit antique dealers who specialize in rare books. Signed autobiographies are great décor pieces and investments, as they might appreciate in value throughout time. Therefore, make sure to display rare books in glass cases where they are protected from kids and spills.

7. Vintage Radios
Mp3 players may be the most widely-accepted form of musical entertainment these days, but old radios and phonographs are definitely the most visually interesting. Broken record players or other vintage audio equipment can be purchased inexpensively through online classifieds or neighborhood garage sales.

8. Faux Windows
With demand for energy efficiency at an all-time high, many homeowners are swapping out their dated, un-insulated window panes for more eco-friendly alternatives. Antique window frames can still be used in homes as a throwback to old-fashioned exteriors. Consider hanging or carefully laying antique frames against walls in rooms lacking real windows and natural light.


As always, these accents stand out best when used in moderation, so avoid showcasing faux windows on every wall or creating every piece of furniture out of reclaimed wood. No matter which project, keep safety precautions in mind when operating handheld saws and drills.


Image Map

Vintage Metal Cart Makeover

Do you pick things up off the side of the road?

I do.

Shamelessly.

Nothing beats FREE!

Like this...

A roadside find transformed - before

a vintage rolling cart!

Awesome chrome legs and a sadder than sad paint job on the rest.

It was missing a few bolts to hold it together, but that was an easy fix.

A couple coats of spray paint later ( in my fav Krylon Jade...like I used on my metal army desk!) we have this...
Metal cart transformed - Krylon Jade - after

my original plan was to use this in my office for my printer, but I couldn't resist dragging it outside....

Vintage cart, glasses, coke crate and tea towels - after

...and styling it up with some vintage glasses and tea towels...

Vintage cart transformed into outdoor serving cart - styled with vintage glasses and tea towels

Vintage cart for outdoor entertaining

...now I just need to make up a batch of lemonade...

Krylon Jade used to transform this roadside find into entertaining cart - after

or finally learn how to make sweet tea...  

Vintage cart found on roadside, transformed into outdoor beverage cart. - Before and After

....what do you think!?

Do you have any road side finds you've given new life too?


Image Map

Leather and Linen - A Mid Century Chair Makeover

I almost forgot to do a post on one of my favorite things in Ever's soon-to-be-revealed-bedroom!

Here's the story...

A looooooooooooooong time ago I picked up this little chair at a yard sale...

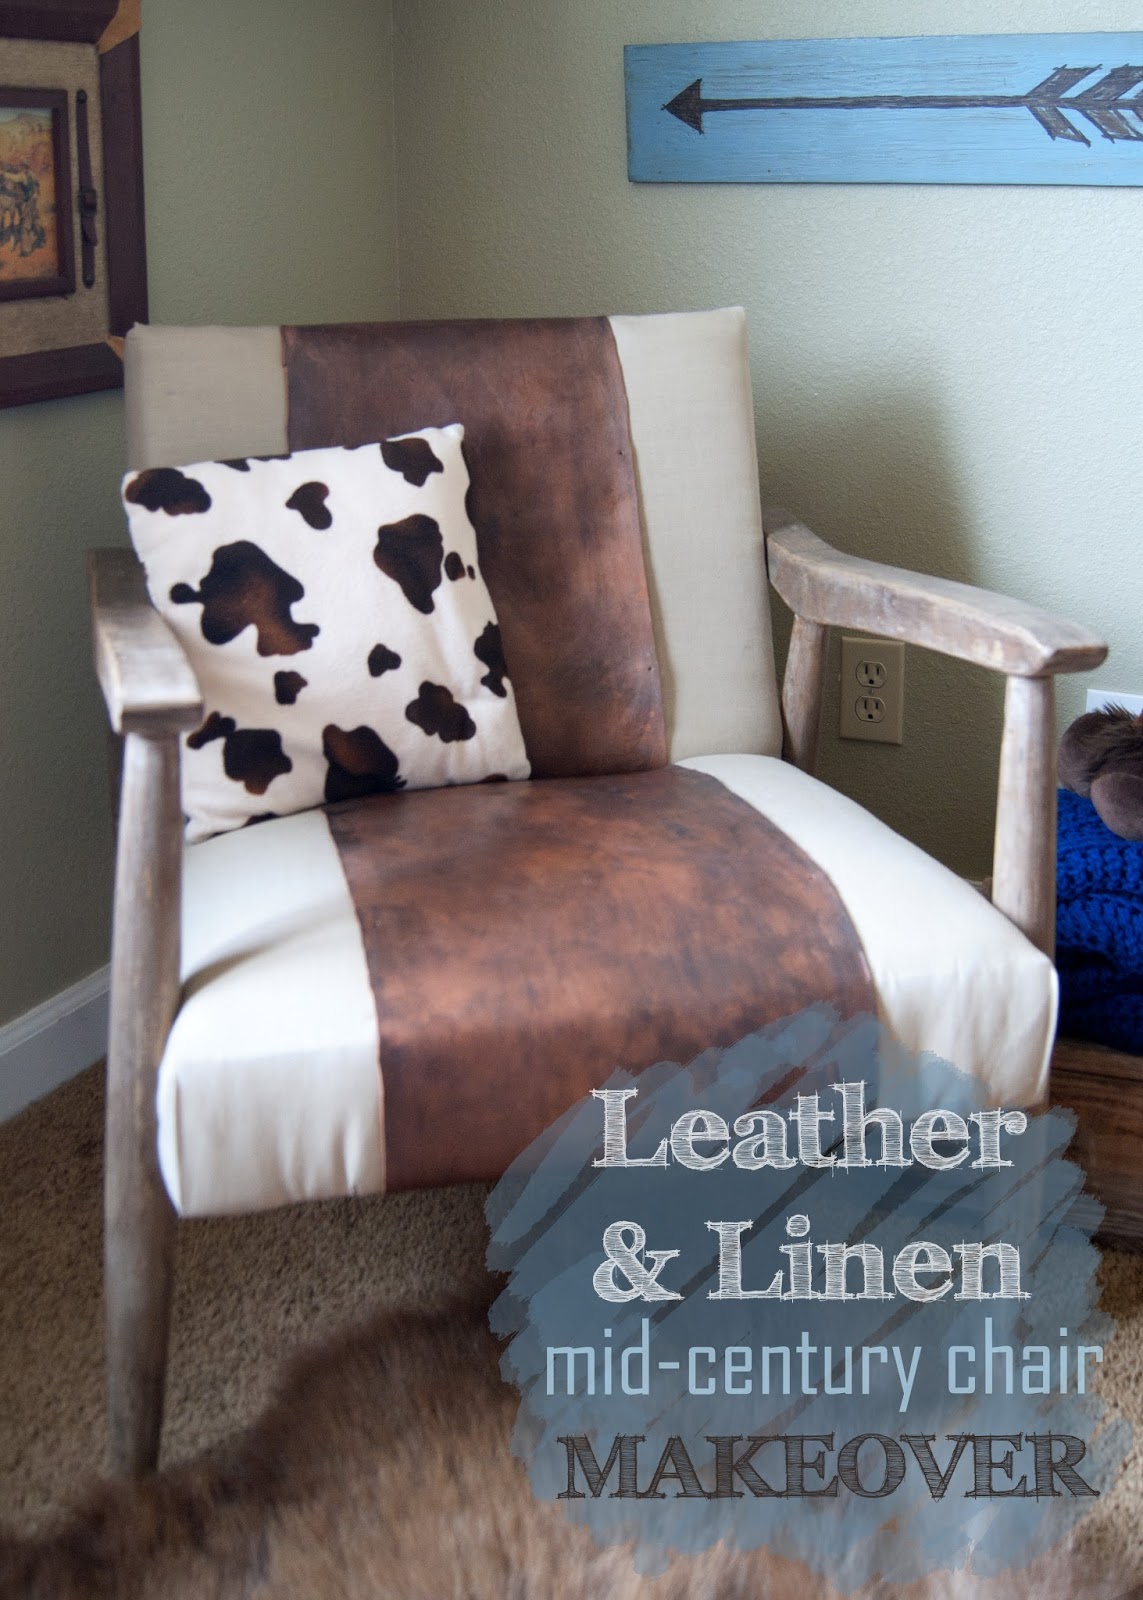
Mid century chair - leather, linen and cow print pillow

FOR FREE!!

People are funny about furniture. If it looks gross they won't buy it. Well, this chair looked gross. It had grimy fabric in a not so attractive green color- it was a horrible textured fabric...like sandpaper and was probably original to the chair. The wood was also disaster with all the finish worn off, but it had things going for it...

great lines..

plus it was sturdy...

and did I mention FREE.

..for the life of me I can't find before pictures...

Bad blogger...I know...

I knew I could give it new life and then it sat in our garage for oh, 6 months...

We finally tore it apart and I started the re-upholstery (I found a linen look fabric for $1 a yard at big box store) while my husband refinished the legs using vinegar stain and wax.

We were just about to finish it, but then we moved and it was still in pieces and it got packed along with everything else.

So that brings us to my recent "lets finish everything we started RIGHT NOW before the baby comes" phase...

in progress, applying nail heads to back of mid century chair

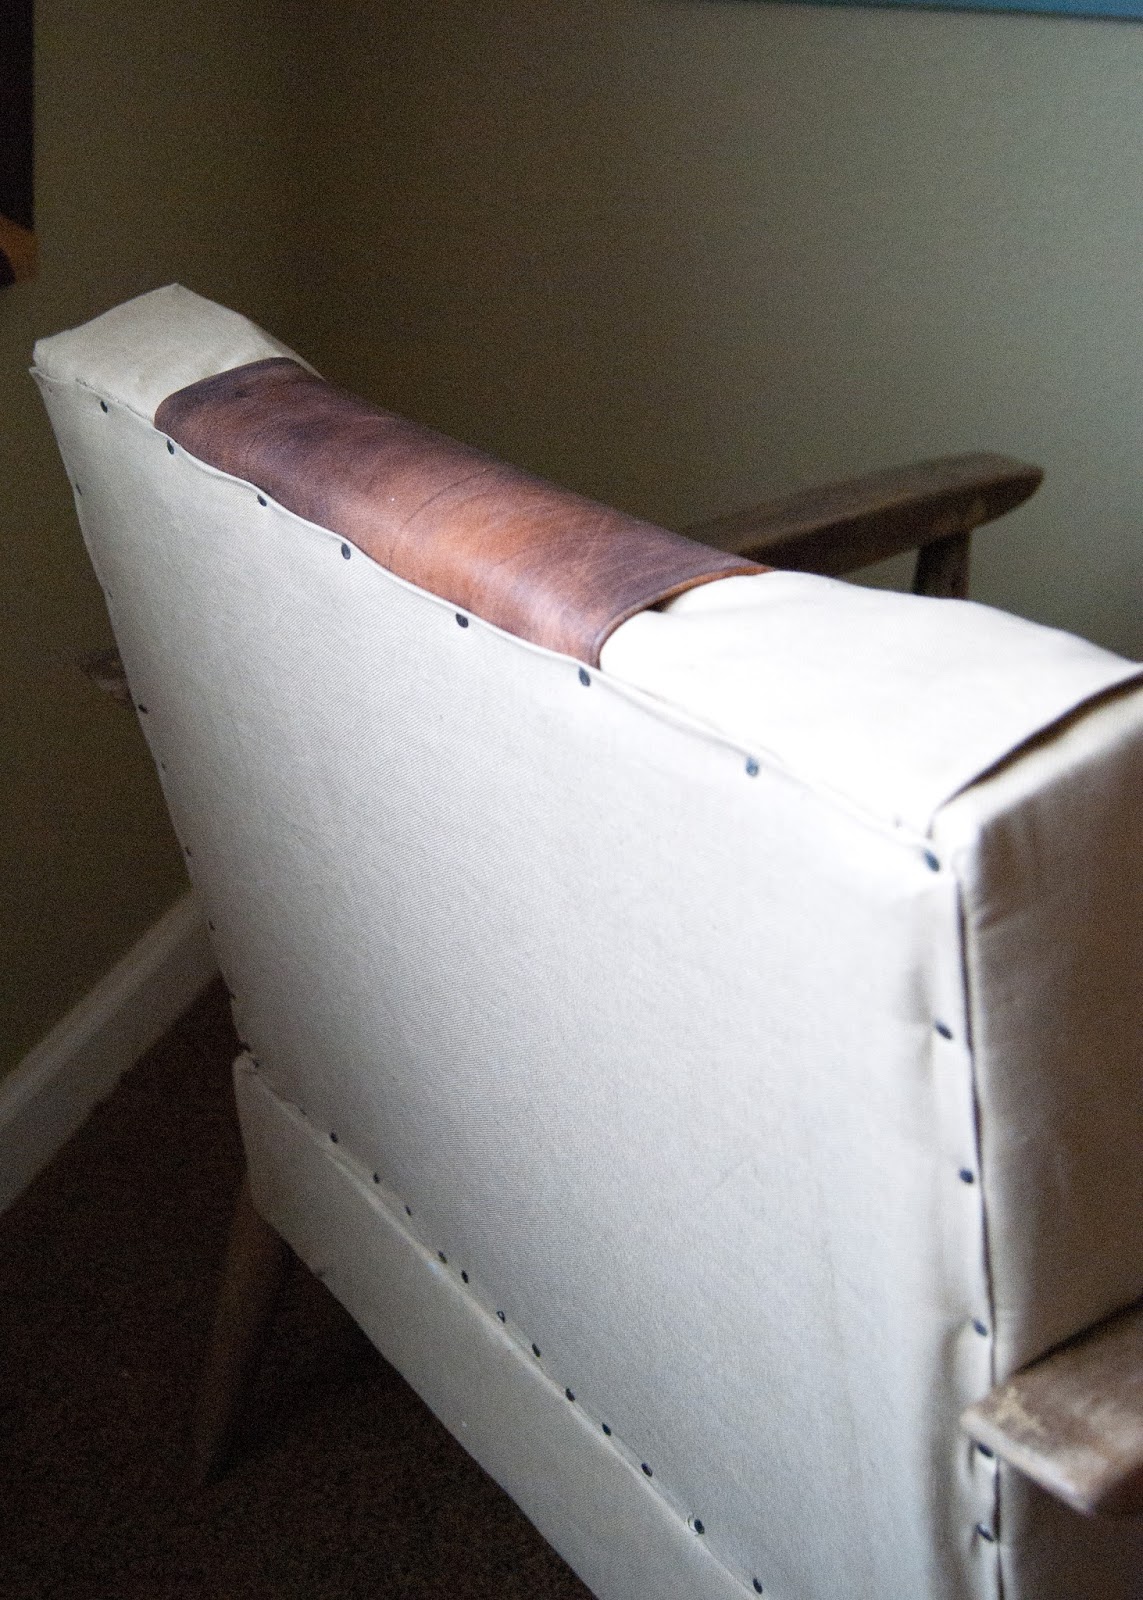
I cut strips of leather (which I dyed- more on that to come) to fit on the back and seat and then used upholstery nails to hold them in place.

Leather and Linen detail on back of mid century chair

I used the same nails to put the back fabric panel on.
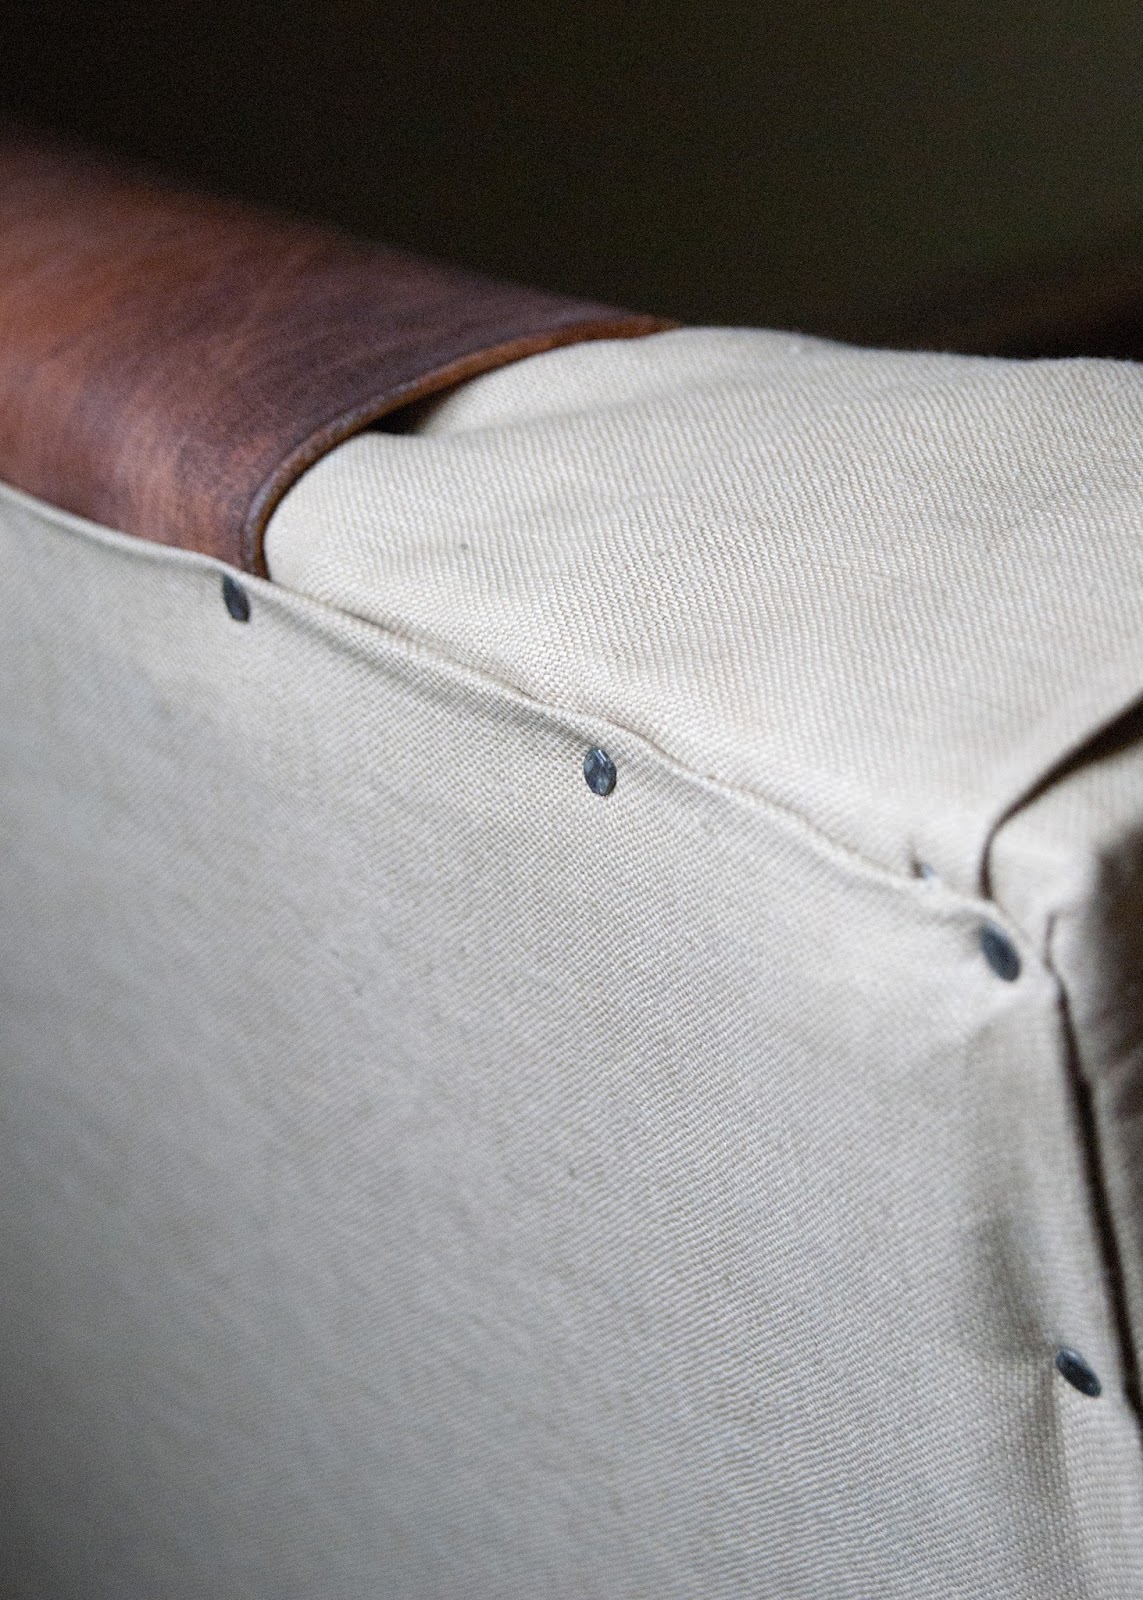
They are gorgeous vintage blued nails that I found on Etsy.

Close up of detail - leather, linen and nailheads.

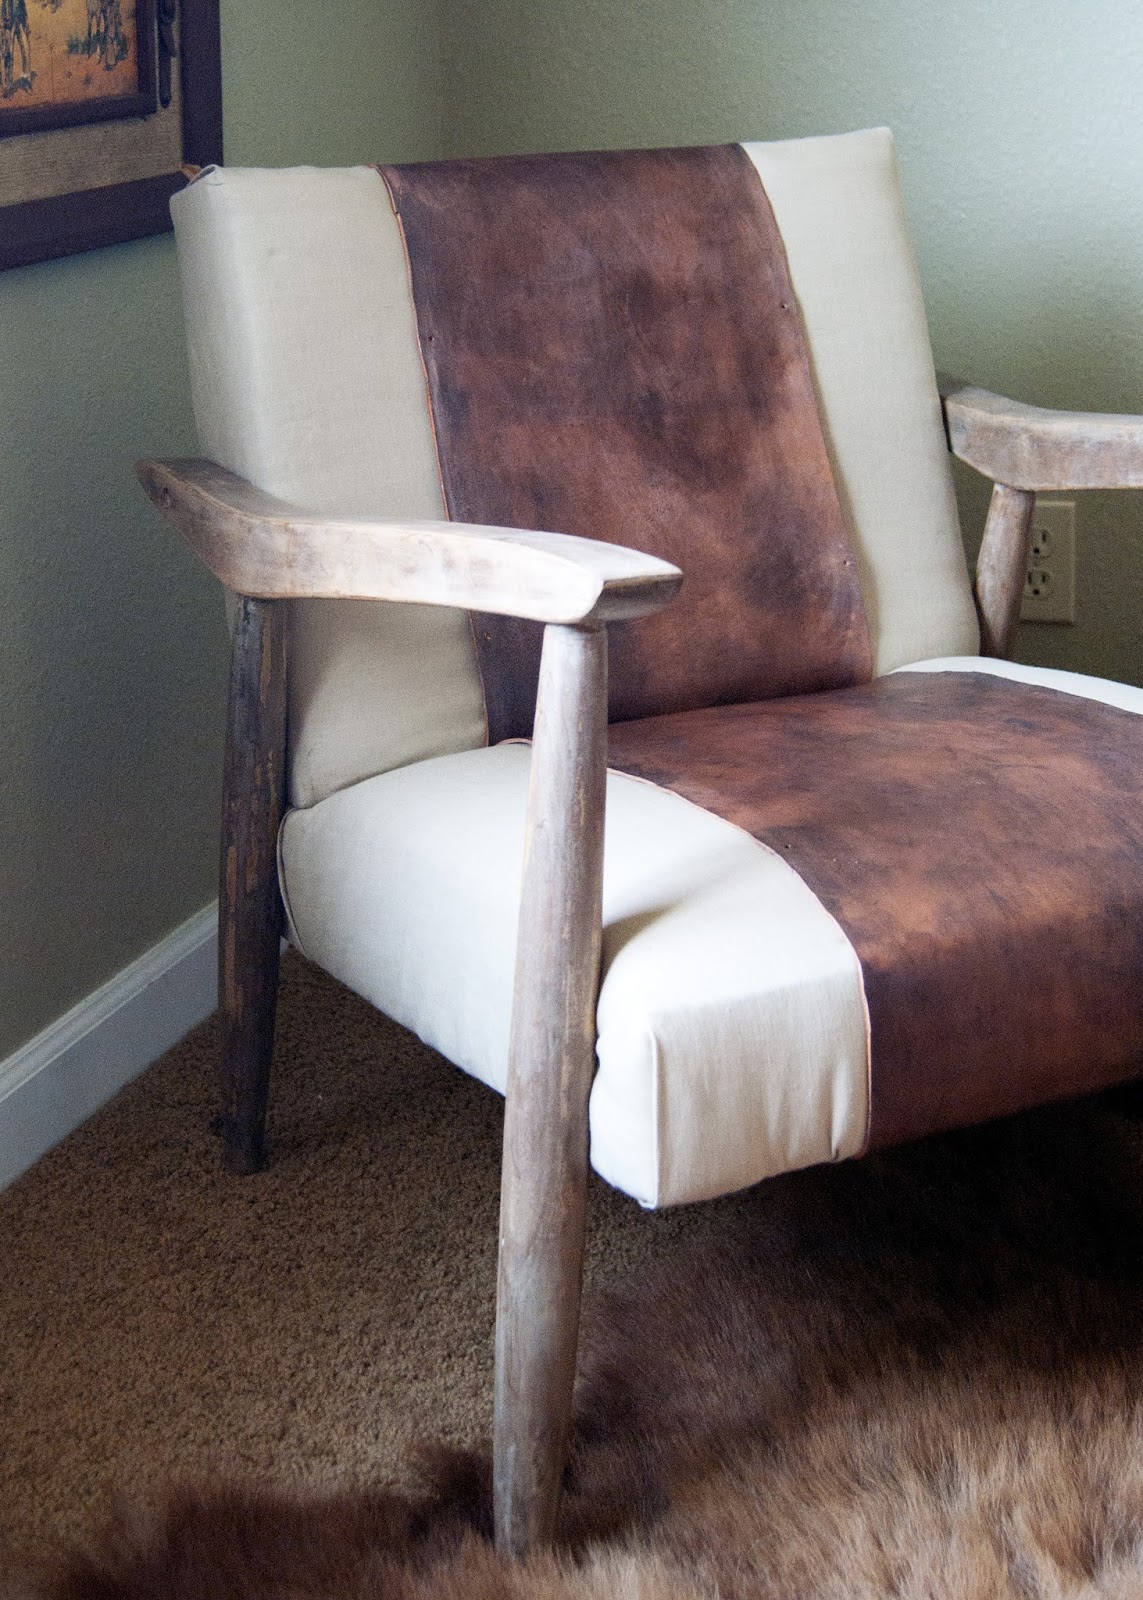
Finally the chair was back together!
Mid century chair gets a makeover with linen and leather. Arrow sign in background is awesome!
(do you spy an arrow sign? They are now available in my Etsy Store!)


Vinegar stained legs, linen fabric and leather

Mid century chair with leather

It fits perfectly in Ever's newly redecorated bedroom.

This is probably one of my most favorite things I own and my first complete (and successful) upholstery project!

What do you think!!?

Sharing with:
Work It Wed - The Happy Housie
Be.YOU.tiful Link Party - Maybe I Will
Under 100 Linky Party - Beyond the Picket Fence
Thursday Style - Life in Velvet
You can follow me!


Image Map
Related Posts Plugin for WordPress, Blogger...