Image Map
Showing posts with label bathroom. Show all posts

Powder Room Makeover - The Plans - One Room Challenge

Last week you got to see my terrible orange / salmon colored bathroom. If you haven't checked it out yet, go do that and come back. Fair warning. Its scary.

 I apologize. You'll recover eventually.

I'll show you pretty things today...I promise.

So, to move forward on a design I like to put a mood board together so I know what direction I want to head. I did the same for this bathroom, Keep in mind that this is just the feeling I want the bathroom to have. I haven't done any shopping for the room yet and I plan on sourcing most of the decor from antique stores, yard sales, clearance aisles and auctions. Oh, and there will be lots of DIY happening.


Averie Lane Powder Room

I'm still undecided about one key element of the room - the vanity color. So I put it as white for now (represented by the console table) , but that could change.

One of my favorite bathrooms is this one form Dear Emmeline...


I love the use of a colored vanity, so I might just go for it!

Also, I'm hopeful that I can test out the removable wallpaper from Spoonflower (I just have to convince the husband). I might create something new just for our bathroom or use one of my existing designs. I like the simplicity of the steer sketch. I normally would shy away from wallpaper, but being able to remove it is a bonus!


What do you think. To crazy?

I'm eager to start making some progress in here and can't wait for next weeks update! Until then, head over to Calling it Home and check out what the other guest participants are up too!


Powder Room Makeover - The Before - One Room Challenge

I'm way late in the day getting up this post, and to be honest, I ALMOST skipped this round of the One Room Challenge, but in the end I just couldn't keep away. 

For those of you new to the ORC, Linda at Calling it Home, puts on a challenge twice a year. The goal? Bloggers have 6 weeks to totally transform a space. Each week we give updates and progress reports and at the end we all share our rooms a big reveal post! I have done 3 One Room Challenges now...my daughters room, our entry and our master bedroom. Its such a rush and one of my favorite things to blog about!!

So instead of skipping it, I decided to tackle one of the worst rooms left in the house. It also happens to be the smallest room in the house....


Our powder room.

Since we are keeping it real, I have to tell you I am really embarrassed that our powder room has looked this way for over two years. Thankfully I don't have to take credit for the TERRIBLE paint color....its salmon...or is it orange? Whatever color it is, its bad...oh, and its on the ceiling too! Lovely.


The hallway got done a couple challenges ago, but would you believe that I still don't have a laundry or master bedroom door up? Ha...its only because I hated the color they got painted and I have plans to change them....lets just call it a bonus ORC project. I also get to touch up the trim from a big painters tape fail that happened a few weeks ago. Yay.

The bathroom is small like I said, but I just know it can be turned into something special.


The layout of the room won't be changing and neither will the vanity or toilet. Floors have to stay for now too, but everything else is getting the boot. Except maybe the cute vintage stool.


I put together a quick checklist so we can all keep up with my progress...

Powder Room To Do:
Remove Tile Baseboards
Add new trim
Paint pocket door
Revamp vanity
Replace mirror
replace light
New toilet paper/towel bars
PAINT

Big list for a itty bitty room. I will go over more of the design details next week as I finalize my vision for the space.

Until then, head over to the One Room Challenge Linking Event to see what everyone else is up to!


Project Kid's Bathroom - Reveal!

It's #projectkidsbathroom REVEAL day!!

You can catch up on all the posts in this series by clicking the links below:

Part 1 : The Before
Part 2 : Tile
Part 3: Chunky Wood Shelves
Part 4: Sliding Door Window Covering
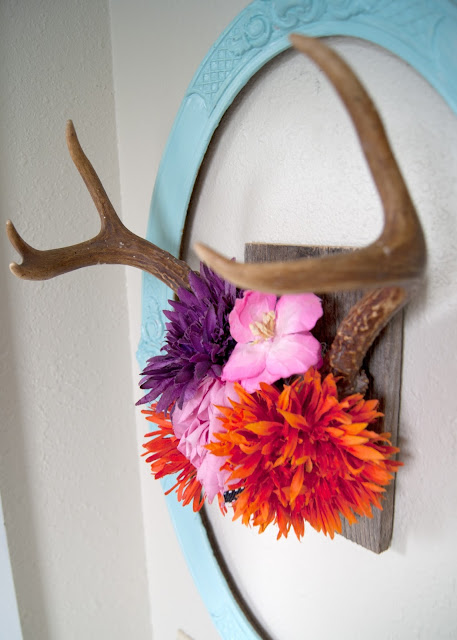
Part 5: Antler Hair Accessory Organizer
Part 6: How to Personalize Builder Grade Lights

Raise your hand if you are super duper excited that I am finally sharing the kid's bathroom makeover!! 

We've actually had it "done" for almost 6 months, and I photographed it back in January, but then I decided go and change the mini gallery wall and had to re-shoot the whole room! Not an easy task when there are three littles constantly destroying it....

Well, lets get on with it! 

...before....

Project Kid's Bathroom Makeover - before & after - new tile, painted vanity, gallery wall, wood shelves and  antler organizers.

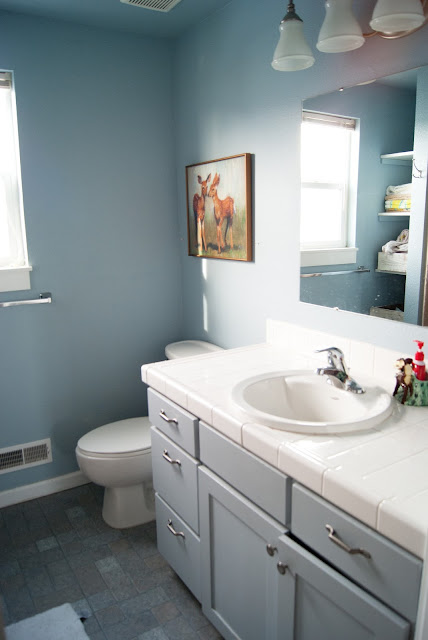
The bathroom wasn't too horrible other than the floor to ceiling shades of blue, dingy linoleum, damaged baseboards, too big lighting....and did I mention all the BLUE? Gah! I couldn't take it anymore!! Although, I admit, it did have one thing going for it ...that cute little deer art I nabbed at a garage sale for just a couple dollars. It was my inspiration for the whole space and my guide for everything else that came into the room. 

And finally, the AFTER!! (I'll include a source list at the end of the post...)

Project Kid's Bathroom Makeover - before & after - new tile, painted vanity, gallery wall, wood shelves and  antler organizers.

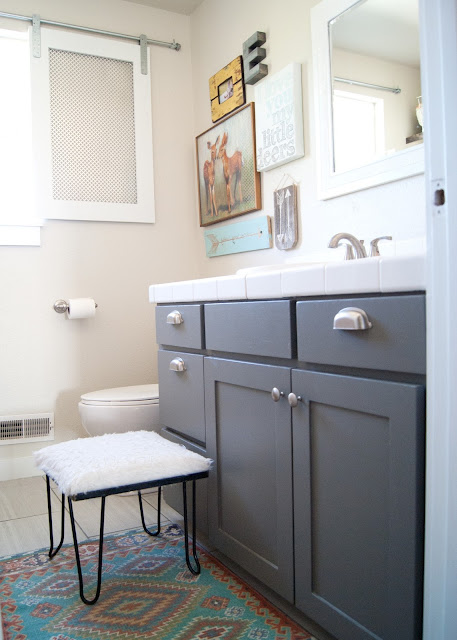
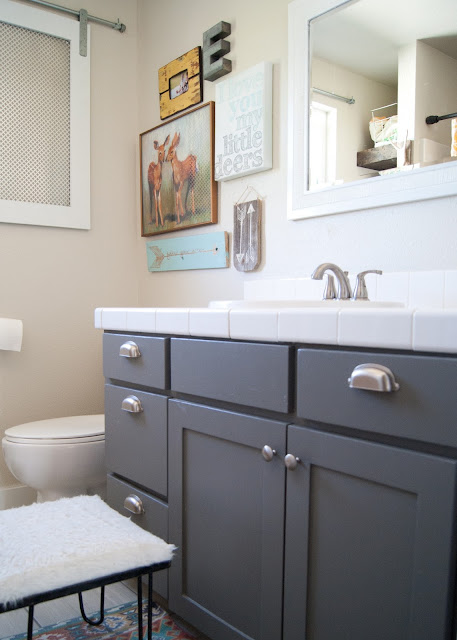
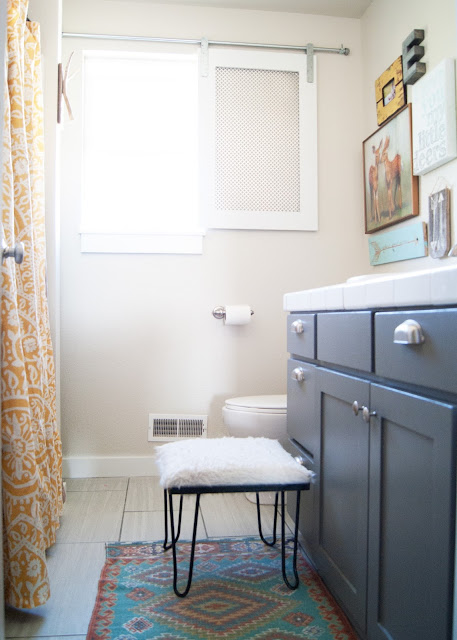
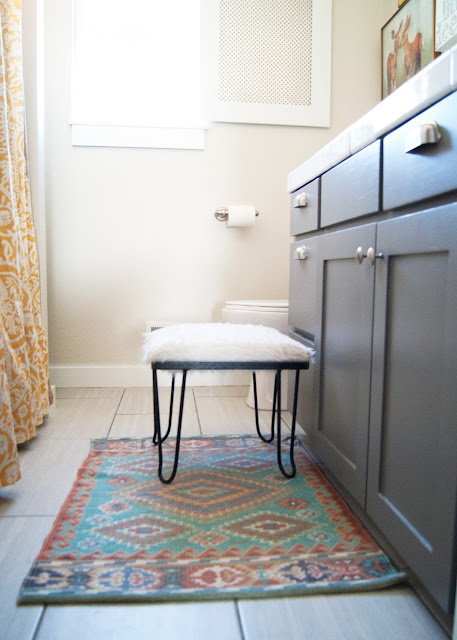
We were able to keep the vanity by giving it a fresh coat of paint (Martha Stewart Zinc - you should be able to have it color matched even though they are no longer carrying her paint line at Home Depot) Its actually the same color that I used in my daughters room at our last house! It sure makes the tile counter top look lots better!

Project Kid's Bathroom Makeover - before & after - new tile, painted vanity, gallery wall, wood shelves and  antler organizers.

Project Kid's Bathroom Makeover - before & after - Martha Stewart Zinc on vanity - World Market Rug

New pulls on all the drawers helped too!

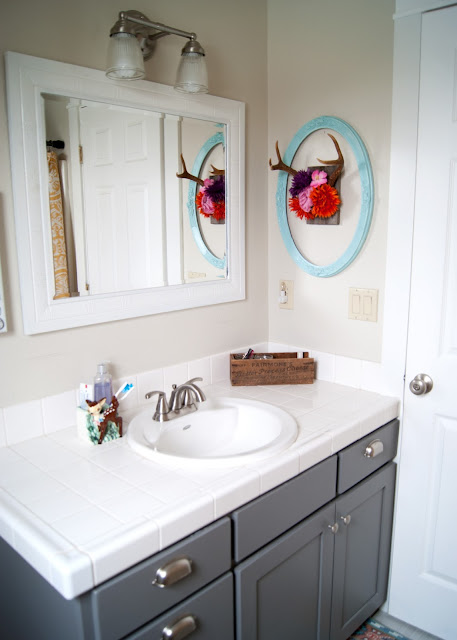
Above the vanity, we switched out the old frame-less mirror with one that was previously living in the downstairs powder room. All I did was give it a couple coats of glossy white paint to tie it in with everything else.

Project Kid's Bathroom Makeover - before & after - Martha Stewart Zinc on vanity , DIY artwork , vintage hairpin leg stool

Project Kid's Bathroom Makeover - before & after - Martha Stewart Zinc on vanity antler hair clip organizer

It looks great reflecting the DIY Antler Hair Organizer!

Project Kid's Bathroom Makeover - before & after - antler hair clip organizer

I kept the walls, tile and vanity in a neutral color pallet, knowing I could amp up the color with art and accessories - like this totally cute vintage deer planter (a gift from my sister) that doubles as a toothbrush holder! I wanted the room to feel cohesive, but not "theme-y", so there are several references to deer, but I don't think it screams "deer bathroom!"

Project Kid's Bathroom Makeover - before & after -vintage deer planter as a tooth brush holder
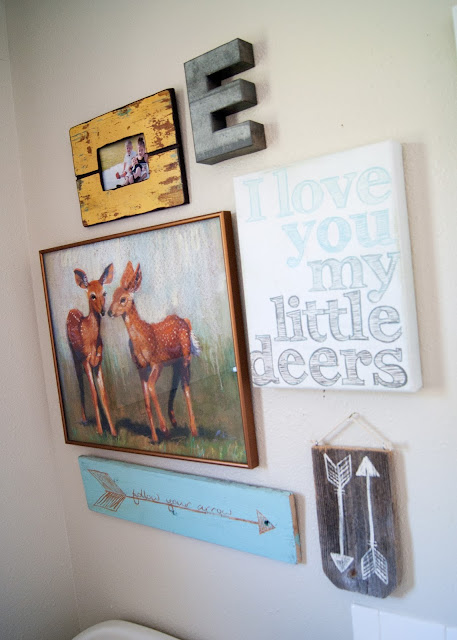
Project Kid's Bathroom Makeover - before & after - bathroom gallery wall
Bathroom Makeover - before & after - Chunky wood shelves in nook

I love the addition of the chunky wood shelves! Totally changes the look of this little nook! 

Bathroom Makeover - before & after - Chunky wood shelves in nook, antler & salvaged wood towel hook

How cute is the towel hook!? Its a quick DIY made from an old antler shed and a piece of scrap wood! 

Bathroom Makeover - before & after - antler & salvaged wood towel hook

Oh, and we can't forget the amazing barn door style window covering!

Bathroom Makeover - before & after - World Market rug / mat and vintage hairpin leg stool

Bathroom Makeover - before & after - World Market rug / mat and vintage hairpin leg stool and DIY barn door window covering

I also brought in a little stool for the kids to stand on. I'm hoping to find or build something different that at least two kids can stand on at once, but for now this works!

Bathroom Makeover - before & after - World Market rug / mat and vintage hairpin leg stool

Bathroom Makeover - before & after - World Market rug / mat and vintage hairpin leg stool

Bathroom Makeover - before & after - Zinc cabinet, gallery wall, World Market rug / mat and vintage hairpin leg stool

So, there we have it! Our kid's bathroom makeover is complete!!
I've included the sources below!

Sources:


Wall Color: Martha Stewart Sandpiper (all the MS colors can be matched at Home Depot)

Vanity Color: Martha Stewart Zinc


Mirror: already had, not sure where it was from.


Antler Hair Clip Organizer: DIY tutorial HERE

Deer Art: thrifted

"Little Deers" Canvas: made by me

"Follow your arrow" sign: Made by me, you can buy it HERE

Arrow Wall Hanging: made by me (similar HERE)

"E": Michaels

Yellow picture frame: thrifted

Window Barn Door: DIY tutorial HERE

Stool: thrifted - Makeover HERE


Shower Curtain: World Market (sold out)


Other Shelving accessories: thrifted or already owned

Thank you so much for hanging in there with me on this makeover! Hopefully when we tackle our Master Bathroom things go a lot faster!

I'd be happy to answer any questions you might have in the comments below! Also if you like what you see, be sure to pin it! 

Project Kid's Bathroom: DIY Barn Door Window Cover for the Bathroom

This week we will be revisiting past #projectkidsbathroom posts leading up to the BIG REVEAL of the finished bathroom! I know you have all been waiting and I am finally ready to share the space!
So join me each day this week as we look back at all the project we've done!
You can catch up by clicking the links below:

Part 1 : The Before
Part 2 : Tile
Part 3: Chunky Wood Shelves
This project is flat out my favorite project we've done in #projectkidsbathroom !

Not only does is it function just like we need it too, it looks totally awesome!

For some reason when I was trying to come up with a window treatment for the bathroom, I couldn't make myself go the traditional route. We took down the nasty mini-blinds and I loved the way the window looked completely open. ALL. THE. LIGHT!

Obviously that is a bit of a problem in a bathroom, though. No one wants their bathroom shenanigans exposed for the whole neighborhood to see, yet I really couldn't picture a curtain or any sort of blinds. No thanks.

Here's a before, lest you forget...

DIY Barn Door Window Cover for the Bathroom - before

Our solution? So glad you asked (wink wink)...

House Tour

So we have been in our house a little over a year! Woo hoo!

Since I am feeling nostalgic I thought I would take you on the BEFORE tour of our house. I took pictures of my own, but they seem to be missing- they are probably on my laptop-which lately has been talking to me and playing strange music..scary! Yea, so, these old real estate pics and some cell phone ones will have to suffice.

Don't judge.
HOUSE
- Facing the Bay- we are not ON the lake, but close on just over an acre.
Related Posts Plugin for WordPress, Blogger...