Image Map
Showing posts with label before & after. Show all posts

Floral Dresser Before & After | Tones for Tots Little Piggy

 Well, hello there!

Its been awhile hasn't it? I knew going into the spring show season I wouldn't have much time to blog, but I didn't realize just how crazy we were to try and do 6 shows in 3 months during my third trimester (and while my husband works a regular full time job!)! My signage was way more popular than I could've hoped for, so I did tons of painting on the off weeks between shows just to keep up with demand.

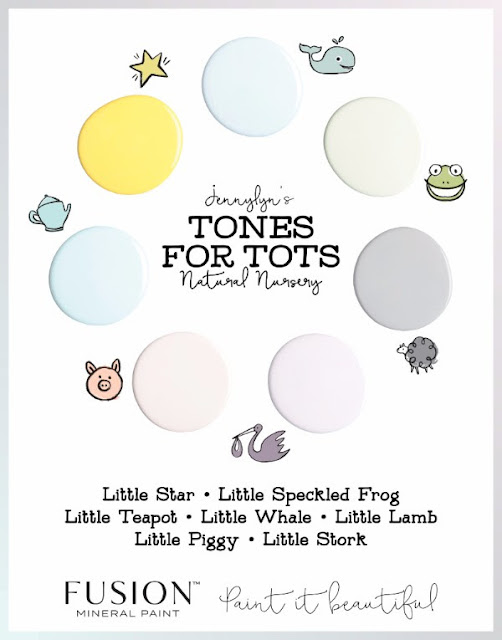
Anyways, during that time I was sent the new line of Fusion Mineral Paint to test out. Its called Tones for Tots and is formulated to be 100% safe to use around your little kiddos! It also comes in the prettiest shades of nursery friendly colors.

Dresser Makeover | Tones for Tots | Fusion Paint Color Chart

When I saw the new line of colors, I knew immediately what I wanted to use it on and exactly what color I wanted to use.

Dresser Makeover | Tones for Tots | Fusion Paint | Dresser Before

This dresser has been hanging out in our closet for a few years. We used it for storing baby clothes, but his stuff has since been moved to his new room and I didn't really want to use the dresser as in anywhere in the house since it doesn't really "go" with our other decor. The thing is though, its not a dresser I'm ever going to get rid of. It just happens to be part of a nursery set that my mother-in-law bought when my husband was born. Basically a 1980's family heirloom.

Good thing I have a little girl in need of a dresser, right!?

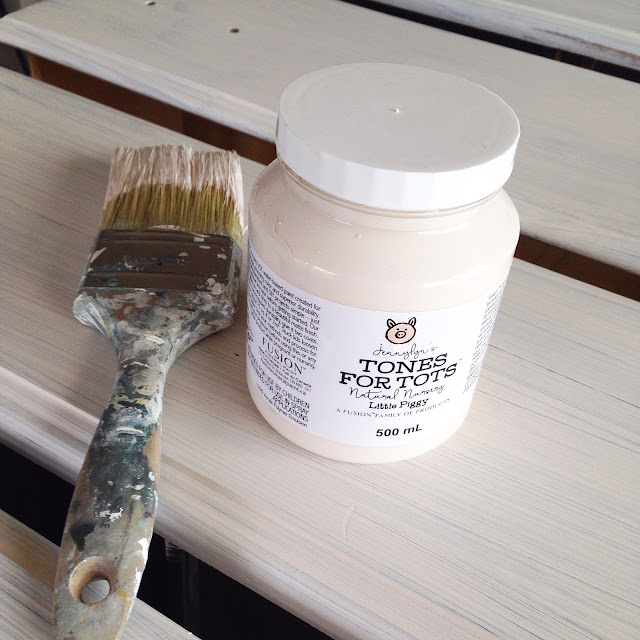
So I picked out the color Little Piggy and gave the dresser 3 coats of paint (after a cleaning and a light sanding). Even though I used a crappy brush the paint went on beautiful! I think it would've covered in less coats had I not started with such a dark dresser.

Dresser Makeover | Tones for Tots | Fusion Paint Little Piggy
Dresser Makeover | Tones for Tots | Fusion Paint Little Piggy Progress

At this point, I could've been done. This paint finishes beautiful and doesn't require a topcoat so all I needed to do was distress the edges slightly and pop the knobs back on to be done, BUT(...haha...there's always a but, right?) my girl has been BEGGING me to paint her a flower picture for weeks and it occurred to me that this dresser was basically a giant blank canvas, so I let her pick a few colors - a couple of Tones for Tots colors, plus a few to aid in the design and I started free-handing some flowers on the dresser.

Dresser Makeover | Tones for Tots | Fusion Paint | adding hand painted flowers

Then I added some detail (you've all been getting teasers on Instagram!) in the style I do on my signs.

Dresser Makeover | Tones for Tots | Fusion Paint | adding hand painted flowers

Ready for the BIG reveal?

Ta-dah!

(Forgive my poor photos! Not only was I using my iPhone because my camera tripod is broken, but I had to stage this in my bedroom because I couldn't get the dresser upstairs by myself. Our room doesn't get the best light and I had to work around our bed too. Oh well! We are actually working on a solution to make photographing projects much easier...I can't wait to share more about it!)

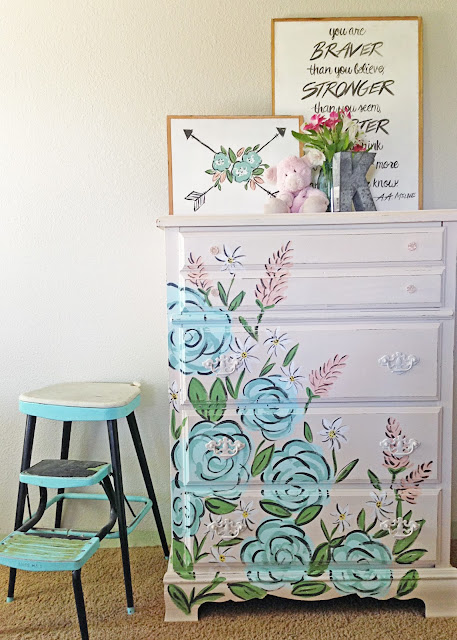
What do you think? Its a bit crazy, but I love it! Especially how the floral wraps around the side as well!

Dresser Makeover | Tones for Tots | Fusion Paint Dresser After
I had so much fun styling this dresser using some of the signs from my shop: Averie Lane Boutique and a few props from around the house! 
Dresser Makeover | Tones for Tots | Fusion Paint | Floral Dresser Makeover After

Dresser Makeover | Tones for Tots | Fusion Paint | Floral Dresser Makeover After

Dresser Makeover | Tones for Tots | Fusion Paint | Floral Dresser After

Dresser Makeover | Tones for Tots | Fusion Paint | Floral Dresser Makeover After

The best part is, my daughter freaking LOVES it. She picked out tiny pink glass knobs for the top drawer and I used the Tones for Tots paint color from the dresser to paint the original knobs for the rest of the dresser. I love how they just disappear and let the floral pattern shine.

Dresser Makeover | Tones for Tots | Fusion Paint | Averie Lane Boutique Sign on Floral Dresser

I totally get that this style of painting isn't for everyone, but I think its the perfect thing for a little girls room! I plan on making a few tweaks to her Granny Chic Room (we've already changed out the bed) so the dresser fits in better and I have a sign project in the works to personalize her space even more! Eventually the room will become a shared space for our girls so I'm okay with giving it a little makeover.

Speaking of...maybe my next post will be introducing baby! She should be here any day!

(Disclosure: The paint for this post was provided to me for free, but all the opinions are completely my own and not influenced by the company providing the materials.)

School Desk and Chair Makeover

It's back to school time!

Are you sending your kids off to school or homeschooling? Either way, its just a crazy time of year, isn't it?!

School Desk and Chair Makeover - aqua school desk, globe, pennant, chalkboard

I WILL be starting home school preschool with the older two kids next week (I'm so excited and scared all at the same time!) and in the spirit of the season (and so we would have somewhere to do school work) I decide to makeover a couple desks that have been sitting in the garage all summer.

These types of desks are pretty easy to come by at thrift stores and yard sales and usually are fairly cheap, they are also fairly ugly...unless you like beige and brown...

old school desk and chair before - brown metal and wood

Personally, its a little too blah for me, so I decided to paint it. I taped off the wood parts of the chair since they really can't come apart and I also removed the tabletop from the desk.

taped off and ready for spray paint

I gave everything one light coat (you really just need one, even tho it can be really tempting to do multiple coats, it will make any distressing you want to do lots harder!) of aqua spray paint - my favorite is Rust-o-leum - and then let it dry for a couple hours. After it was dry I took some rough sandpaper (80 grit) and went over all the metal parts of the desk to rough it up and expose the metal underneath. I love the distressed look and its a great finish for kids, since I know they would  just beat up the finish anyways. 

School Desk and Chair Makeover - aqua school desk, globe, pennant,

To revive the wood on the chair, I wiped it down with a mixture of olive oil and vinegar. It helps clean and hydrate the wood all at the same time. For the desk top I went back and forth on what I should do with it. It is a laminate material, and even though it isn't real wood it IS super durable for a work surface. I may hit it with some chalkboard paint in the future, but for now I am enjoying the light wood tones and the aqua colors together.

School Desk and Chair Makeover - aqua school desk, globe, pennant, chalkboard

School Desk and Chair Makeover - aqua school desk, globe, pennant, chalkboard

I styled the desk in front of a giant school chalkboard that I had leaning against a wall - I have plans to hang it, but it hasn't happened yet. The globe was my husbands when he was a kid and we picked up the rodeo pennant & school box at a local auction.

School Desk and Chair Makeover - aqua school desk, globe, pennant, chalkboard

School Desk and Chair Makeover - aqua school desk, globe, pennant,

I plan to keep the school area clean and simple and clutter free and I still can't decide if it should go in the office upstairs or in the living room....I might be in denial about how much it can take over. Any suggestions? There are some great homeschooling room designs out there that I have been using for ideas, but real life advise is always welcome! So, obviously, this won't be how we set up for homeschooling, but I couldn't resist a little styling session for the blog!

aqua school desk, globe, pennant,

 I have another bigger double desk that I've decided will work better so I'll blog about it once I get the home school area set up! In the meantime,....this little desk and chair set is up for grabs. If you are in the Boise / Nampa / Caldwell area, feel free to email about making it yours!

How to Make Over a Vintage Vinyl Dinette Set (using Spray Paint & Mod Podge!)

So the other day my husband dropped me of at work (I babysit at our gym a couple times a week) and then he took the kids and headed off to check out the local garage sales. 

When he picked me back up he was so excited because he had found this...

Dinette Set Before

A vintage 1970's dinette set for about $25.

Wanna know what my first thought was?

Oh crap.

Even though it looked super cool, I couldn't wrap my mind around what it would take to reupholster all the seat backs and cushions (hello, scary vinyl!). Normally I'm all about trying to preserve the integrity of vintage pieces, but this set was badly smoke stained and one cushion had a rip in it, clearly I would need to take the whole thing apart. Honestly it was too overwhelming for me to think about.

I mentioned to my husband that I wish I could figure out a way to just paint it, but he shot that idea down because he claimed it couldn't be done. Well, I like to prove I'm right and found a couple great tutorials on how to spray paint vinyl (this one was especially helpful!) Except there was one problem, I had still had that one rip to contend with. In my search for ideas I cam across THIS tutorial on how to use Mod Podge & fabric to recover vinyl. This could actually work, I thought!

The next step was to come up with a plan.

Picking out supplies - spray paint and retro fabric

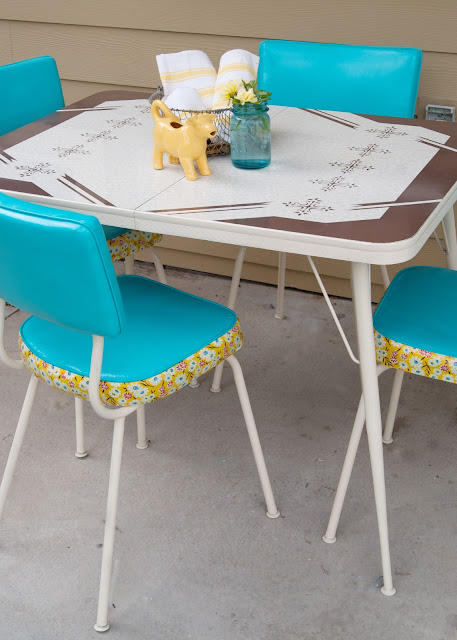
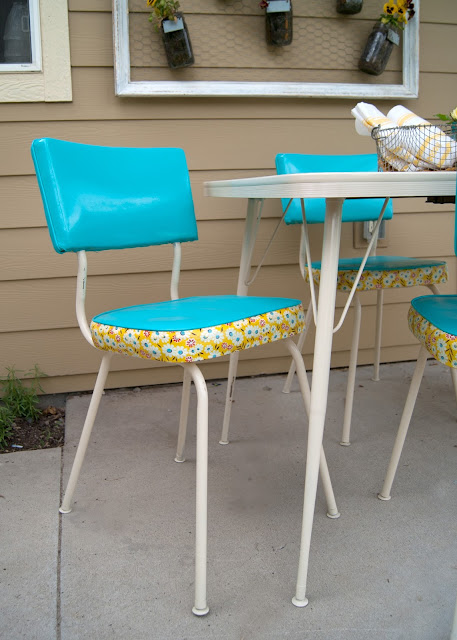
Since the table top itself was staying, I tried to find a vintage inspired fabric that I thought coordinated with it. Its hard to tell, but the table pattern is brown and so are the leaves in the fabric I picked. I then used my fabric to pick the colors for everything else. I picked Rust-Oleum Seaside* (*indicates affiliate links) for the cushions and Navajo White* for the chair frames and table legs - the off white color was a perfect match for the tabletop. I could've chosen about any colors I wanted, but the key is picking a paint that says it bonds to plastic. 

Once all my supplies were gathered I go to work!

The first thing I did was take the seat cushions off of the chairs and then gave everything a really good cleaning with some dish soap and a scrub pad. You can see how discolored and nasty the seats were and I couldn't save the cardboard because it stunk so bad.

Taking apart chairs

I let the seats dry out in the sun and then I gave them all a couple coats of spray paint. Oh, just so you know, I actually tested the spray paint technique on one of the chair backs to see if it would work (***spoiler alert, it did!***) before proceeding with this whole project, so I went into this part very confident!

Cushions ready for spray paint
spray painted vinyl cushions

I was so happy to see that ugly brown go bye-bye!

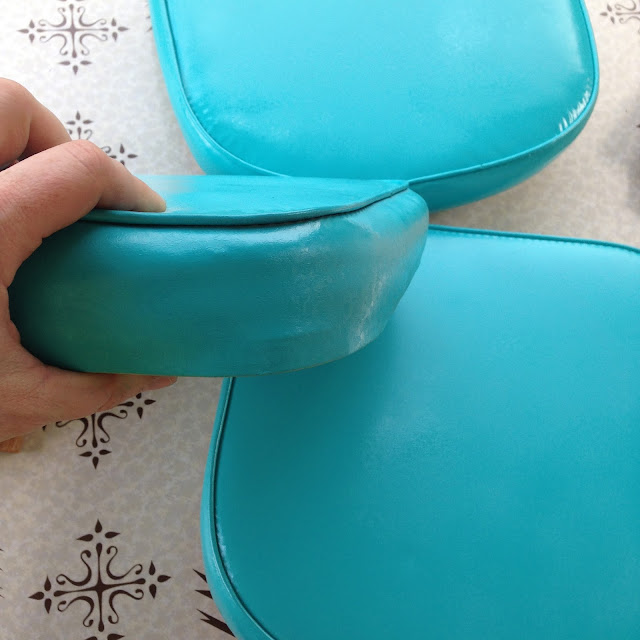
Cushions feel just like vinyl! spray painted vinyl cushions

The vinyl stayed slightly tacky for a couple hours, but the longer it sat the softer it got. It feels just like vinyl now!

The next step was attaching the fabric. My plan was only to attach the fabric on the bottom edge of the cushion - that's where the rip was on one cushion.

Repairing a tip in vinyl using facric and mod podge

I cut strips of fabric wide enough to cover the cushion and wrap underneath a bit.

repairing a rip in a vinyl cushion using mod modge

On the first cushion, I just slid the fabric right up to the piping, but it was hard to hide where the edge of the fabric frayed, so on the rest of the cushions I rolled the edge of the fabric over so I would have a clean line against the piping. Just think of it as hemming, but with glue.

repairing a tear in vinyl using fabric and mod podge

My strips weren't quite long enough to make it around the cushion - I should have bought more yardage (I only bought 1), but the nice thing about using the Mod Podge was I could create a back piece that was pretty seamless with the rest.

In the picture below you can see how much I left hanging below the cushion. I did this so I could wrap it under the cushion just like the vinyl was. I planned on stapling it on, but ended up just gluing it. It worked great! Another great tip is to keep some baby wipes nearby to wipe up any glue that gets on the seat cushion!

vinyl cushion - spray painted and covered in fabric using mod podge

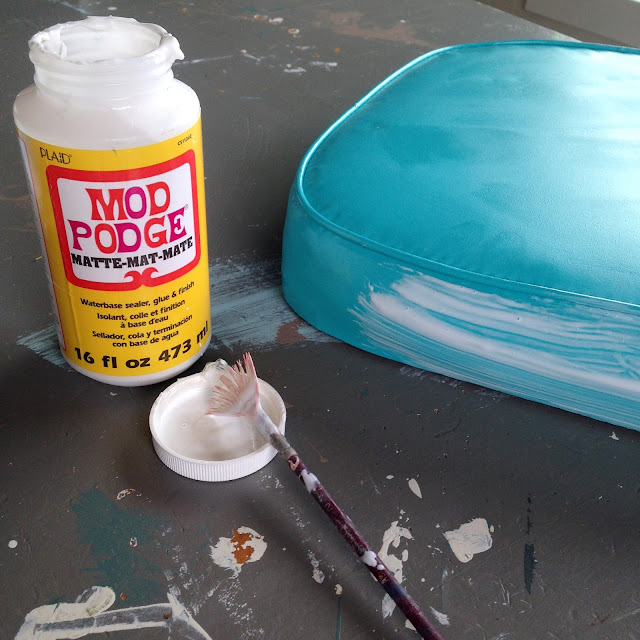
After I had the fabric on I went over it with another coat of Mod Podge. In the initial steps I used a matte finish, but once dried the texture was still pretty rough, so I did a second coat with a gloss (you could also use Mod Podge for Outdoors)

using mod podge to attach fabric to vinyl cushion

It turned out perfect and I can't even tell which cushion had the rip!! Yay!

How to Makeover a Vintage Dinette Set (using Spray Paint & Mod Podge!)

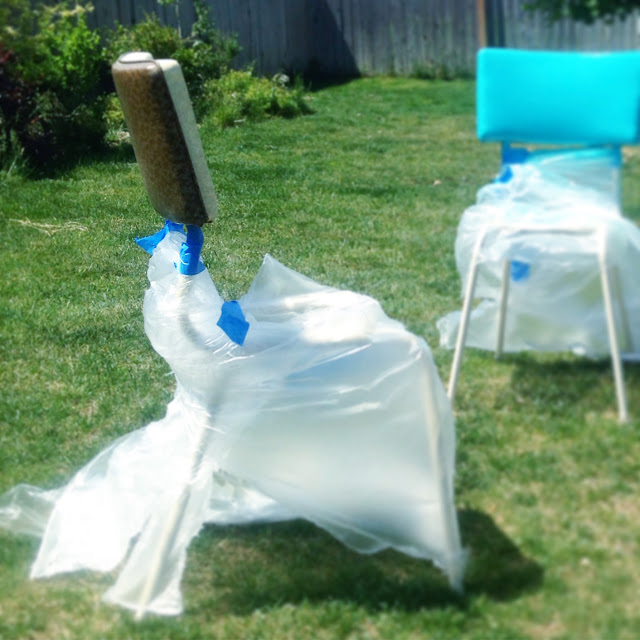
Finally I was ready to paint the rest of the table. First I taped off the table top and gave the table legs and the chair frames several coats of the Navajo White. I also recommend using a primer if your metal has any sorts of rust. After it was dry I taped off the frame so I could spray paint the back cushions. I thought about painting the backs white to save time, but it didn't look right, so I sucked it up and taped them off.

spray painting chair frames

Finally I was able to put everything back together!!

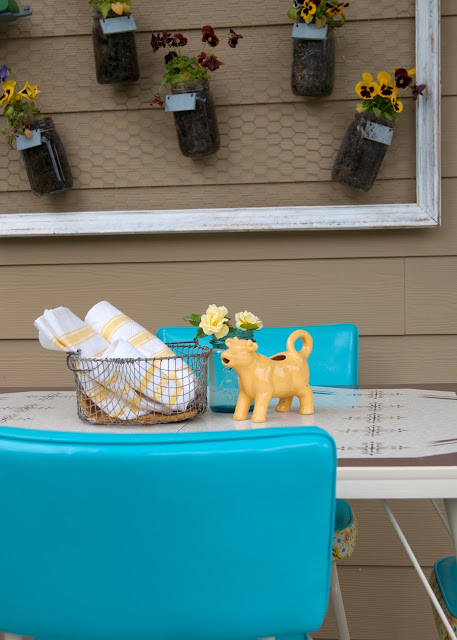
I set it up on our back porch to act as patio table for now. 

Isn't it cute!

How to Make over a Vintage Dinette Set (using Spray Paint & Mod Podge!)
How to Makeover a Vintage Dinette Set (using Spray Paint & Mod Podge!)
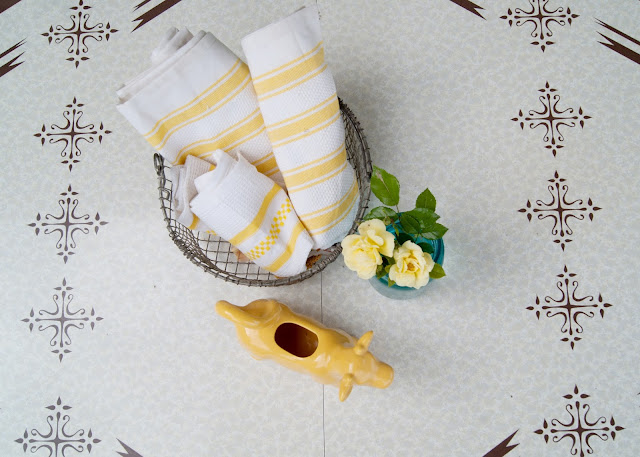
Table top - vintage table, blue mason jar, yellow tea towels, yellow cow creamer

Its hard to believe its the same table!!

How to Makeover a Vintage Dinette Set (using Spray Paint & Mod Podge!)
How to Make over a Vintage Dinette Set (using Spray Paint & Mod Podge!)

I really love how the table top stands out now too! That pattern is pretty awesome!

vintage dinette set makeover - yellow cow creamer, blue mason jar, vintage tea towels

The fabric helps give it a little nod to the 70s and the blue helps make the whole table feel brighter and happier. The brown was so drab before!

How to Makeover a Vintage Dinette Set (using Spray Paint & Mod Podge!)

What do you think?

Remember, here's where we started...

How to Makeover a Vintage Dinette Set (using Spray Paint & Mod Podge!) - before & after

and now!
How to Makeover a Vintage Dinette Set (using Spray Paint & Mod Podge!) - before & after
Seriously, so much better!!!!

I'm so happy I was able to save the dinette without reupholstering it!!!

How to Makeover a Vintage Dinette Set (using Spray Paint & Mod Podge!) - before & after

As much as I love this makeover, we have no real room for it, so if you are in the Boise area and are interested in this table feel free to contact me!

How to Makeover a Vintage Dinette Set (using Spray Paint & Mod Podge!) - before & after

Do you love this project? Don't forget to pin it in case you come across your own vintage table that needs a makeover!


Related Posts Plugin for WordPress, Blogger...