Image Map
Showing posts with label recipe. Show all posts

Easy Banana Bread Pancakes - Guest Post at A Girl & A Glue Gun!

Good day my lovelies!
I'm so excited to be guest posting over at the hilarious and talented
for Food Friday!!

Come on over and learn how to make the EASIEST pancakes EVER!!

Easy Banana Bread Pancakes

Seriously, you probably already have everything you need to make these right now!!!
Don't deprive your children or your husband or yourself of these... its seriously like banana bread for breakfast! 
yummm-o! 
see you there!


You can follow me!


Image Map

Crazy Cake {recipe}

Sticking with the birthday theme for the week, here is one of my go to cake recipes! Its amazing and fun to make with kids (if you dont mind a little clean up afterwards!!!)

There is something very nostalgic about pulling out an old yellowed recipe-

or 
having my mom pull out the recipe & send a picture of it to me
- to make something from my childhood. 

Pink Ladies {recipe}

Around here we love Pink Ladies...its like a root beer float, only without root beer. Its more like a Shirley Temple on steroids. Our little local drive-in, The Frosty Palace, is the only place I know where to get one and any time we need a cool treat that's where we head.
I decided to figure out how to make the darn things on my own as a surprise treat for my cousin's baby shower- which we threw for her while we were camping over 4th of July. ( More on that to come!)

Summer Pasta Salad {recipe}


This coming weekend is the kick off of festival season here in Sandpoint, starting with Lost in the 50's (yup, people totally get into it...poodle skirts, old cars and a sock hop!). In come the tourists and out come the BBQ's! I like to have some easy recipes on hand that I can make ahead and that can withstand the heat (no mayo!) I thought I would share one of our favorites. I have been making a version of this for years and the best part is its completely open to interpretation- aka - you can put whatever you want in it once you learn the method! Yay!

Homemade Ravioli w/ Acorn Squash Filling + Chunky Zucchini Tomato Sauce {recipe}

Ever have one of those nights when you realize you have forgotten to take something out for dinner an hour before it should be served? That happened last night, I had a fabulous lunch with my Mom-in-law and so I was totally not thinking about dinner. Then I remembered that even tho I might not be starved, the hubby would be home soon and he WOULD be!

Eek! What to do??! Well, I happen to have a huge box of summer veggies from my aunt's garden and in that box happened to be be several acorn squash. I actually have never cooked with them and had no idea what they tasted like....so of course I headed over to Pinterest to look for some ideas( I am one of those people that actually make the recipes I pin...shocking!) I came across some ideas for roasted acorn squash and THEN I saw a recipe for ravioli! That was it!

So I broke out our never used, brand new, $5, yard sale pasta maker(...yea, I know...its one of those great deals that we couldn't pass up, but I haven't had the guts to use) and set to work!

I used this great recipe for my Ravioli Dough...I will skip giving my own tutorial since this one is so good! It also shows how to make the ravioli by hand without using a pasta machine, which is handy I think! Since I do have one, I followed the directions on the box...or at least I attempted too. They are all in Italian for the most part! Lol!

I also found this recipe that inspired my filling. She also has a great tutorial and a couple filling options + a sauce! Such a cute blog too! I adapted the recipe for my own use because I didn't have all the ingredients and I obviously didn't have time to make a grocery run.

So here is my recipe for the filling...

Acorn Squash Filling

2 acorn squash
olive oil
1/2 large onion
2 cloves garlic- minced
1 egg
1/2 tsp Italian seasoning
1/4 cup sour cream
salt/pepper

I cut my two acorn squash in half and placed them on a cookie sheet greased with olive oil, salt & pepper. I roasted them at 400 degrees for about 30 mins. While they cooked I worked on my pasta dough and got it in the fridge to rest. I also chopped my onion and garlic and sauteed it until soft. After the squash was cooked I scraped it out of the skin- I did this while it was blazing hot...if you have more time I recommend letting it cool first! I then mashed it with the onion/ garlic mixture and the rest of the ingredients. You could run it thru a food processor, but I didn't mind small bits of onion running throughout the filling. I set aside while I prepped my dough to be filled.


Lil Elle was fascinated by ravioli process!

It was so easy using the pasta machine! I am now dreaming up other recipes to make homemade noodles for! yummy! My hubby helped me fill the ravioli and seal them up. We don't have any fancy tools for cutting them so we just used a knife and fork. Since they aren't perfect I'm calling them "rustic"...that's a get out of jail free card at our house!


At this point we realized we hadn't even thought of a sauce...oopsy! I guess I got a little too involved with the pasta making process..luckily for me, I married a cooker husband! He whipped up a quick sauce that was seriously perfect with the ravioli. He really doesn't measure anything and normally can't even remember what he did, but this time he was kind enough to write it down for me!

Here's his recipe for an easy sauce!

Chunky Zucchini Tomato Sauce

1/2 onion- chopped
1/2 bulb garlic ( five or six cloves)- chopped
1/2 large zucchini or 1 small- cubed
1 can stewed tomatoes
1 tbl dried basil
1/4 cup white wine ( we actually used a moscato, because it was all we had)
salt and pepper
olive oil

Saute onion and garlic in olive oil until soft. Add dried basil, salt & pepper. Add cubed zucchini and saute until it just starts to soften. Deglaze pan with wine and add can of tomatoes. Salt and pepper to taste. Let simmer while you cook up the ravioli!

SO YUMMY! This was a perfect combo...slightly sweet from the squash, yet hearty and filling! Not to mention a totally vegetarian meal...which wasn't intentional, but still so good! We couldn't stop gushing at our kitchen brilliance and our superb teamwork! If only you could have smelled our house! I hope you try this recipe...and if you do let me know what you think!!!!


Mini Elephant Ears aka Southern Idaho Scones {recipe}


Its that time of year....FAIR! Which means I tend to be in the mood for fair food...good for me or not I love all things fried. In moderation, of course.

The number one thing on my list of favorite Fair food? Elephant Ears! Or as we call them in Southern Idaho- scones...I know I know...nothing like a real scone at all, something I didn't learn until moving to Washington when we decided to get some of the famous Puyallup Fair Scones and they looked like biscuits...say what? I was so confused. I have since learned that there are also English style scones that again are NOTHING like what I grew up with. I guess S. Idaho is just a little bit on the weird side.

No matter what you want to call them...Elephant Ears or Scones , they are a super easy thing to make at home. When I was a kid, my dad would make these on special occasions for breakfast( I know right!?)...and now I make them for my little family!

Mini Elephant Ears a.k.a S. Idaho Scones

Pear Butter {canning}

So just now I just put a Pear Butter Bread Pudding in the fridge to soak for the day- a total experiment that must be taste tested before I post the recipe, but I think its going to be a yummy dessert for tonight AND it used my latest project...Pear butter!

The hubby and I spent the better part of Sunday stirring big pots of pear butter on the stove. It is my first real experience with canning from start to finish and I loved it, well mostly... my back started hurting and I had to pull a chair up next to the stove to rest once in a while...being almost 5 months pregnant next to a hot stove all day didn't really mix. Anyways...this whole canning experience begun because my husband brought home BOXES of fruit. We've already dried a case of bananas, a case of pears and and made 29 pints of pear butter ( in two flavors!). That only leaves one case of pears and two boxes of apples to go!


We used this lovely Pear Butter recipe from Simply Recipes. It uses star anise( I had never worked with it before), Cardamom and ginger! If you have never canned, she has a great photo tutorial that takes you thru the process step by step. The other recipe we used is straight out of our Ball canning book, a much simpler recipe calling for just orange juice and nutmeg, but using the same steps as the other recipe.

Don't these little jars of goodness look wonderful!!! I love the little labels I created for them! I have never made labels before and with some trial and error was pretty successful I think :)


Hopefully the rest of this stormy day will be spent making Pear Jam and Applesauce!

Frozen Fruit & Yogurt Bites {snack}


So after a request from an online mommy group here in Sandpoint, I decided to throw together a post about how to make a super easy and yummy snack for toddlers. My little E  likes LOVES yogurt, but at only 15 months its not something she can manage on her own. That's not to say she doesn't try, but usually the end result is a bath. So after I have saw frozen yogurt bites pinned on Pinterest I decided to give it a try. To say E liked them is an understatement...she freaking devoured them. There was a problem tho... making a batch was easy, but she could eat them so fast that they were gone before I knew it! I was then left with a crying baby wanting more and not understanding I can't make the freezer freeze any faster. Then it occurred to me that I could add in some fixings depending on what fresh or dried fruit I had on hand. It has worked out great! It has saved me from a crying baby and is actually a satisfying breakfast( served with some dry cereal), lunch (along with crackers and cheese) or snack!

I threw together this little tutorial for those visual learners like me! Forgive the cell phone pictures...I was trying to do this while little miss was wanting to be held.  I will update the photos eventually!

What You'll Need
Fresh or dried fruit( raisins, dried cranberries, strawberries, blueberries, banana..etc)
Yogurt (depending on whats on sale I will buy flavored Greek or the YoBaby whole milk yogurt...but anything works!)
Plastic baggy
wax paper
plate or cookie sheet

Step One


Space out your chosen fruit on a plate or tray lined with wax paper. I chose bananas today, since I had a ton. Cut them up in small bite size pieces...take into consideration how well you're child handles chewing. Remember these will be frozen so they won't be as easy to mush up. I like to get them as small as possible.

Step Two

Now take your yogurt (My flavor of choice was Greek Coconut) and put it into a Ziploc baggy ...I actually use bread sacks. They are right in the same section as the freezer bags and Ziplocs, but they are really cheap and easy to use...I don't feel as guilty using them and throwing them away. To fill my bag I get out a cup, stuff the bag in and fold the excess over the side- basically I have lined the cup. Then its easy to just dump the yogurt in. I then push all the yogurt to one corner and give the bag a really good tight twist, then snip of the corner and you have a homemade piping bag. I then pipe onto each piece of fruit to cover. This part is a little tricky if you want the whole fruit covered...honestly I don't worry about it, because my toddler doesn't care. I think you could probably dip each piece of fruit in the yogurt to completely cover, but I'm not about to take that time...remember I'm trying to feed an impatient toddler!


It should look like this when you are all done. If you run out of fruit to cover just make little dollops of yogurt wherever they fit. Easy!

Step Three

Pop the whole plate in the freezer for at least an hour.

Step Four


Serve to your impatiently patiently waiting toddler! Yeah...she looks so innocent doesn't she...

Was this easy to follow?! Come back and let me know what your kiddos think of these yummy bites of goodness!! Any questions? Feel free to comment!

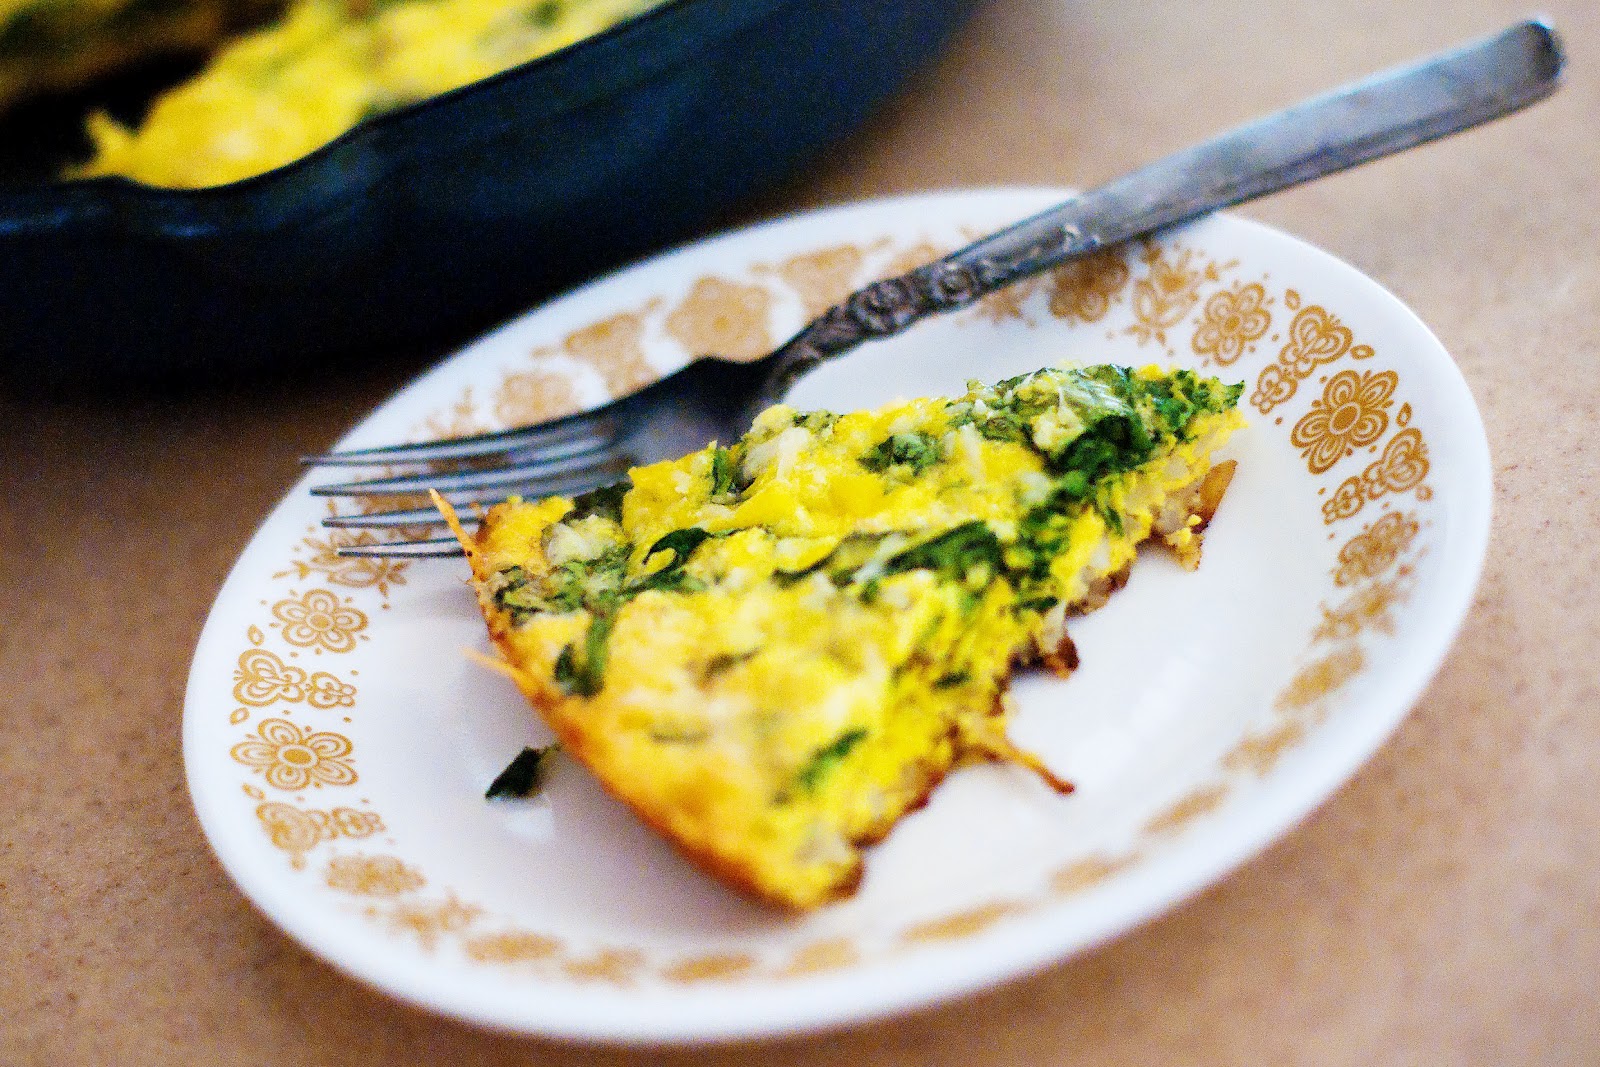
One Pan Egg Bake {breakfast}

Not every morning am I quite this ambitious {the last 12 weeks have been mostly cereal}, but this morning I was up before the little one so I had some time to put something really yummy together.
This is my first time writing up a recipe...I'm usually a dash of this-sprinkle of that, kind of cook. The great thing is that this recipe should be really flexible and easy to mix up with whatever ingredients you have on hand!

ONE PAN EGG BAKE

Ingredients:

2-3 tbsp- Bacon grease( or olive oil )- enough to cover bottom of skillet
2 cups- Frozen Hash browns
Salt/pepper
6 -eggs
1 tbsp -water
1 cup -fresh baby spinach
1/2 cup -Parmesan cheese


So I love cooking in a cast iron skillet- this pretty little number was one I got for the hubs at Christmas! They are great to use because they distribute the heat evenly, are practically nonstick and can go from stove top to oven!

To get started, first preheat your oven to 350 degrees. Then melt some bacon grease in the skillet over medium heat. I used enough to make sure there was a thin even layer covering the bottom of the pan- 2-3 tbsp. This is a crucial step to help the hash browns form a crust. No bacon grease?? If you don't have bacon grease just lying around like I do, this is a good time to cook up some bacon to use in the bake or to eat on the side. See, problem solved! (you can also substitute olive oil or butter if you want!) After the grease was heated thoroughly I added my hash browns. I added enough to cover the pan in a thin layer- 2 cups. I spread them out quickly with a wooden spoon, sprinkled them with salt and pepper and then I STOPPED touching them! Yes...I said stop...as in put down the wooden spoon! You want them to form a nice brown crust! Playing with them will just create a gloppy mess...trust me...I have had this happen.

This is a great time to put together your egg mixture. I used a combo of duck and chicken eggs this morning- 2 duck and 2 chicken. This is approx 5-6 eggs. This step I would use at least one egg per person you are feeding, plus an additional egg for good measure. I beat my eggs in a small bowl with a Tbsp of water. I like using water to loosen up the egg a bit to make it easier to pour. Salt and pepper your eggs at this point. I also took this time to chop up some fresh spinach and get out my Parmesan cheese.

When I could see that my hash browns were starting to be very brown, I poured in half the egg mixture. It should spread on its own, try to not to disturb the hash browns. I evenly sprinkled on the chopped fresh spinach, followed by the last half of the egg mixture. Last I topped the whole thing with a generous amount of Parmesan cheese! Stick the pan in the the oven for about 20 mins, or until the eggs have set and the cheese has browned.

After removing it from the oven I let it sit for a few minutes to let everything relax a bit. Now its time to slice and serve!  Its that easy! You can add almost any ingredient you could think of. Get creative...if you would put it in an omelet you can put it in this bake!


Hope you try this recipe! Maybe this weekend would be a good time! I would love to hear what variations you come up with so feel free to come back and comment! I might just feature your concoction on my blog!!

{Amber}
Related Posts Plugin for WordPress, Blogger...