You read that correct.
We got all sorts of crazy and decided to pour concrete right over the laminate counters in our kitchen. I'm going to share how we did it with you - the good and the BAD because I want you to be able to learn from our mistakes.
We really wanted to banish the laminate, but per usual, our budget was itty bitty teeney tiny. We were in the process of saving up to buy quartz of some type, but then we got our new apron front sink, and well, I wasn't about not to install it. So the sink kicked our brains into get creative mode...(to read how we installed an apron front sink in existing cabinetry - CLICK HERE.) The only way to fit the sink in without major modifications to the sink base cabinet was to have it sitting about 1/2 an inch taller than our existing counter tops. There went my plan to just skim coat the counters with Ardex Feather Finish, as it would have taken forever to build it up 1/2 an inch.
After brain storming, we decided we could use the sink itself as part of the forms to POUR concrete right over our laminate. We had never seen it done, but figured if we totally bombed it, we would only be out the cost of materials. Sometimes you just have to try!
First we picked our Concrete :
We decided to go with Rapid Set Cement All because it could be poured easily and didn't have large rocks. I was worried it might cause problems with how shallow we were pouring them.
We also wanted a darker color so we added one box of SAKRETE 1 lb Cement Color in Charcoal per bag of concrete.
We dry mixed it the color with the concrete mix to make sure it was evenly distributed.
Before adding the water to the concrete to pour it, we needed to prep the kitchen counters.
Tile demo first.
Then, using a skill saw, Justin cut off the lip on the counter.
He then built basic concrete forms out of 1x4 common boards. I know some people use melamine, but its not necessary unless you want ultra smooth edges. He designed the forms so that when he poured the concrete it would create a nice thick edge all the way around.
We also decided early on that we wanted our faucet to come right out of the concrete, so Justin cut pieces of PVC to the size of the holes we needed and installed them into the counter. To prevent leaks, we also caulked around each pipe. Doing it this way we could avoid trying to cut through the concrete after it was poured.
Now it was finally time to pour!
This is where things got dicey.
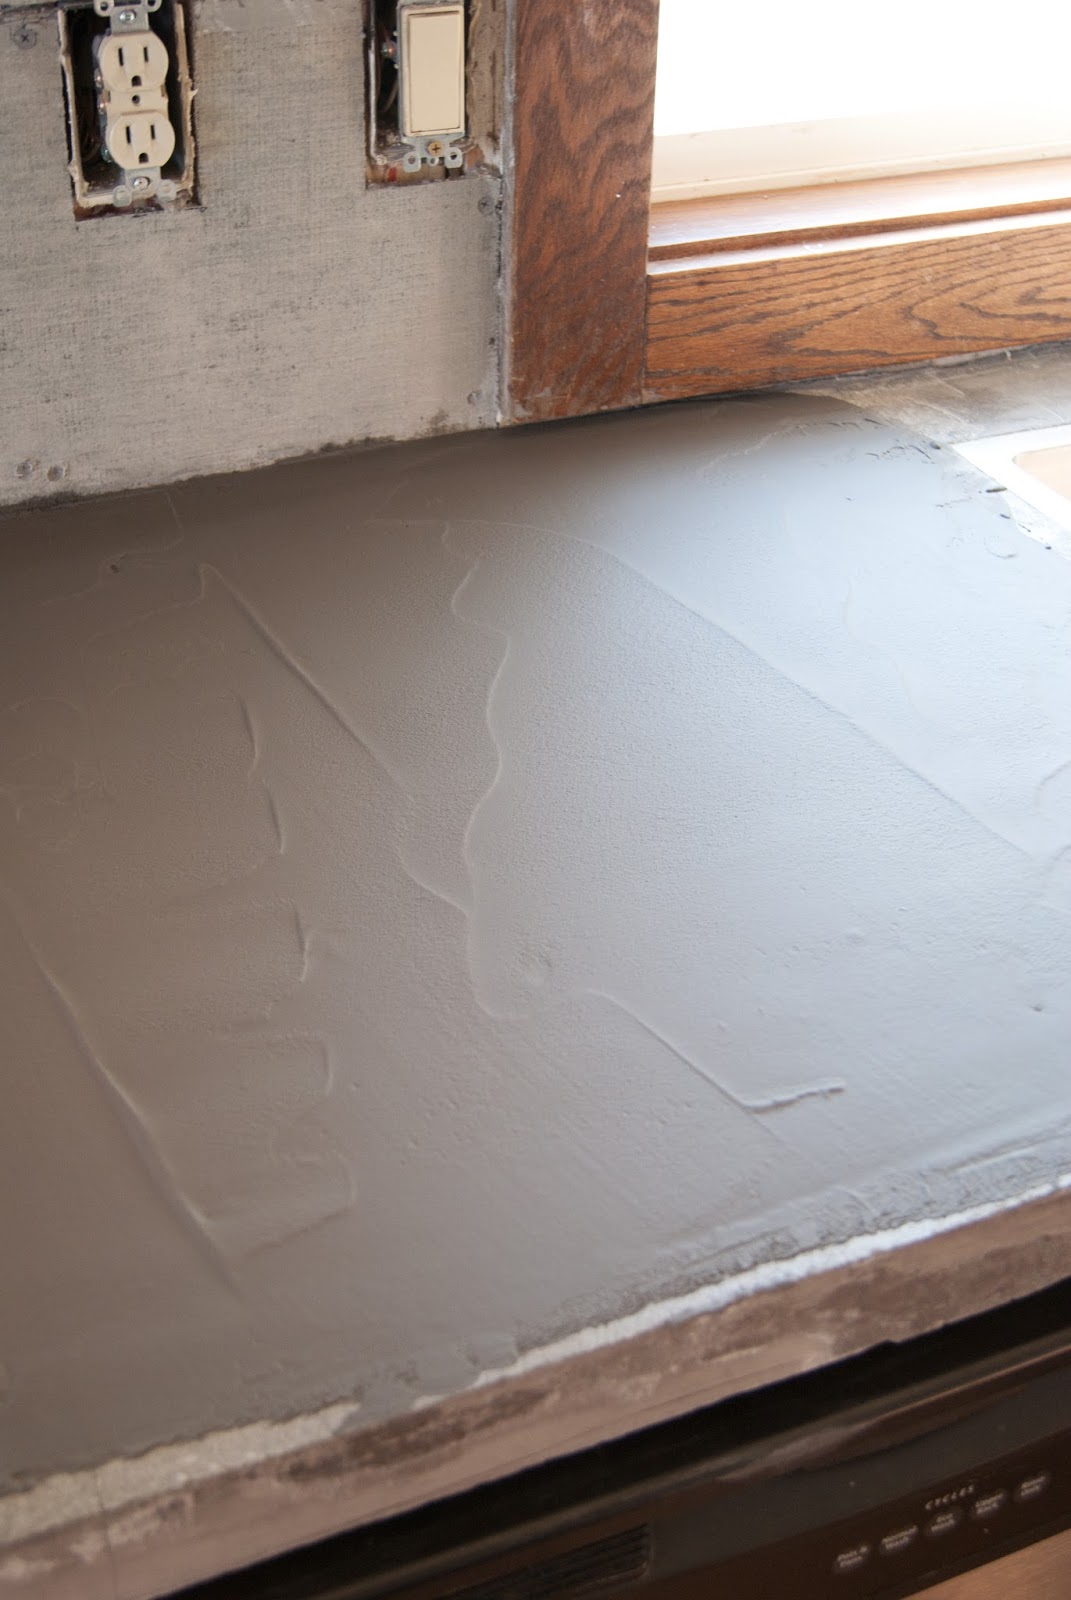
Unfortunately, we ran into a problem right away. We mixed the first batch of concrete to the ratio on the bag. It was way to thick and was dry before we had time to work with it. You can see below, that we actually had to rip part of it back off. Lesson learned, with our second batch we mixed it much wetter and it was a lot easier to pour.
After repeating mixing and pouring it was time for the moment of truth...
I loved it, but it wasn't exactly level...in hind sight we should have used a self leveling concrete mixture - live and learn, right?
To solve the level issue, Justin kicked us out of the house and took the grinder to the counters to get things as level possible. BIGGEST DISASTER EVER. - if you have to do this, be sure to take proper precautions to contain the debris, we taped off the whole room with plastic and had our shop vacuum on as well. Also, please wear a respirator!
After the grinding was done, the counters were still far from perfect, but we slapped some sealer on them and called it a day. We lived with them like this for the next couple months.
So, round two of the counters began.
We mixed up a super thin batch of concrete in hopes that it would self level.
After it had set a bit, Justin worked it with the trowel to get it as smooth as possible.
Then we repeated the grinding process in a few places and then broke out the polishing pads. Again, be sure you contain the dust by taping off the area and wear a mask! Trust me, there was lots of dust! You also have the option to wet sand, but we couldn't locate the right pads and were mid project so we just used what we had. I'm guessing if you used a self leveling concrete, you could skip this step entirely, but again, we were totally experimenting here.
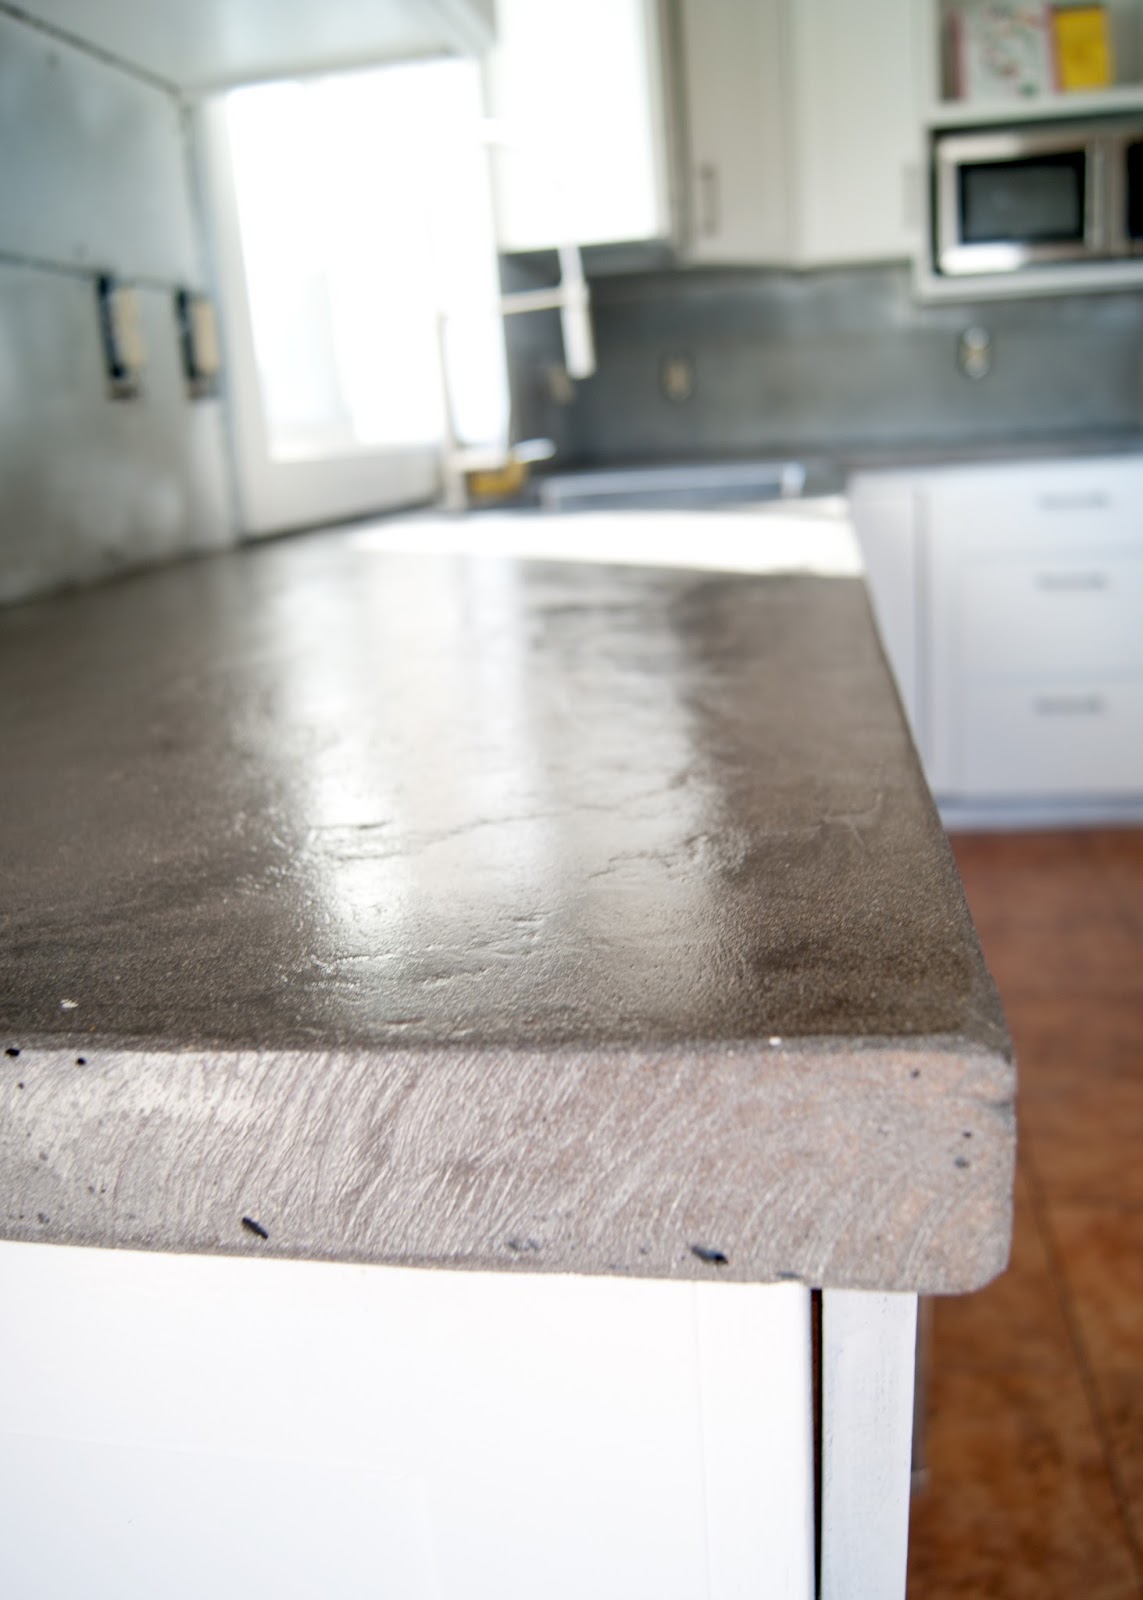
It took Justin an entire day, (what a trooper!) but they were finally polished. The final step was coating them with a wet look sealer (we used this one). We did a coat every night for a week to achieve a high gloss look. We plan on doing a coat of car wax at some point, but we haven't got to that yet.
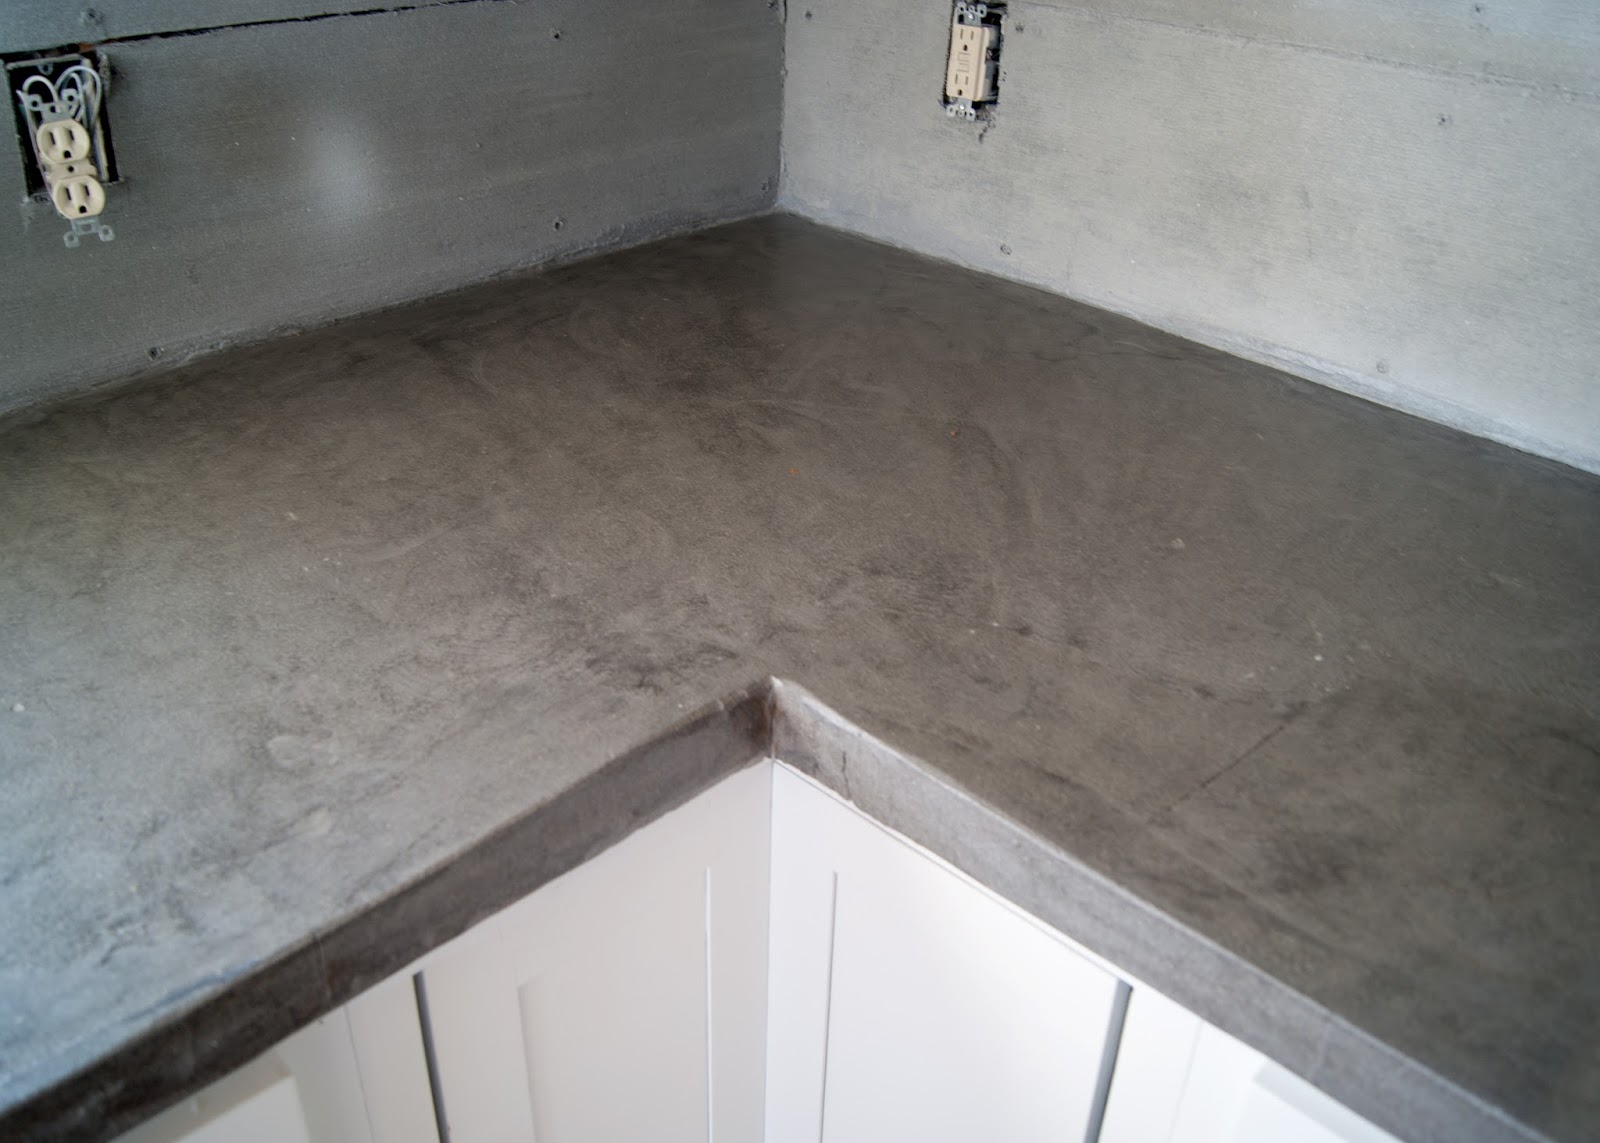
Here's how they turned out:
The high gloss looks wet below, but its completely dry.
They are not perfect by any stretch, but that's what I like best about them!
You can see the salt and pepper from the sand in the concrete, the small swirl marks left from grinding, as well as color variations on the surface from the different pours we did. There are still a few cracks and places where the concrete didn't fill the form perfectly along the edge, but those too are some of my favorite parts.
I love the wet look of the counters and its a breeze to wipe up any spills!
We have lived with them for a couple weeks now and I couldn't be happier! We haven't had any problems with them - I even walked on them to do touch up paint on the upper cabinets. They are strong.
Should we compare the before and after, again?
Here's a review of what products we used as well as the cost break down for this project:
3 Bags - Rapid Set Cement $19.39/ bag
3 Boxes - SAKRETE Cement Color in Charcoal $5.54 / box
1 Gallon - Wet look Cure Sealer for Concrete $19.98 (we still have 2/3 of the gallon left for future coats)
3 Boxes - SAKRETE Cement Color in Charcoal $5.54 / box
1 Gallon - Wet look Cure Sealer for Concrete $19.98 (we still have 2/3 of the gallon left for future coats)
Grinder and wheel - $70.00 ( not required if using a self leveling concrete!)
Polishing Pads or wet sanding pads ( we had these, weird, I know.)
= $164.77
Under $200 for that much new counter, not bad!
Here's what's left to do on our Kitchen to do list:
- add shelving to island wall
- paint Walls & Ceiling
- paint island & hood vent
- paint or re-stain perimeter cabinets
- replace counter tops Still have the island to do - possibly reclaimed wood?
- replace back splash - demoed!!
- change globes on pendant lights
- replace tile floor??
- get smaller microwave- fix microwave shelf area
- new blinds
- new stools
- new sink and faucet
What do you think?


.JPG)


No comments :
Post a Comment