Image Map
Showing posts with label Averie Lane Farmhouse. Show all posts

Farmhouse Ceiling - removing ceiling tiles

Last week I talked about the studio, but I am jumping over to another project that happened last weekend as well. If you follow me on Instagram, you already know we did a little exploratory demo in our living room.

The ceilings in the living area were clearly several inches lower then in the rest of the house and I assumed that the tiles were glued to the old plaster, so I wasn't thinking we would be touching them anytime soon.

Farmhouse Ceiling - removing ceiling tiles

BUT....Curiosity got the best of me ( a trait I am sure many DIYers share with me) and I just had to know what was up there.

Farmhouse Ceiling - removing ceiling tiles

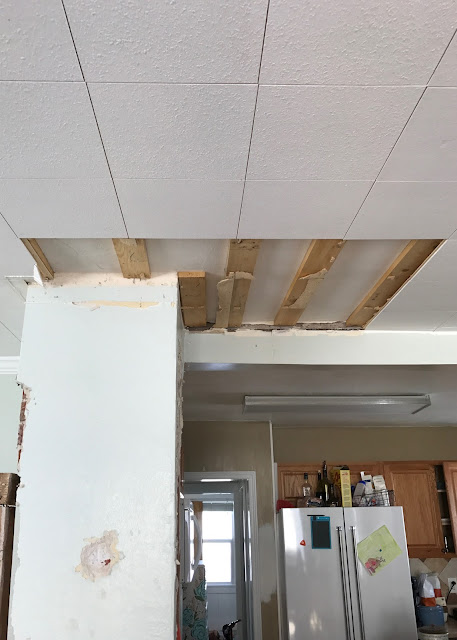
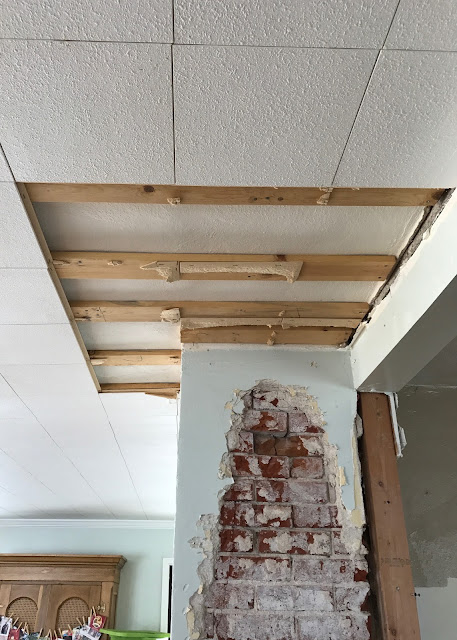
It started with just one tile, which I soon discovered was stapled to 1x4 wood boards and they were very easy to pull down...

Farmhouse Ceiling - removing ceiling tiles

Farmhouse Ceiling - removing ceiling tiles

I could see the old plaster ceiling up above and it looked in decent shape, so we kept pulling tiles down. (my nephew was happy to help!)

Farmhouse Ceiling - removing ceiling tiles

Farmhouse Ceiling - removing ceiling tiles


This was completely impromptu so we didn't even bother moving furniture or rugs.

Farmhouse Ceiling - removing ceiling tiles

As we progressed, we realized that the ceilings would not be salvageable. It was pretty clear that when its time to remove the wood strips we are going to lose our plaster as well. Which isn't necessarily the end of the world because I have some ideas for this room anyways, but it does put a hold on more demo until we can determine what the insulation is sitting on (aka is there decking in the attic or is it just sitting on the plaster?) Either way, its going to be a mess so not the project for a snowy day.


This means we are living with this...


Its not pretty folks. Who wants to come over and climb up in our attic?


***Update***
My almost bro-in-law was kind enough to climb up and scope things out for us last night. It looks like the insulation IS sitting on the plaster. So that means it will all come down when we remove the plaster. He also discovered the original exerior of the house is still up there as well...siding and all. So  opening the ceilings just got a bit more complicated (not that is wasn'tt already). We knew the main living room was an addition in the 50's but weren't sure exactly how they had done it. It also explains all cracks in the plaster on the walls and on the ceiling. Fun fun.


Farmhouse Master Bedroom Reveal - One Room Challenge

Its reveal day! I'm typing this late at night because we cut it pretty darn close on this one!


Even though this challenge was a 6 week challenge, we did most of the work over a period of 6 days. Approximately 1 day a week. I tell you this, not to brag or complain, but because I want you to see how doable a room makeover is, even when you don't have weeks and weeks to work on it!

I'm not going to spend a lot of time talking, but I do want to refresh your memory on where our room started. Keep in mind this room is the "master" at whopping 10x12.


We removed the carpet and stripped the floors before we moved in. Full disclosure? They're still unfinished. I couldn't decide what I wanted to do, so I left them for now. The addition of a rug is enough to make the room feel finished.

My original design board ended up being pretty accurate other than I switched the rug out.


Other things on the list included switching out the fan for a new light, adding trim work and painting the whole room.

Okay, now the pretty pictures!!

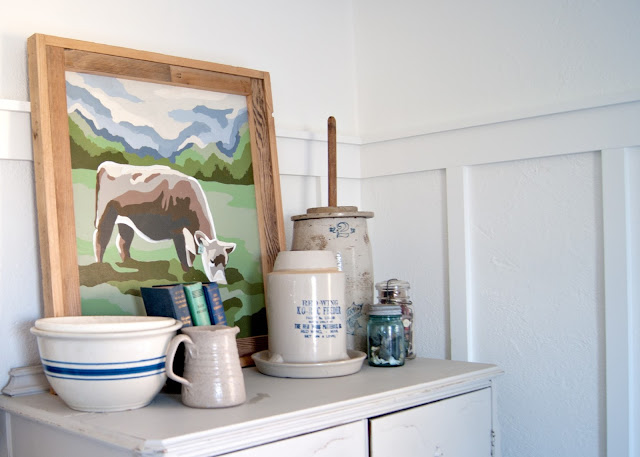
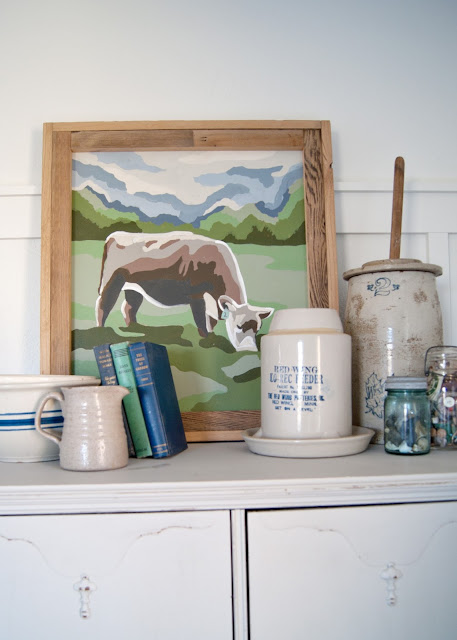
Farmhouse Master Bedroom Reveal - Benjamin Moore Simply White, Paint by number cow painting . antique crocks, red wing, chicken feeder, books, mason jars, fusion mineral paint putty, kilim rug


As you enter the room, the first thing you see is my wardrobe (and yes it really is my closet!) and a full length mirror that my dad built for me.

Farmhouse Master Bedroom Reveal - Benjamin Moore Simply White, Paint by number cow painting . antique crocks, red wing, chicken feeder, books, mason jars, fusion mineral paint putty
Cabinet/Wardrobe : vintage
Painted "Putty" by Fusion Mineral Paints

Farmhouse Master Bedroom Reveal - Benjamin Moore Simply White, Paint by number cow painting . antique crocks, red wing, chicken feeder, books, mason jars
Painting: By Me
books, crocks, bowls, jars : vintage

Farmhouse Master Bedroom Reveal - Benjamin Moore Simply White, Paint by number cow painting . antique crocks, red wing, chicken feeder, books, mason jars

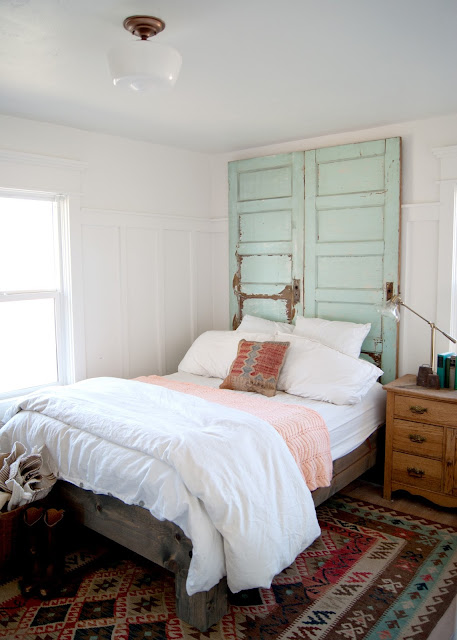
Opposite the wardrobe is the bed. 

Farmhouse Master Bedroom Reveal - Benjamin Moore Simply White, antique wash stand, glass shade pharmacy lamp, crosby lamp, target , door headboard, kilim rug

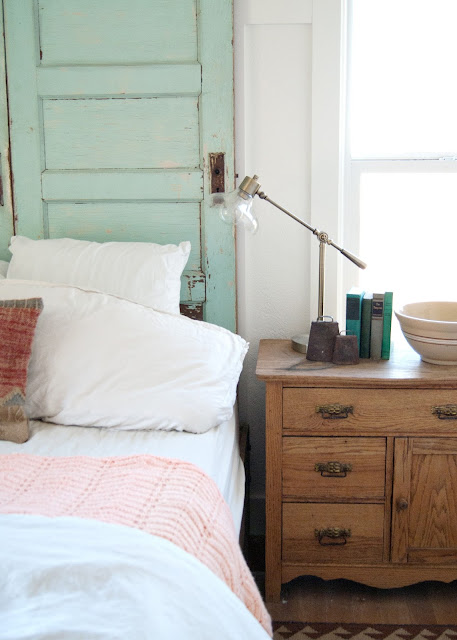
Farmhouse Master Bedroom Reveal - Benjamin Moore Simply White, antique wash stand, glass shade pharmacy lamp, crosby lamp, target
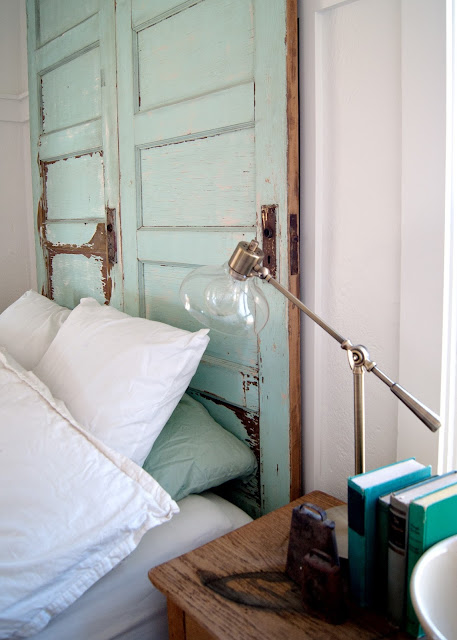
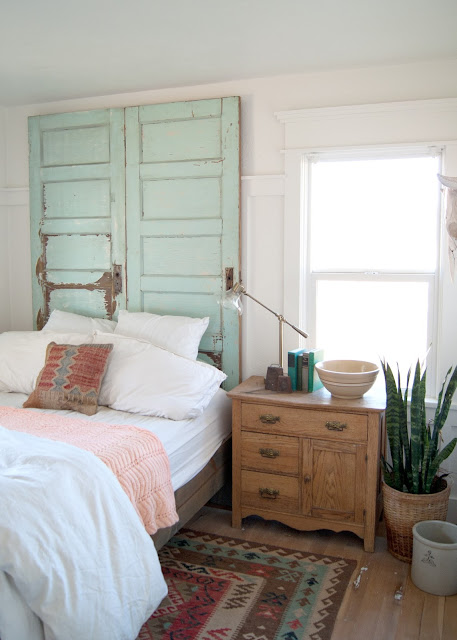
Headboard : Vintage (tutorial here)
Nightstand : antique
Lamp: Target
Accessories : Vintage

Farmhouse Master Bedroom Reveal - Benjamin Moore Simply White, antique wash stand, glass shade pharmacy lamp, crosby lamp, target

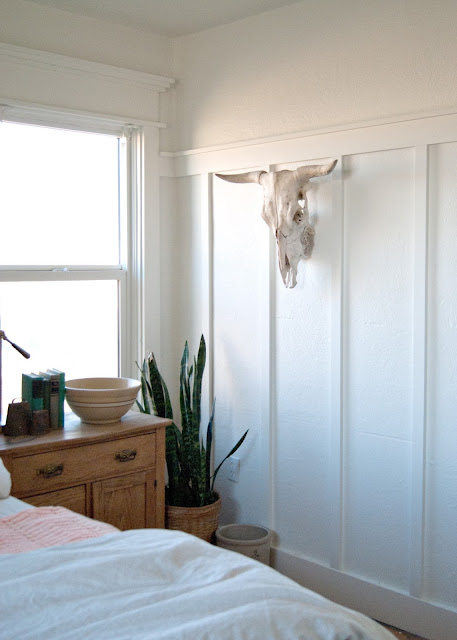
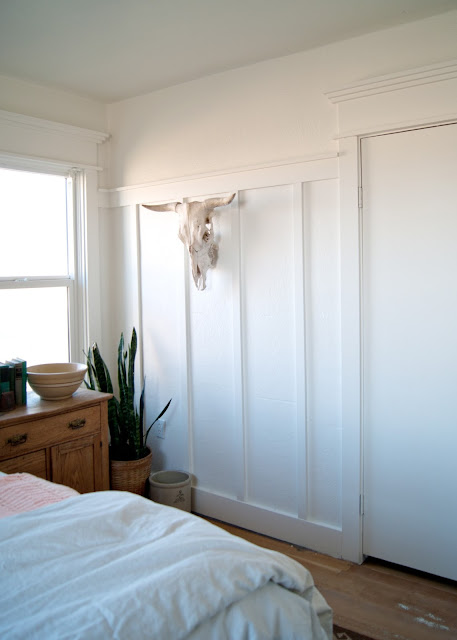
A plant and a vintage crock help with the awkward layout of the room. I kept artwork minimal, instead allowing the trim work to add texture and interest.

Farmhouse Master Bedroom Reveal - Benjamin Moore Simply White, farmhouse trim , board and batten, cow skull, snake plant

Farmhouse Master Bedroom Reveal - Benjamin Moore Simply White, farmhouse trim , board and batten, cow skull, snake plant

I debated on what to do with the wall next to the closet. We talked about a barn door at one point, but instead we painted the door the same color as the rest of the room - BM Simply White (mixed in Glidden Diamond). The cow skull was a gift from my grandpa and the inspiration behind my blog logo. Its one of my favorite things ever.

Farmhouse Master Bedroom Reveal - painted BM Simply White - cow skull

Farmhouse Master Bedroom Reveal - snake plant, basket, crock, antique washstand

That's right, the whole room is Simply White (flat finish!)...walls, trim, and ceiling. Its amazing how much it brightens the room and because we chose a flat finish it helps minimize all the imperfections in our plaster walls.

Farmhouse Master Bedroom Reveal - door headboard, kilim rug & pillow
Light : Home Depot (spray painted this color)
Bedding: Target
Pink blanket : vintage
Kilim Pillow Cover: Hobby Lobby (in store)

Farmhouse Master Bedroom Reveal - basket, wool blanket, boots

Farmhouse Master Bedroom Reveal

I love our room!

Our last master bedroom (it's so different!)  had many of the same elements, but this version is so much more us. It gives me a little taste of what the rest of the farmhouse can look like with with a lot of elbow grease. I can't even explain how excited I am to tackle another room! This room also gives me confidence in my design decisions. I am really good at getting the foundation of a room to look good, but this is the first room that I feel like my vision and the outcome matched perfectly! I am learning where to invest my money and where to take advantage of my love of vintage and antiques. We still have a few things to add and change, but for now, this room is a breathe of fresh air in a house that still needs a TON of work!

What do you think?
Also, I am happy to answer any questions you might have! I'm sure I missed some crucial detail.

Oh, and be sure to head over to Calling it Home to see the reveals from the other 200+ bloggers! Amazing stuff and I am honored to have my little room linked up among them! Also, a BIG thank you to Linda for hosting such an awesome event!

Click HERE

Thank you for stopping by!
-Amber


Farmhouse Master Bedroom - ORC week 5

Its week 5...say what!?

I've accomplished almost nothing in the room itself. Yup, still not painted  (that's on the list for Sunday...), but once the room IS painted we can load everything in. 

I thrive under pressure. Trust me. haha!

So, what have I got done you wonder?

Well, I painted my wardrobe in a beautiful Putty color from Fusion Mineral Paint. I love this paint so much and can't wait to see it next to white walls! This shot doesn't do it justice! I'll be dedicating a whole post to it after the reveal when I have pretty pictures! (you can see the BEFORE here).


Farmhouse Master - Fusion Mineral Paint - Putty

Other than that, I've been gathering accessories. 

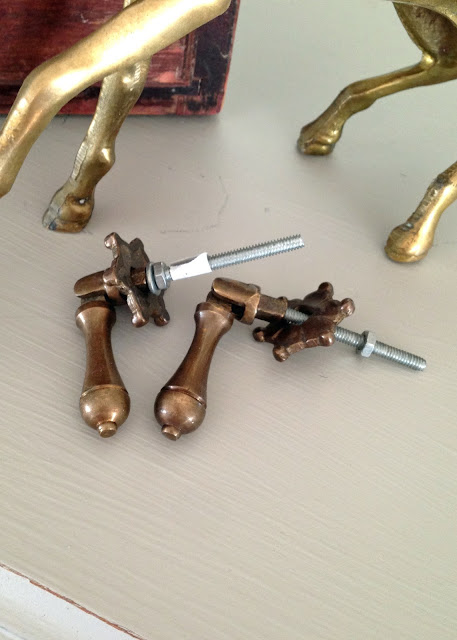
Farmhouse Master - brass accessories

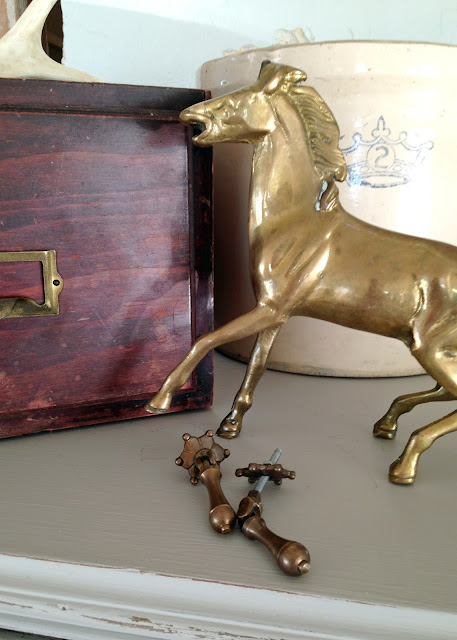
I especially love these vintagey bronze/brass pulls from Hobby Lobby! My husband found them and I think they will be perfect with all the other brass accessories! 

Farmhouse Master - brass accessories

I have a few other things, but I'll share those in the big reveal next week!! 

As usual, head over to Calling it Home to see what the other guest participants are up too!


Farmhouse Master Bedroom - a rug and a wardrobe. Week 4 ORC

Week 4.

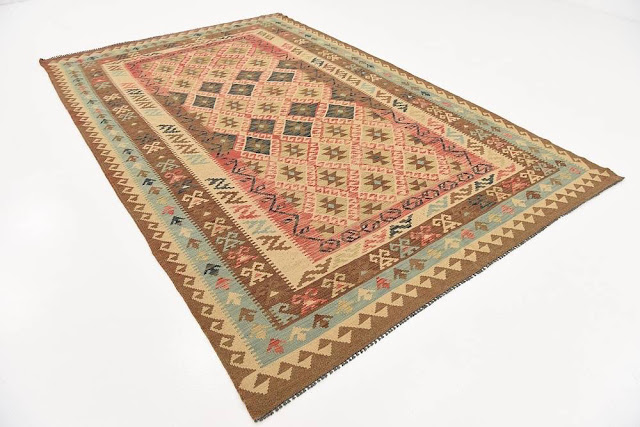
We're over the hump and things should be wrapping up, but we still have a ways to go - like I haven't patched a single nail hole or even put a coat of paint on anything, but who cares about that? Especially when I have a gorgeous new rug to swoon over!

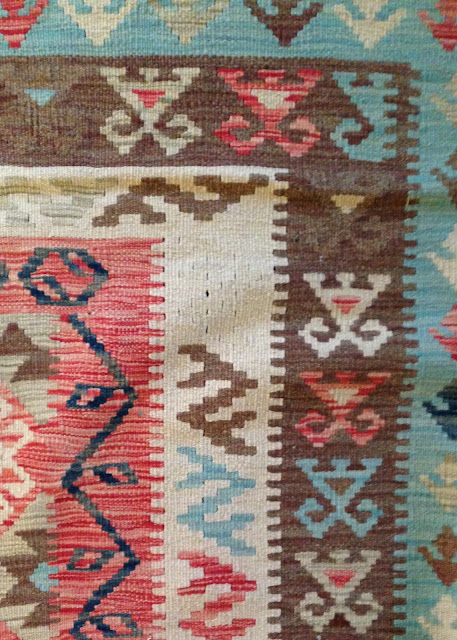
Farmhouse Master Bedroom - KIlim Rug - esalerugs.com

Farmhouse Master Bedroom - KIlim Rug - esalerugs.com

I was all set to order this rug, but in the last second I spied this kilim which happened to be the exact colors I was looking for. You may remember me saying in Week 2 that I didn't want this style of rug, but that's partly because I was having trouble finding one that wasn't predominantly red or if I was finding them, I couldn't justify spending $1000+ on a single rug. Ouch. I happened upon this one when I got smart and switched the sort method to "low to high" ...duh. Since it was one-of-a-kind, I got it ordered as quick as I could, figuring if I hated it I could return it and order the other one, but luckily I LOVE it!!

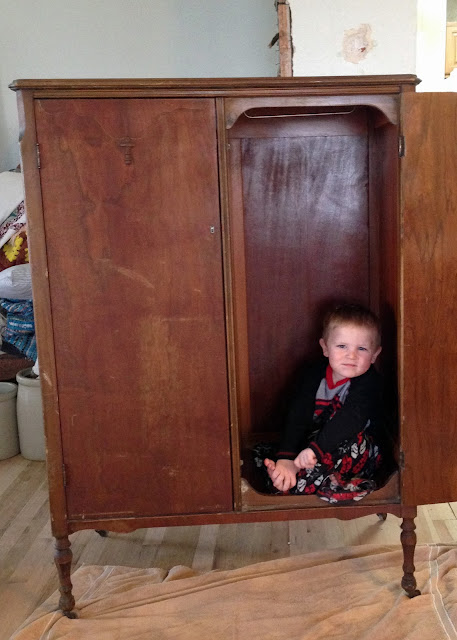
Getting the rug also allowed me to get going on another project. The wardrobe that will be my closet space...
Farmhouse Master Bedroom - vintage wardrobe before

Yesssss....

This will be all the closet space I get. ALL. OF. IT. I think that should be plenty of space for my six flannels and a couple pairs of boots (insert laughing/crying emjoii here) right? I've already started painting it a pretty putty color! I'll share more next week!

So that is all for this week! Not much, but lots of decisions made and ready for install as soon as I get the walls painted! 

Be sure to head over to Calling It Home to see what the other guest participants are up too! There are some amazing spaces that I can't wait to see the final results of!!!


Farmhouse Trim - ORC Week 3

Its week 3 of the ORC and all of a sudden things are happening (finally!)

I bought a few accessories this week, including this pretty lamp from Target. I sat it on my fireplace bookcase for safe keeping and couldn't get over how perfect it is for our living room too. I'm already getting some ideas for when I'm ready to tackle that space! 


You might be wondering why I only got one? Well, due to the window placement in our room, our bed will have to sit off center which means I will only have room for one night stand. By no means am I thrilled about this, but I have to make it work. I just WISH they made a matching floor lamp. Darn it.

I also settled on a rug and ordered it (if you know me this is a real shocker!) Its not the one from my original design board and its also a vintage kilim, which I said I didn't want, but I couldn't resist it and since it was one of a kind I just went for it. Call me crazy! I can't wait to see it in real life. I'll share pictures when I get it - probably on Instagram first, so be sure to follow!! ( @averielaneblog )

Ok, now to the meat and potatoes... farmhouse trim!

Here's what the trim looked like before...


Basic simple trim. The baseboards are about 6 inches tall which is awesome and the window trim is nice and chunky, but it lacked umph...ya know?

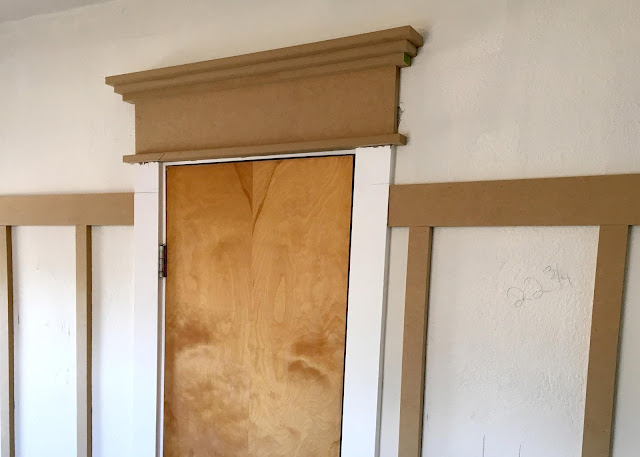
So after brainstorming we decided we needed to beef up the tops of the windows and add board and batten to the walls. The plan meant we could leave all the trim untouched except for the tops of the windows and doors. Obviously.

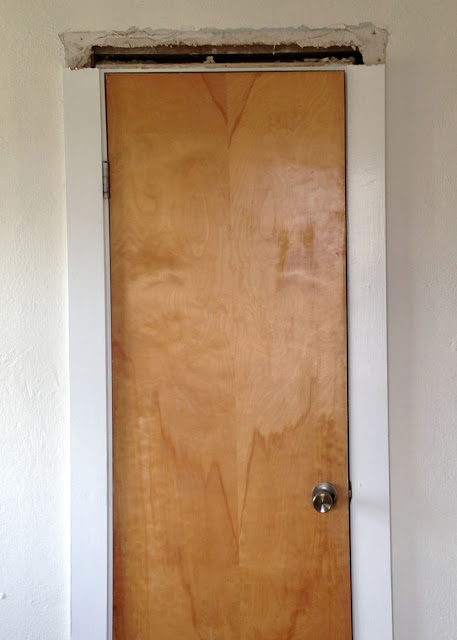
I got the job of removing the top piece of trim... (that door would be awesome in a mid century house, wouldn't it? I forgot to put it on my to do list, but it is definitely going...or changing...)

DIY Farmhouse Trim | Working with existing trim

Next, we started installing the trim.

Let me back track one sec... we were all set to use pre-primed pine boards for this project, but when the hardware store didn't have enough of what we needed, we went to plan B instead. We bought 3/4 inch MDF (which is the equivalent to 1x material) cut to the exact size we wanted. The switch meant we also saved ourselves a couple hundred dollars in material. With the savings we actually bought a nicer table saw to cut all the MDF with. The initial money spent ended up being about the same, but since we have lots of trim work to do in the house, we will save money in the long run. Winning!

So like I said we chose to start with the header above the doors and windows.

It consisted of 5 pieces :
2- 3/4 x 1.5"
1- 3/4 x 6"
1- 3/4 x 2.25"
1- 3/4 x 3"

DIY Farmhouse Trim - door header

I know it looks a little crazy and overwhelming at the moment, but it really fills the space above the windows and doors and makes the room feel much grander. Maybe more grand than your average farmhouse bedroom should feel, but then again, we are working with such tiny rooms, anything we can do to make them feel bigger helps!

I created this handy little diagram in case you want to duplicate what we did....

DIY Farmhouse Trim Diagram
Once we had the trim up we decided since it was so substantial maybe we needed to tame back my plans for floor to ceiling board and batten. My husband wasn't really going for it anyways so his idea of picture rail height won out. I actually really like it too and since I know that the walls and trim will all be the same color, I'm not worried about it breaking up the room to much.

DIY Farmhouse Trim - with board and batten walls 

We chose not to do paneling under the battens because we wanted to avoid removing all the trim. I'm planning to do a satin or eggshell finish on the trim so any texture on the walls should be hard to see. That's my hope at least!
 
DIY Farmhouse Trim - with board and batten walls

To finish up the trim we still have to attach the last piece that goes on top of the wall trim. It will create a little ledge and help tie into the door headers. Then, I get to fill holes, prime, caulk and paint the whole room! Go me!!!

Since we are sharing this room in real time, there won't be any progress in here until next Monday. We are off to Ellensburg for a last minute vintage show and to hang with my parents for my birthday!!!! Yay!

Let me know what you think of our room so far and then head over to Calling it Home to see what the other guest participants are up too! Have fun and happy blog reading!

Click HEREto go to the link up!

Farmhouse Master Bedroom Design Plan - ORC Week 2

Welcome to Week 2 of The One Room Challenge!

Last week I showed you my very boring and highly disorganized tiny "master" bedroom. It is a complete blank slate so I can take it any direction I want, but it also sets the tone and feeling of the rest of the house so I need to make some key decisions that we will repeat as we move forward on other rooms.

I want the room to feel light bright and airy, but I also love me some color so I will be bringing lots of that it too. 

Lets walk through my design board, shall we?

Farmhouse Master Bedroom Design Plan

Lets start with the foundation of the room. We are planning on doing a floor to ceiling board and batten wall treatment around the whole room. I haven't decided the exact color, but I'm leaning towards BM Simply white on the trim, walls and ceiling. So far, we've bought all the materials and mapped out where the battens will go on the wall. To solve a few issues (old house = crazy walls..) we will also be beefing up the window trim in a more farmhouse-y style.

..like this...

Farmhouse Master Bedroom Design Plan  - farmhouse windows
Please Pin from Original Source!

I haven't totally decided on what to do with our unfinished floors. I have some samples of lye & oil to try out and I have considered paint washing them, but we may just keep them raw and throw down a big rug for now.

Speaking of rugs, I think I've decided on a rug, but I haven't pulled the trigger yet, so that could change too. I love a good old vintage rug, but I want the rug to be plush and comfy to walk on, so that means most vintage flat weave rugs are out. Boo hoo...

Other things coming into the room include our bed & headboard. You can read about how we built it: HERE. I'm toying with the idea of painting the platform part of the bed, but that depends on what I end up using for a side table. I have an antique cabinet that I plan on using, but until I move it in, I won't know if it works. I also have to add storage for my clothes since the closets aren't exactly made for two, so I'm going to be refinishing an vintage wardrobe. I know I want it painted but I need to decide on the rug first! Ha! Better get on that.

Farmhouse Master Bedroom Design Plan - farmhouse bed

Accessories and what-nots have yet to be purchased (we've got how many weeks left?), but you can see it will all be fairly simple, natural and vintage inspired.

Last, I can't wait to bring in some art!
I created my own paint-by-number style cow paintings to take to our vintage shows and I think one would be a PERFECT addition to our farmhouse bedroom!

Don't you think so?

Farmhouse Master Bedroom Design Plan - Paint by number cow

Well, here's the official list of what needs to happen over the next 3 weeks...

  • Install Board & Batten
  • Beef up window trim
  • Paint
  • Order Rug
  • Shop for Accessories 
  • Blinds? Curtains?
  • Paint vintage cabinet

My, oh, my!!!  (any Dave Niehuas fans out there?) We've got lots to do don't we!?

Let me know what you think and be sure to visit www.callingithome.com to see what the other One Room Challenge participants are up to! My guess is some have actually made progress on their rooms!

Restoring Old Floors - Averie Lane Farmhouse

Hey Everyone!

I thought I would pop in for a short update about the farmhouse before starting on another big painting session...(oh hey, we will be in Kansas Ciry, MO for Vintage Whites Market THIS WEEKEND! yay!)


If you have been following on Instagram you might've seen that we decided to tackle the floors before moving into the farmhouse. We had a couple weeks before we needed to be out of the other house so it seemed like good timing.

I have to laugh now, because not so much! We severely underestimated what removing old flooring and restoring hardwood floors would entail! Justin got all the carpet out easy peasy, but under the tile we found another layer of tile and some other goodies like a LIVE plug in (gah!!) So. not. fun.

(btw...we assumed the black layer and tile contained 
asbestos so we took precautions to contain it safely.)


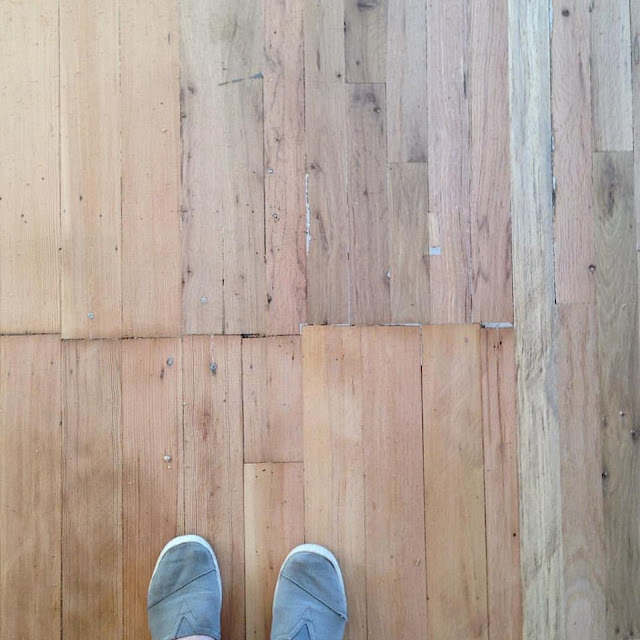
Luckily the second layer of tile was only under one 10x10 ft section of floor, but it set us back several days in our floor overhaul. You can see in the picture below that under the tile was also a patched in section of floor.


Once all the tile was safely removed, we rented all the sanding equipment from our local Home Depot. Our floors had been primed over by the previous owners so we needed to sand off the primer and level the floors. Again, we underestimated how long this would take us. We spent a day and half sanding and only accomplished the first round of sanding. We didn't even touch the corners of the rooms that will all need sanded and scraped by hand. We both knew there was no way these floors would get done before our looming moving deadline so we aborted the mission and decided we could live on them unfinished for awhile.

A fun time-lapse of Justin using the edger (which holy moly is a beast to run!)


Hey, look pretty floors!

I kinda love how the fir and oak meet up with each other. It was very common to put the fancy wood in the main living area and the less expensive wood in the private areas.

Vintage Floors - oak and fir - restoring old floors

I'm so glad we decided to stop the sanding process and move in. Sure the floors are a bit rough and there is still dust everywhere (SO MUCH DUST!), but its actually turning out to be a smart move. The floor finish I really want to do would not have happened in our time frame so we were planning on using a poly finish (which is NOT what I wanted at all) instead. I just received some samples of lye and oil to play with and will be tackling each room on its own whenever we have a break between shows. I think the combination will help marry the two types of flooring together and also keep things light and bright in the house.

Here's a short video I shot for Instagram stories that shows how the floors look and the lay of the land before we moved our crap in.


What do you think? What would you do if these were your floors?

Also, if you happen to be in Kansas City this weekend, I would love to meet you at the market. My girl crush Ree Drummond will be there Friday night too!! So fun!!

Averie Lane Farmhouse (empty house tour)

Introdcuing: Averie Lane Farmhouse (empty house tour)

My husband and I have been talking for years about how we want to live and raise our children. It always has included talks of living in the country and either building or fixing up a house. For years and years its just been a dream and quite honestly, I couldn't figure out how we would be able to make that dream a reality any time soon. We always pictured ourselves trying to get back to North Idaho, but without a job to go to or an affordable housing market, it wasn't really a viable option right now. Our current house is awesome, big enough, almost done being remodeled and really just a good place to be, except for one major thing: lack of work space for our growing business...think studio & wood shop. Our 2 car garage and the kitchen table weren't really cutting it anymore.

Then, one lazy evening I was flipping through the local real estate listing on my phone (because that's something that I just love doing. Call me cray-cray! Haha) when a little house in the next town over popped up. Most of the time, the houses in this area are super cute, but either way too small for our family or too big of a project for us to even consider, but this one was something special. Sitting on just over an acre surrounded by farmland, the house looked well maintained, but not completely remodeled so we could make it our own. Plus it had outbuildings! Just what we needed! This is when my mind started churning so I showed it to Justin and he liked it. It wasn't our dream property in North Idaho and it would mean that we would be staying in Southern Idaho for several more years, but we couldn't stop talking about it. We decided it was time to make our dreams reality. There is more to the story, that I will share in due time, but all I have to say right now, is this where we are suppose to be and even though its a bit scary, we are so ready!!!

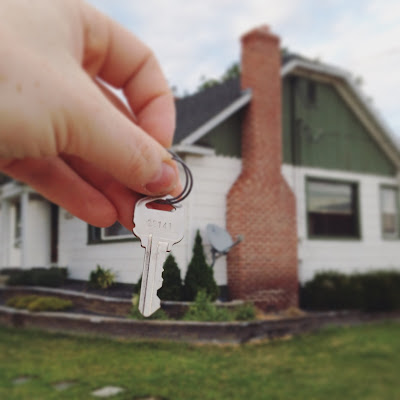
Fast forward to today and the house is all ours....tiny bedrooms and all! The farmhouse is actually the same size as our current house, but is laid out completely differently. We're talking a single teeney tiny bathroom for all 6 of us...what are we thinking?! Thank goodness we aren't afraid to get our hands dirty because we have some grand plans to make it the perfect house for us and I'm hoping you will follow our journey!!

Enough chit chat, I know you are all eager to see what our little farmhouse looks like! I'll explain the different areas as we go so you can get an idea of what we have planned for in each space. 

Front:

Introdcuing: Averie Lane Farmhouse (empty house tour) Front

Introdcuing: Averie Lane Farmhouse (empty house tour) front porch

I love the exterior of this house! It will need new siding at some point, but for now I will just clean it up a bit and maybe give the trim a coat of paint. The stairs up to the front door should probably be updated at some point as well, but for now its a charming entrance,...I mean, come on...that door!!!

Introdcuing: Averie Lane Farmhouse (empty house tour) front door

Before we head inside, I did a quick mock up of the floor plan so you have a better idea where each room is and how it relates to the next. I didn't manage to get closets on here or the basement, because ...learning curve, you'll get the idea tho!

Introdcuing: Averie Lane Farmhouse (empty house tour) floor plan
Entry:
From the front door you walk right into the living room. Not much a true entry (I'm going to miss my current one!) but honestly, we won't use this door much. The back door is just more practical.

Introdcuing: Averie Lane Farmhouse (empty house tour) Entry

Introdcuing: Averie Lane Farmhouse (empty house tour) entry

Living Room:
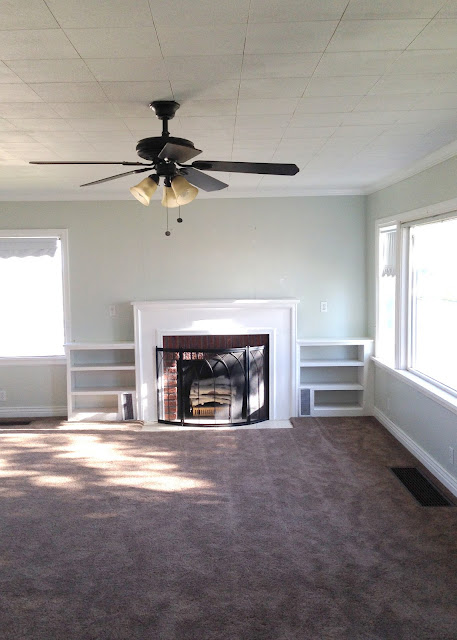
The living room has big windows that let in tons of light. It looks darker in these photos only because I took them in the later part of the day. I love the fireplace and shelves, but the paint, ceiling tiles and the flooring have to go. We've already started on some of it that you can see if you follow me on Instagram ( @averielaneblog ) We *hope* to eventually open the ceiling in here to the attic space, but we need to get some advice from a contractor before we move forward. Its something we think we can do ourselves to save on costs. 

Introdcuing: Averie Lane Farmhouse (empty house tour) living room

Looking back towards the front door...


Office (aka, the we have no idea what it is room):
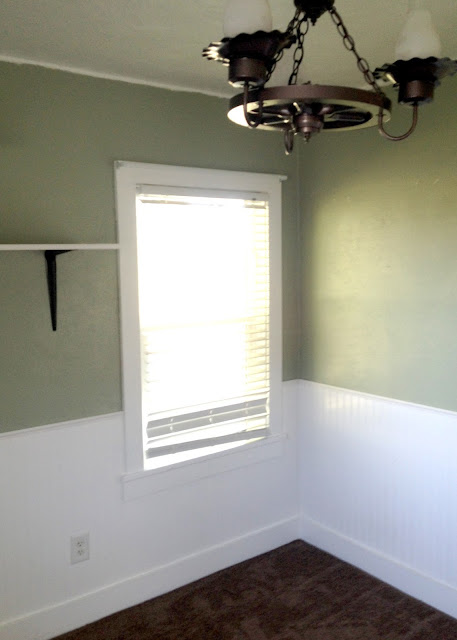
Any thought on what this room is!? I think it might have been an old entry or something, but who knows! The previous owners used it as a computer area. I've already removed the doors since my kids thought they were the best thing to slam open and shut and I could foresee lots of pinched fingers in my future. No bueno!

Introdcuing: Averie Lane Farmhouse (empty house tour) office

Dining Room:
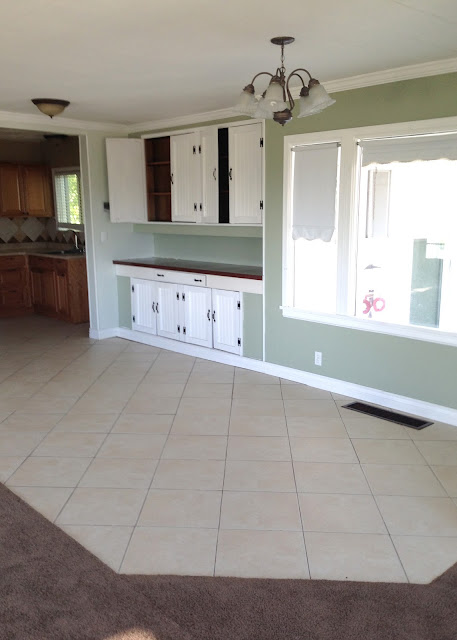
The only reason this gets called the dining room is because of the tile, which has already been demolished (praise be!). The lighting is awkward and those built-ins look better in photos than they do in real life. I do have some ideas about how to help them not look quite so janky. I love that window tho!!

Introdcuing: Averie Lane Farmhouse (empty house tour) dining room

Introdcuing: Averie Lane Farmhouse (empty house tour) dining room

Kitchen:
Haha! I have to laugh because this is barely a kitchen. Sure there are all the kitchen things, but its basically a glorified hallway. I will do a phase one makeover on it, but this thing will not cut it for very long. We have talked about adding on to the house and after we get through the kitchen you will see why!

Introdcuing: Averie Lane Farmhouse (empty house tour) kitchen

Introdcuing: Averie Lane Farmhouse (empty house tour)

Introdcuing: Averie Lane Farmhouse (empty house tour) kitchen

Bedrooms:
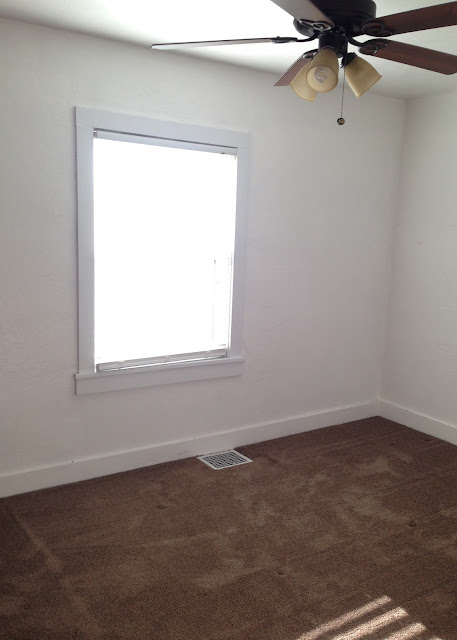
There are technically 3 bedrooms, but Lord help me they are postage stamp size! We decided who got which room purely based on the beds that needed to go in each. A master bedroom does not exist in this house. Thank goodness I love small cozy spaces!

Introdcuing: Averie Lane Farmhouse (empty house tour) bedroom

Introdcuing: Averie Lane Farmhouse (empty house tour) bedroom

Introdcuing: Averie Lane Farmhouse (empty house tour) bedroom

Bathroom:
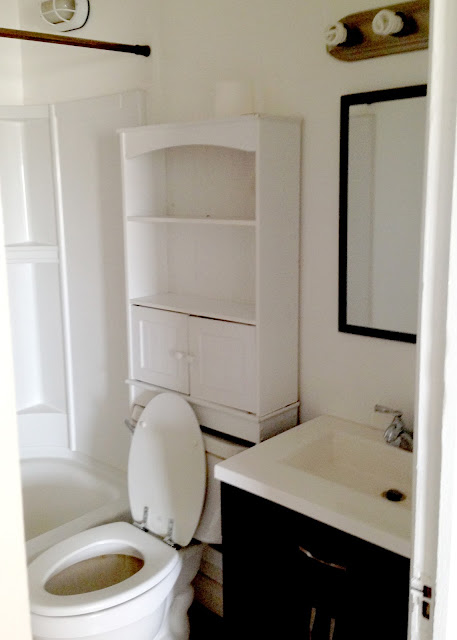
Does this bathroom look small to you? Well, it is...maybe even smaller! How we are going to make this work with all 6 of us, I'm not sure. One thing I am sure about....there is a window hiding behind the shower and I'm determined to expose it!

Introdcuing: Averie Lane Farmhouse (empty house tour) bathroom

Hallway: 
Just so you can see how close everything is to everything! Haha...hold me!


Laundry/Basement:
The door off the kitchen leads into the laundry area. Its a later addition to the house and basically a hot mess. The washer and dryer can't even sit close to each other and the stairs leading to the stairs are a bit scary to say the least. We are hoping to rip this addition off and do a bigger better one, but until we can do that I will probably need to bump this room up on the priority list purely for saftery reasons. The basement itself is good sized at around 800 sqft, but its a bit awkward. We have plans for it too eventually!


This chimney vents the water heater and a few other things and I am 99.9% sure it runs up next to the stove area in the kitchen. You know what I'm thinking don't you!!??!!

Introdcuing: Averie Lane Farmhouse (empty house tour) basement

Well, that ends the inside of the house tour! I will do a tour of the out buildings next week, because those areas are just as important and 100% why we committed ourselves to years worth of projects! 

What do you think? I can't wait to inject our personalities into the space! SO. MANY. IDEAS!!!

You might be wondering what our plans are for our other house? We will actually be renting it out which means we have just a couple weeks to make the new house livable before we have to be out of the old one. I do plan on doing an "After" tour of it before we are out, so look for that next week along with updates on Farmhouse progress!

Related Posts Plugin for WordPress, Blogger...