Image Map

Fireplace Makeover : The Final Reveal

Welcome to all those of you visiting from our feature on Apartment Therapy! Such an honor to have you here today!


Finally!!!!

Thank you for following along with us as we tackled our fireplace makeover!

It has truly been a labor of love that has changed my whole opinion about this space!

So, it wouldn't do much good to show you an after without taking a trip down memory lane, now would it?

Here's what the fireplace looked like when we moved in...

Fireplace  Before before

Dark walls, dark trim and a big boxy dark fireplace with orange tile. Not exactly our style.


The first step in the fireplace transformation, was painting the walls (Sandpiper )and trim (white) around the fireplace....

Fireplace before

Much better!

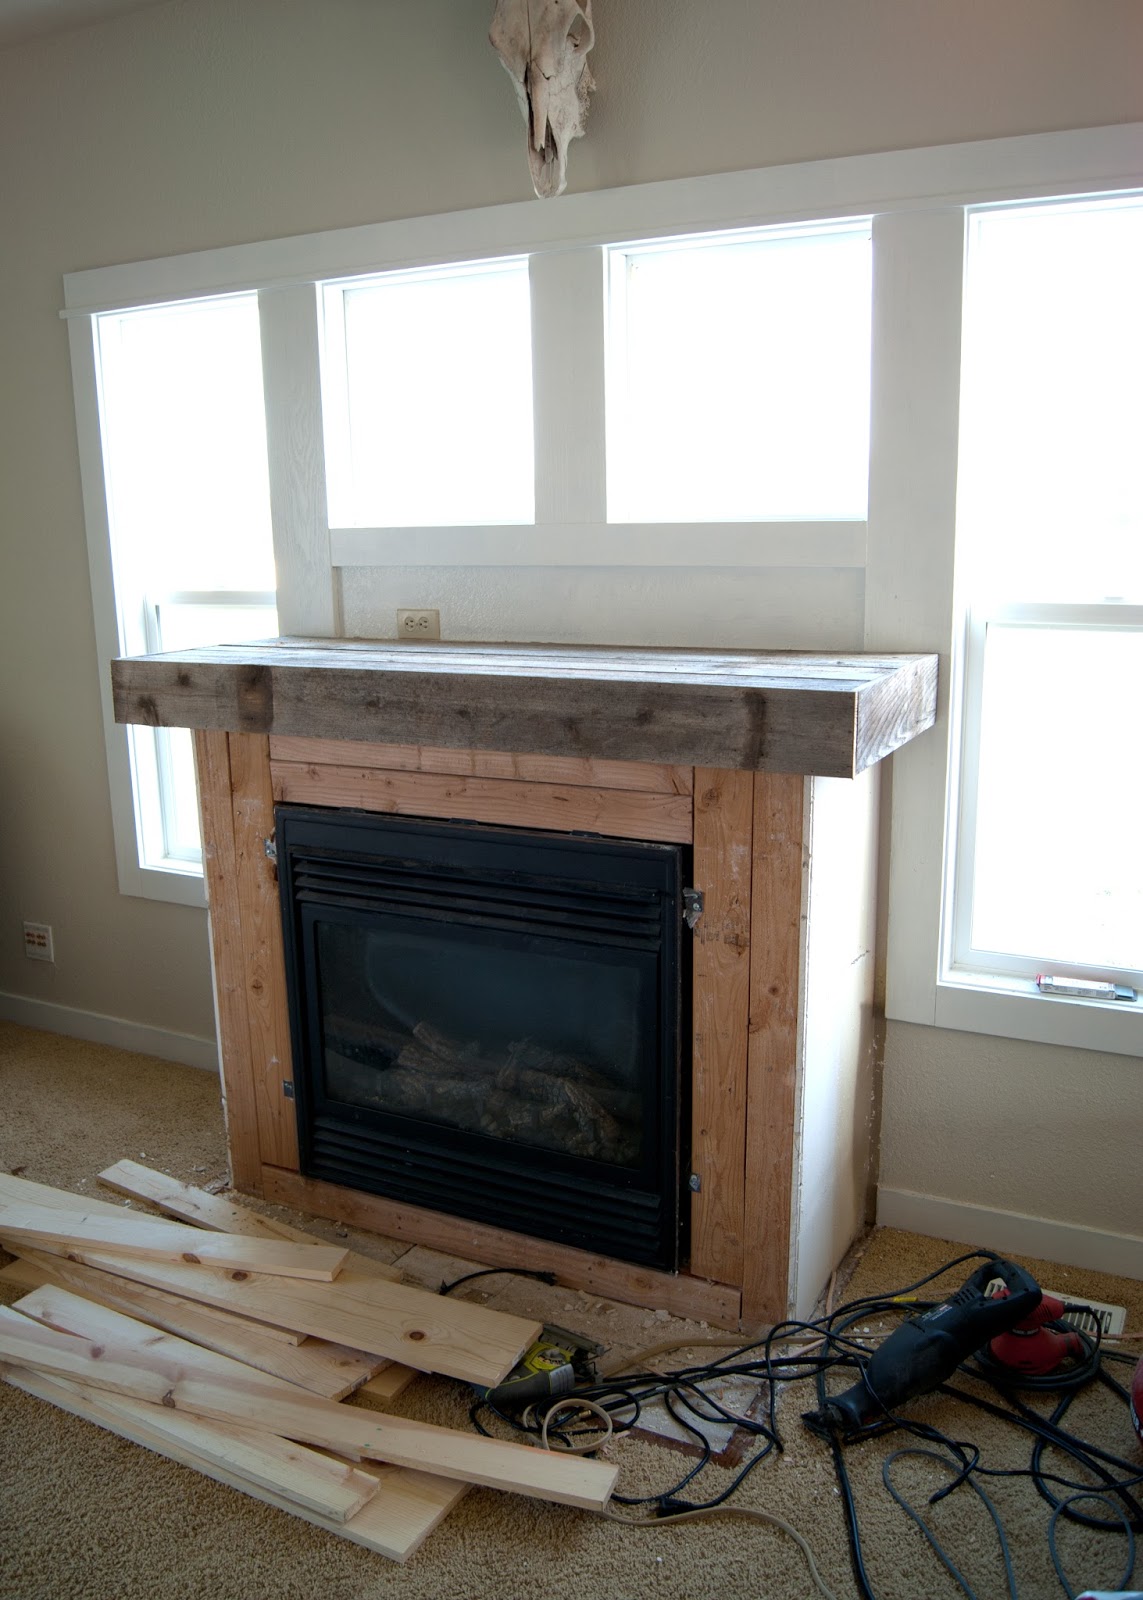
Then we finally tackled the fireplace itself, demoing the tile and trim....

demo day on the fireplace

Adding a chunky reclaimed cedar mantel...

building a reclaimed mantel

...planking the sides...

How to plank a fireplace

and tiling the hearth and surround.

Tiling a fireplace - octagon and dot pattern

After adding some trim, grout and paint, we had a brand new fireplace!

Fireplace Makeover - DIY Fireplace makeover using reclaimed and salvaged materials - octagon & dot tile, reclaimed wood,  white paint, planking - all for under $60! Before and After and links to all the steps!

Isn't the change remarkable!?
I love the texture of the reclaimed wood on the mantel...

Fireplace Makeover - DIY Fireplace makeover using reclaimed and salvaged materials - octagon & dot tile, reclaimed wood,  white paint, planking - all for under $60! Before and After and links to all the steps!

and the subtle detail of the planking on the sides...

Fireplace Makeover - DIY Fireplace makeover using reclaimed and salvaged materials - octagon & dot tile, reclaimed wood,  white paint, planking - all for under $60! Before and After and links to all the steps!

The whole wall just feels lighter!

Fireplace Makeover - DIY Fireplace makeover using reclaimed and salvaged materials - octagon & dot tile, reclaimed wood,  white paint, planking - all for under $60! Before and After and links to all the steps!

I'm still experimenting with  how to style the mantel. It's soooo deep and all those windows!? Right now its holding the blue mason jar collection from in the kitchen because we took down the weird shelf thingy that was holding them.

Fireplace Makeover - DIY Fireplace makeover using reclaimed and salvaged materials - octagon & dot tile, reclaimed wood,  white paint, planking - all for under $60! Before and After and links to all the steps!

Having the fireplace done also means I can really focus on designing the living room space. (remember my plan? HERE)

Fireplace Makeover - DIY Fireplace makeover using reclaimed and salvaged materials - octagon & dot tile, reclaimed wood,  white paint, planking - all for under $60! Before and After and links to all the steps!

I'm loving the look of deep saturated colors paired with all the white...

Fireplace Makeover - DIY Fireplace makeover using reclaimed and salvaged materials - octagon & dot tile, reclaimed wood,  white paint, planking - all for under $60! Before and After and links to all the steps!

If only I could banish the carpet or hide it with a really huge gorgeous rug? Until then, I'll just pretend it isn't there...

Updated fireplace, vintage chair, horse blanket

Oh, dear, my yard sale chair is going to need attention soon (no, I still haven't done anything with it...my bad...)

Fireplace, horse blanket, reclaimed wood

Ignore that, and again lets admire the beautiful fireplace transformation!

Fireplace Makeover - DIY Fireplace makeover using reclaimed and salvaged materials - octagon & dot tile, reclaimed wood,  white paint, planking - all for under $60! Before and After and links to all the steps!

I'm in LOVE!

Here's a quick image I put together so you can compare the before and after - feel free to pin it!

Fireplace Makeover - DIY Fireplace makeover using reclaimed and salvaged materials - octagon & dot tile, reclaimed wood,  white paint, planking - all for under $60! Before and After and links to all the steps!


If you have been following you know I was doing a cost break down at each phase of the reno, so lets see how that panned out...
Cedar Boards - FREE
Cement Board - $12*
Nails - $5*
*our cost was actually only $3 thanks to some returns
2 -1x4s - $8
2 1x6s - $10
Tile - $10
Tiling supplies - already had
 Bright White Non- Sanded Grout - $13 
Paint- already had 
Caulking - already had
=
$44!

For REALS!?

This whole makeover project shows that if you are willing to get creative, you can totally change the look of a space without a huge budget. Sometimes this means you can't follow whatever the latest design trends are, but they are just that, trends. Sticking to a classic design can still feel fresh and it definitely doesn't  have to be boring! 
My advice to you is: if you want to tackle something like this...JUST GO FOR IT! 

Did you miss any of the series? 
Catch up with these links:


Octagon and Dot Tile

Grout, Trim, Paint and Caulking

I'd love to hear what you think!


Sharing with :
Remodelaholic

No comments :

Post a Comment

Related Posts Plugin for WordPress, Blogger...