I bought a few accessories this week, including this pretty lamp from Target. I sat it on my fireplace bookcase for safe keeping and couldn't get over how perfect it is for our living room too. I'm already getting some ideas for when I'm ready to tackle that space!
You might be wondering why I only got one? Well, due to the window placement in our room, our bed will have to sit off center which means I will only have room for one night stand. By no means am I thrilled about this, but I have to make it work. I just WISH they made a matching floor lamp. Darn it.
I also settled on a rug and ordered it (if you know me this is a real shocker!) Its not the one from my original design board and its also a vintage kilim, which I said I didn't want, but I couldn't resist it and since it was one of a kind I just went for it. Call me crazy! I can't wait to see it in real life. I'll share pictures when I get it - probably on Instagram first, so be sure to follow!! (
Basic simple trim. The baseboards are about 6 inches tall which is awesome and the window trim is nice and chunky, but it lacked umph...ya know?
So after brainstorming we decided we needed to beef up the tops of the windows and add board and batten to the walls. The plan meant we could leave all the trim untouched except for the tops of the windows and doors. Obviously.
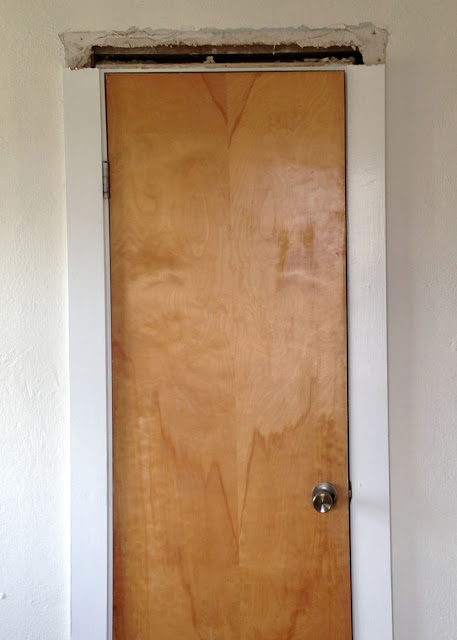
I got the job of removing the top piece of trim... (that door would be awesome in a mid century house, wouldn't it? I forgot to put it on my to do list, but it is definitely going...or changing...)
Next, we started installing the trim.
Let me back track one sec... we were all set to use pre-primed pine boards for this project, but when the hardware store didn't have enough of what we needed, we went to plan B instead. We bought 3/4 inch MDF (which is the equivalent to 1x material) cut to the exact size we wanted. The switch meant we also saved ourselves a couple hundred dollars in material. With the savings we actually bought a nicer table saw to cut all the MDF with. The initial money spent ended up being about the same, but since we have lots of trim work to do in the house, we will save money in the long run. Winning!
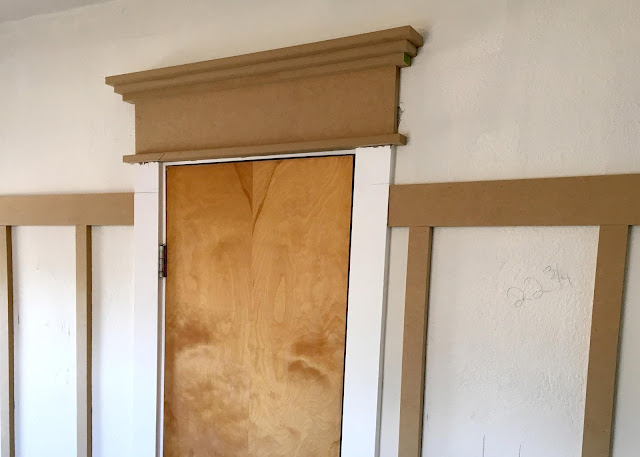
So like I said we chose to start with the header above the doors and windows.
It consisted of 5 pieces :
2- 3/4 x 1.5"
1- 3/4 x 6"
1- 3/4 x 2.25"
1- 3/4 x 3"
I know it looks a little crazy and overwhelming at the moment, but it really fills the space above the windows and doors and makes the room feel much grander. Maybe more grand than your average farmhouse bedroom should feel, but then again, we are working with such tiny rooms, anything we can do to make them feel bigger helps!
I created this handy little diagram in case you want to duplicate what we did....
Once we had the trim up we decided since it was so substantial maybe we needed to tame back my plans for floor to ceiling board and batten. My husband wasn't really going for it anyways so his idea of picture rail height won out. I actually really like it too and since I know that the walls and trim will all be the same color, I'm not worried about it breaking up the room to much.
We chose not to do paneling under the battens because we wanted to avoid removing all the trim. I'm planning to do a satin or eggshell finish on the trim so any texture on the walls should be hard to see. That's my hope at least!
To finish up the trim we still have to attach the last piece that goes on top of the wall trim. It will create a little ledge and help tie into the door headers. Then, I get to fill holes, prime, caulk and paint the whole room! Go me!!!
Since we are sharing this room in real time, there won't be any progress in here until next Monday. We are off to Ellensburg for a last minute vintage show and to hang with my parents for my birthday!!!! Yay!
Let me know what you think of our room so far and then head over to Calling it Home to see what the other guest participants are up too! Have fun and happy blog reading!
Click HEREto go to the link up!


No comments :
Post a Comment