I first shared this crib before we up and moved to southern Idaho...I thought we would revisit it today in preparation for the big room reveal ( that I promise will happen eventually!)
Crazy what changes in a year!
I had pinned THIS CRIB way back when we found out we were having a boy...
cute, huh!?
I was not loving the $300+ price tag, but figured since it converted it might be worth the money. Unfortunately every time I looked at in online it was unavailable (insert sad face here). So, I did what any good DIYer/thrifter would do and searched Craigslist for a crib!
Sure enough I found this one for $100!
Same basic look as the one I wanted only in rougher shape...it once had a drop down side that had been fixed as part of a recall. This didn't scare me since it was super sturdy...but the parts kinda made it, well....ugly.
So I whipped out a can of mistint "oops" paint (originally I planned on using it on the walls in his room), made up some chalk paint and when to town painting it.
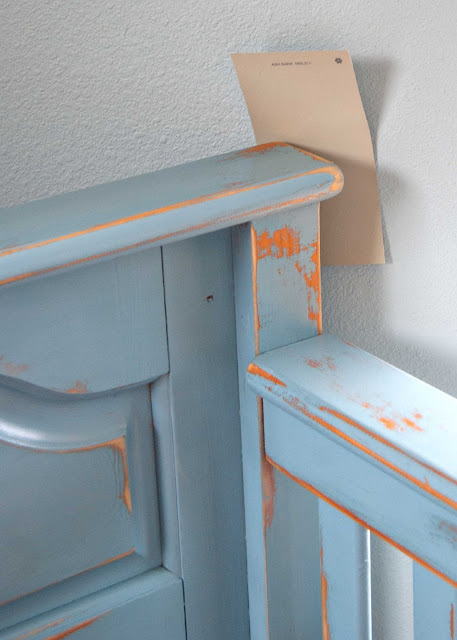
After it was painted I roughed up the paint to give it the vintage feel you know I love. I only had one minor mishap in the painting process...
FYI, you can not stain over chalk paint...(my husband even warned me...)...ick...
(this was the ONLY nice day we've had so far this spring and
I used it to my advantage...it just happened to be Easter that day too!)
We skipped the stain and sealed it with a Rust-Oleum 2x Painter's Touch Satin Clear Spray...I wanted a durable surface and wasn't about to take the time to hand wax all those slats! It took 4 cans to cover the whole crib...including the back. We let it air out for a couple days before moving into the babies room.
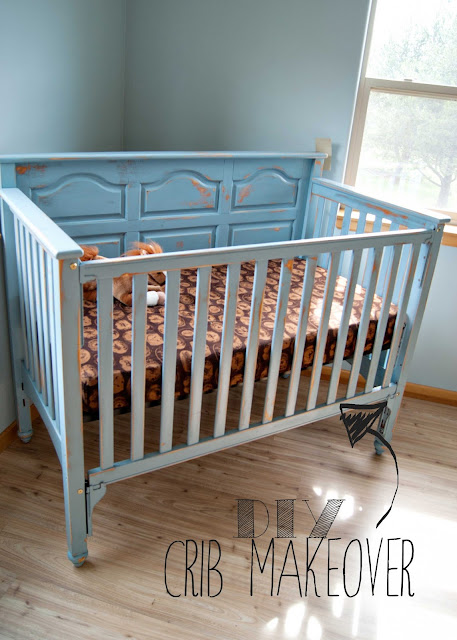
Here's the finished product!
Not bad, eh!?
Loving the blue which clearly would not have worked for a wall color! I'd say I dodged a bullet with that one! As you can see, his room is blue and blue and more blue right now...
Have no fear! That will definitely be changing...remember I said we are doing things out of order...paint is next on the list! Probably something along this line...I also have some mistint options I need to test out...
After I figure out the wall color, I might go over the paint with some stain to darken it up. Right now tho I like the almost yellow color coming thru. Not every day you see a blue crib!
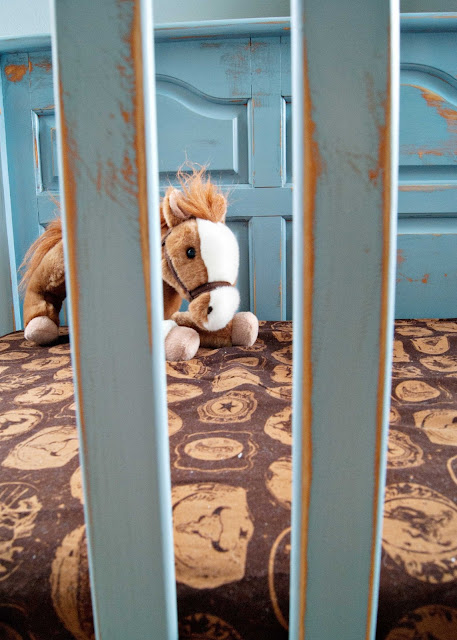
I'm also super thrilled that I finally get to use the crib sheet my sister made me! Rustic cowboy and not too cutesie!
We stole the little horse from big sister....a little cowboy needs a horse now don't you know.
HUGE change and just right for my little buck-a-roo!
Project total:
Crib-$100
Paint- Free from my stash
Clear Coat- $15
Linking up with:










Sooooooooooooo cute!!!!! I love the blue color! The crib sheet looks so awesome next to the blue of the crib!
ReplyDeleteI am in love with the sheet! I can't wait to get the room conpleted!
DeleteSo fabulous, Amber! I love the blue, especially!!
ReplyDeleteThank you!
DeleteVery cute crib makeover! Nice price tag too!
ReplyDeletexoxo Carly
Happy weekend!
Thank you for stopping by!
DeleteOh! So excited you stopped by! Thank you!
ReplyDeleteYou worked wonders on that thing!! It looks AHHHH-Mazing!! :) So glad you linked up. :)
ReplyDeleteThanl you for taking the time to check out my crib makeover!
DeleteYou worked wonders on that thing! It looks AHHHH-Mazing! So happy you linked up! ;)
ReplyDeleteoh this is AWESOME! what a great job. love the distressed look. found you on i should be mopping the floor linky party; i posted a "tour" of my baby girls nursery! love, love, love your crib!
ReplyDeletemegvcornwell.blogspot.com
I am so seriously in love with this crib! Way to go for stepping out of the box!
ReplyDeleteWow! I am completely in love with this crib makeover! What an AWESOME job!
ReplyDeleteJen @ PinkWhen.com
Love the finish on this crib, it's so cool. Looks fantastic. Thanks for sharing on our Brag About It! We appreciate it. Come back soon. All the best ~ Sharon and Denise
ReplyDelete