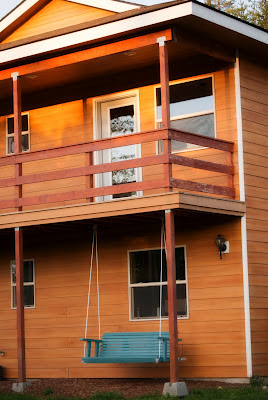
Do you remember this bench from Yard Sale Tales {week 3}?
That's right, the one we picked up for $4!!!!
I thought I would show you its transformation!
Step 1: Sand
My hubby took on this part. He got out the power sander and went to town. The bench was pretty rough and had lots of chipping paint. So the main goal was to get all the loose stuff off and get rid of any potential splinters.
Step 2: PAINT!
Our original plan was to try and match the original finish. It was red covered in a bluish green paint. We painted a base coat of red, but in the end we like our can of $7 "oops" paint so much that we left it the solid blue color. I think we will let natural distressing occur over time.
Step 3: Attach hardware
We decided to go with a marine grade rope, partly because it fit the size of the preexisting holes in the bench and partly because it was very cost effective- $18 for 100ft ( and we used about 40ft of it). We ran four lengths of the rope through the holes and tied it to carabiners that attached to large eye bolts in the deck joists. We made sure that all the parts and pieces could handle 600+ pounds. Just to be safe!
Step 4: Hang!
Yay!!! The best part! It took several tweaks of the rope to get it just right, but its up! I love the blue against the orangey brown of the house!
Brightens up the whole front of the house I think!
Little E playing behind the new swing. So much fun!
Step 5: Sit and Enjoy!
Alreay a big hit with Elle and our little Roxy dog!
Price List-
$4 Bench
$7 Gallon of "oops" paint-
we only used 1/4 of the paint and have enough to paint our exterior doors!
$45 Hardware/rope
=
$56.00
You can't even buy a new bench for less than $100!
Compliments to my hubby for making one of my dreams come true!!!
I love it so much!
{Before & After}


No comments :
Post a Comment